Category: Snacks

Mediterranean Snacks recipes

  • Roasted Red Pepper Hummus

    Roasted Red Pepper Hummus

    Roasted Red Pepper Hummus

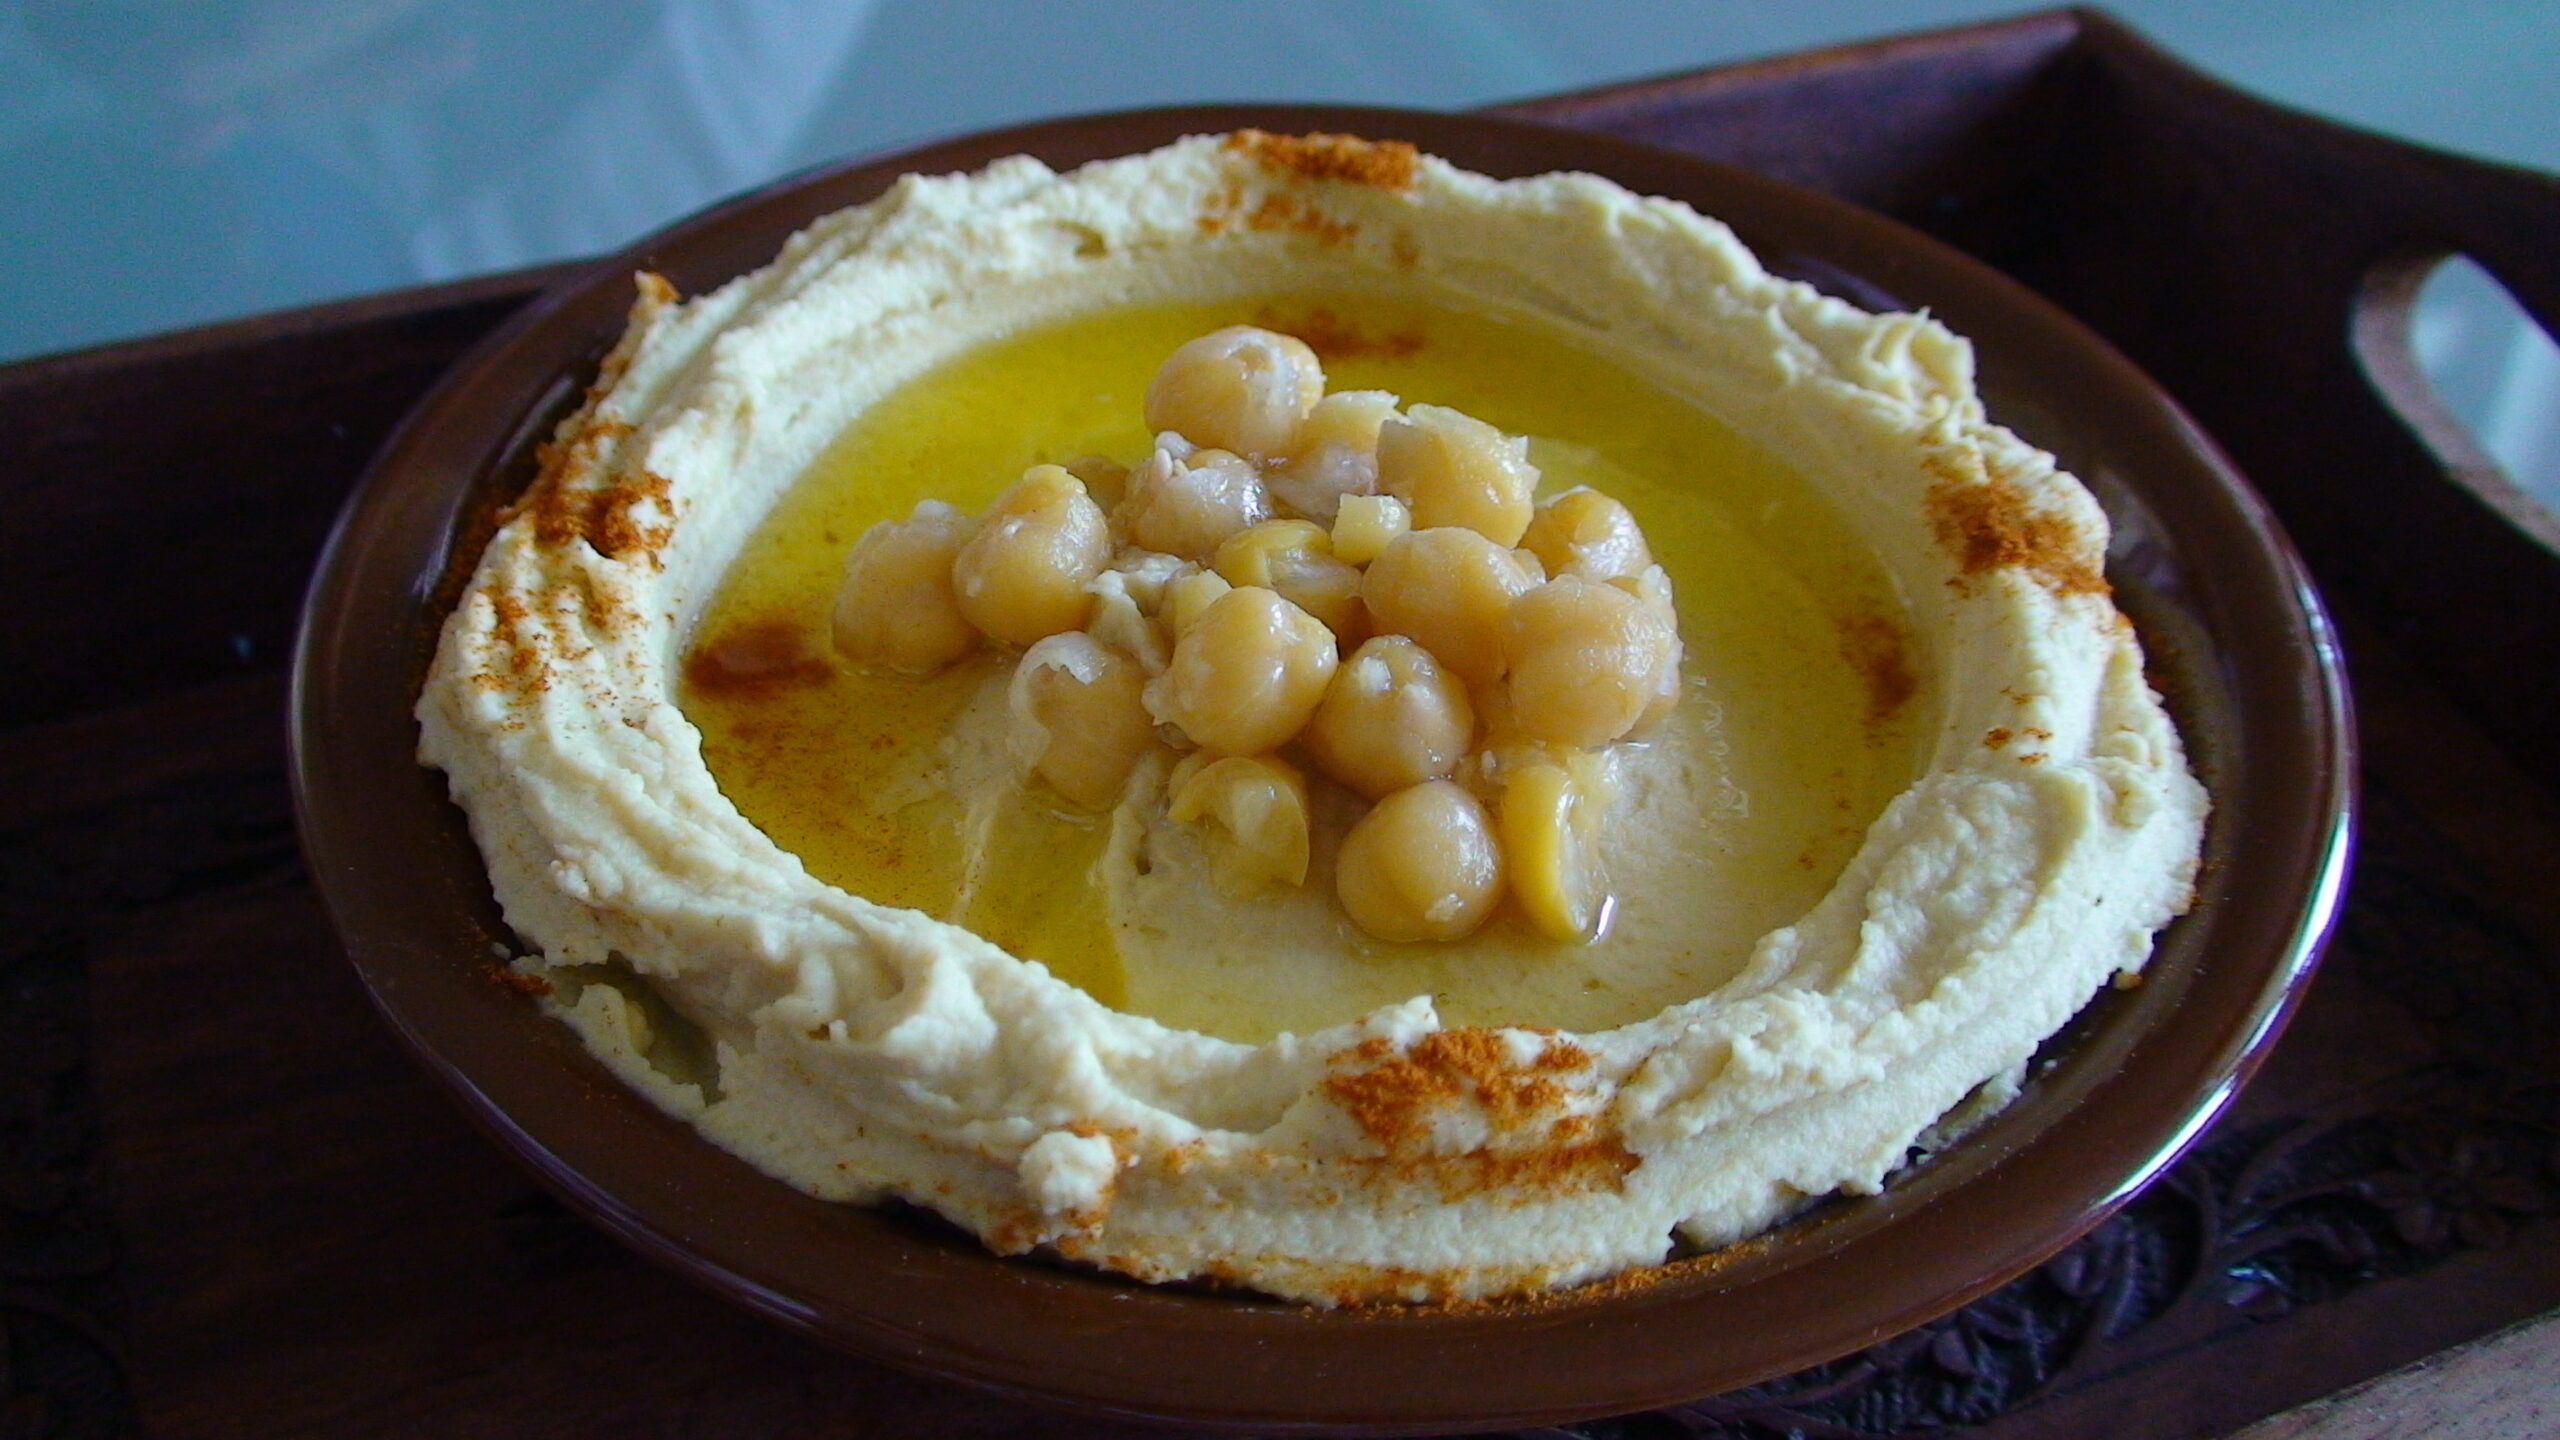
    A Mediterranean Classic with a Smoky Twist Hummus is one of the oldest and most beloved dishes in Mediterranean cuisine, with roots stretching back thousands of years across the Levant, North Africa, and Southern Europe. This roasted red pepper version takes the classic chickpea dip into richer terr

    A Mediterranean Classic with a Smoky Twist


    Hummus is one of the oldest and most beloved dishes in Mediterranean cuisine, with roots stretching back thousands of years across the Levant, North Africa, and Southern Europe. This roasted red pepper version takes the classic chickpea dip into richer territory — the char of oven-roasted peppers brings a gentle smokiness that balances the earthiness of tahini and the brightness of lemon. It is the kind of recipe that looks impressive on a table but comes together in under 30 minutes, which makes it a staple in Mediterranean households for good reason.


    The Mediterranean diet is built around exactly this kind of food: plant-based, olive oil-forward, nutrient-dense, and genuinely satisfying. Hummus delivers protein and fiber from chickpeas, healthy monounsaturated fats from olive oil and tahini, and a range of micronutrients that processed snack foods simply cannot match. Swap out the chip bowl at your next gathering for a platter of roasted red pepper hummus with warm pita and raw vegetables, and the difference in how you feel afterward will be noticeable.


    This recipe works as an appetizer, a snack, a sandwich spread, or the center of a mezze platter. It keeps well in the refrigerator for up to a week, which means making a double batch is almost always worth it.


    —


    Why It Fits the Mediterranean Diet


    Chickpeas are a cornerstone of the Mediterranean diet for good reason. A single cup provides approximately 15 grams of protein and 12 grams of fiber — the kind of plant-based protein that keeps blood sugar stable and hunger in check for hours. The fiber in chickpeas has been specifically studied for its effect on LDL cholesterol reduction.


    Tahini, made from ground sesame seeds, contributes calcium, iron, and healthy fats. Sesame seeds are rich in lignans — plant compounds with documented antioxidant properties. Extra virgin olive oil provides oleocanthal, a natural anti-inflammatory compound with effects comparable to ibuprofen at culinary doses.


    Roasted red peppers are an excellent source of vitamin C (a single pepper contains more than an orange) and beta-carotene, which converts to vitamin A in the body. The combination of chickpeas, olive oil, tahini, and peppers in a single dish delivers a nutritional profile that would take a dozen processed products to replicate.


    —


    Ingredients


    For the hummus:

  • 2 cans (15 oz each) chickpeas, drained and rinsed — reserve ¼ cup of the liquid
  • 2 large red bell peppers
  • 3 tablespoons extra virgin olive oil, plus more for drizzling
  • 3 tablespoons tahini (well-stirred)
  • 2 cloves garlic
  • Juice of 1 large lemon (about 3 tablespoons)
  • 1 teaspoon ground cumin
  • ½ teaspoon smoked paprika
  • ½ teaspoon salt, plus more to taste
  • Pinch of cayenne pepper (optional)

  • For serving:

  • Drizzle of extra virgin olive oil
  • Smoked paprika for dusting
  • Fresh parsley, chopped
  • Warm pita bread, cucumber slices, carrot sticks

  • Quality notes: Use whole chickpeas from a can rather than a carton — the texture is better. For tahini, buy a brand where the only ingredient is sesame seeds; the natural oils should separate to the top (stir before using). Use the best olive oil you can for finishing — it matters more here than in cooked applications.


    —


    Equipment Needed


  • Baking sheet lined with foil or parchment
  • Food processor or high-powered blender
  • Tongs for handling roasted peppers

  • —


    Step-by-Step Instructions


    1. Roast the peppers.

    Preheat your oven to 450°F (230°C). Place whole red bell peppers directly on the baking sheet. Roast for 25–30 minutes, turning with tongs halfway through, until the skins are blackened and blistered on all sides. Transfer to a bowl, cover tightly with plastic wrap or a plate, and let steam for 10 minutes. The steam loosens the skin. Peel off and discard the charred skin, remove the stem and seeds, and roughly chop the flesh. Set aside.


    2. Prepare the chickpeas.

    Drain and rinse the chickpeas, reserving ¼ cup of the liquid (aquafaba). For the smoothest hummus, take 2 minutes to slip the thin skins off the chickpeas — just pinch each one between your fingers. This step is optional but noticeably improves the texture.


    3. Build the hummus.

    Add the garlic to the food processor and pulse until minced. Add the chickpeas, roasted red pepper flesh, tahini, lemon juice, cumin, smoked paprika, salt, and cayenne if using. Process for 1 full minute. Scrape down the sides. With the machine running, drizzle in the olive oil, then add the reserved chickpea liquid a tablespoon at a time until the hummus reaches your preferred consistency — smooth and creamy, not stiff. Process for another 2 minutes for the smoothest result.


    4. Taste and adjust.

    Taste for salt, lemon, and cumin. Mediterranean hummus should be distinctly lemony and well-seasoned. Add more lemon or salt if needed. If the hummus is too thick, add another tablespoon of chickpea liquid.


    5. Serve.

    Transfer to a wide, shallow bowl. Use the back of a spoon to create a swirl pattern. Drizzle generously with olive oil, dust with smoked paprika, and scatter chopped parsley over the top.


    —


    Pro Tips and Variations


    Make it creamier: The secret to restaurant-quality hummus is processing longer than you think necessary — at least 3–4 full minutes total. The extended blending breaks down the cell walls of the chickpeas for a much smoother result.


    Roasting shortcut: If you need to move faster, use jarred roasted red peppers (drain and pat dry). The flavor is slightly less smoky but very close.


    Sun-dried tomato variation: Substitute half the roasted peppers with oil-packed sun-dried tomatoes for a more intense, concentrated flavor.


    Add heat: A teaspoon of harissa paste or a whole roasted jalapeño blended in gives the hummus a North African character that pairs beautifully with grilled meats.


    For a smooth surface: If serving for a gathering, refrigerate the hummus for at least 30 minutes before serving — cold hummus holds its shape better for presentation.


    —


    Nutritional Info (per serving, approximately ¼ cup)


    Calories: 180 | Protein: 7g | Carbs: 18g | Fat: 10g | Fiber: 5g | Vitamin C: 45% DV


    —


    Storage and Reheating


    Store in an airtight container in the refrigerator for up to 7 days. The flavor actually improves after 24 hours as the garlic mellows and the spices deepen. Keep a thin layer of olive oil on the surface to prevent the top from drying out.


    This hummus does not freeze well — the texture becomes grainy after thawing.


    —


    What to Serve With It


    Pair with warm whole wheat pita, sliced cucumber, carrot sticks, and cherry tomatoes for a classic mezze presentation. On the Mediterranean diet, hummus is also excellent as a spread on sandwiches in place of mayonnaise, as a topping for grain bowls, or alongside grilled chicken or fish. Try it with our Grilled Eggplant and Bell Pepper Skewers for a fully plant-forward Mediterranean meal.


    —


    FAQs


    Can I use dried chickpeas instead of canned?

    Yes, and the result will be even smoother. Soak 1½ cups dried chickpeas overnight, then simmer with ½ teaspoon baking soda for about 1 hour until very tender. The baking soda helps break down the chickpeas for a creamier texture. Reserve the cooking liquid in place of aquafaba.


    Why is my hummus grainy instead of smooth?

    Usually this means the chickpeas weren’t processed long enough, or the tahini was not properly stirred before measuring (the sesame paste separates and the dry portion makes for gritty hummus). Process for at least 3–4 minutes and use room-temperature ingredients.


    Is this recipe gluten-free?

    Yes. All ingredients are naturally gluten-free. Serve with gluten-free crackers or vegetable dippers for a fully gluten-free option.


    How much does this yield?

    This recipe makes approximately 3 cups — enough for 8–10 as an appetizer or 12 as part of a larger mezze spread.


    Tools & pantry for this recipe

    A few things that make this easier. These are affiliate links, so we may earn a small commission at no extra cost to you; we only suggest what we’d actually use ourselves. See our editorial policy.
  • Grilled Halloumi with Figs and Pomegranate

    Grilled Halloumi with Figs and Pomegranate

    Grilled Halloumi with Figs and Pomegranate

    Grilled Halloumi with Figs and Pomegranate Introduction Let’s kick things off with a simple and stunning dish that’s sure to impress. Grilled halloumi, paired with the sweetness of figs and the tartness of pomegranate, is a delightful marriage of flavors and textures. This recipe brings

    Introduction


    Let’s kick things off with a simple and stunning dish that’s sure to impress. Grilled halloumi, paired with the sweetness of figs and the tartness of pomegranate, is a delightful marriage of flavors and textures. This recipe brings out the best of each ingredient, making it a standout choice for any occasion.


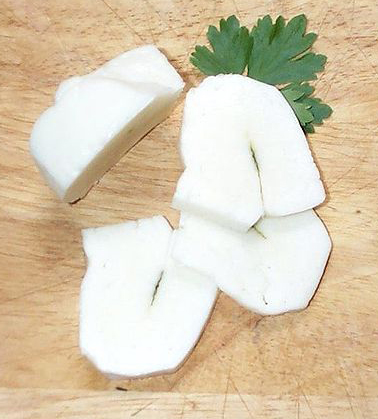
    Halloumi, a semi-hard, brined cheese from Cyprus, has a unique characteristic: it can be grilled or pan-fried until it develops a golden, caramelized crust while still retaining its chewy, squeaky interior. This cheese isn’t just tasty; it’s also a staple in Mediterranean cuisine. It’s savory, salty, and perfect for both starters and light mains.


    When paired with figs, the natural sweetness contrasts beautifully with the saltiness of the cheese. Whether the figs are fresh or lightly grilled, they add a touch of sweetness that complements the halloumi perfectly. The jewel-bright pomegranate arils and a drizzle of extra virgin olive oil tie everything together, making it a truly Mediterranean dish.


    Fresh mint and a squeeze of lemon give the dish a fresh, vibrant touch. This recipe is not just a culinary delight but also aligns with the Mediterranean diet, offering a satisfying protein hit from the cheese, natural sweetness from the fruit, and healthy fats from the olive oil.


    Health Benefits


    Halloumi’s Protein and Calcium: Halloumi provides a substantial amount of protein and calcium, with a 100g serving offering about 20g of protein and 700mg of calcium. Made from sheep’s and goat’s milk, it contains a different casein protein profile compared to cow’s milk cheese and is often more tolerable for those with mild dairy sensitivities.


    Figs — Fiber and Natural Sweetness: Fresh figs provide dietary fiber, potassium, magnesium, and vitamin B6. They satisfy sweet cravings naturally without the use of processed sugars. Dried figs can be used as well, soaking them in warm water for 20 minutes makes them plump and jammy.


    Pomegranate’s Antioxidant Power: Pomegranates are rich in punicalagins, antioxidants that help reduce blood pressure and lower LDL oxidation. The arils also provide fiber, vitamin C, and folate.


    Olive Oil and Polyphenols: Extra virgin olive oil adds heart-protective monounsaturated fats and anti-inflammatory properties.


    Ingredients (Serves 2-4 as a starter)


  • 250g (9 oz) halloumi cheese, sliced ¼-inch thick
  • 4 ripe fresh figs, halved (or 6-8 dried figs, soaked in warm water for 20 minutes)
  • ½ cup pomegranate arils (from about ½ a pomegranate)
  • 2 tablespoons extra virgin olive oil, plus more for drizzling
  • Juice of ½ lemon
  • Small handful fresh mint leaves
  • Freshly ground black pepper
  • Flaky sea salt (like Maldon) for finishing

  • Equipment Needed


  • Ridged cast iron grill pan or outdoor grill
  • Thin metal spatula (essential for flipping halloumi cleanly)
  • Serving plate or board

  • Step-by-Step Instructions


    Prepare the Halloumi: Pat the halloumi slices dry with paper towels. Brush lightly with olive oil on both sides.


    Heat the Grill Pan: Heat a ridged cast iron grill pan over high heat until it’s screaming hot. Do not add oil to the pan; the oil on the cheese is sufficient.


    Grill the Halloumi: Place the slices in a single layer, not touching. Do not move or press them for 2-3 minutes until they release cleanly from the pan. Flip and grill for 2 minutes more until golden grill marks form on both sides. Remove immediately and serve hot.


    Grill the Figs (Optional but Excellent): In the same hot pan, place the fig halves cut-side down. Grill for 60-90 seconds until they develop caramel char marks and release their sugars. Remove carefully.


    Assemble the Plate: Arrange the grilled halloumi on a serving plate or board. Tuck the fig halves alongside. Scatter pomegranate arils generously over everything.


    Dress and Finish: Drizzle with extra virgin olive oil and squeeze lemon juice over the top. Scatter fresh mint leaves. Finish with a few grinds of black pepper and a pinch of flaky sea salt.


    Serve Immediately: This dish is best enjoyed hot, with the halloumi at its best within 2-3 minutes.


    Pro Tips & Variations


    Dry the Halloumi Thoroughly: Pat the halloumi dry and let it sit on paper towels for a few minutes before grilling.


    Don’t Use Non-Stick for This: A hot cast iron or stainless steel pan creates the crust. Non-stick doesn’t get hot enough, causing the cheese to stick.


    Dried Figs Work Beautifully in Winter: Soak dried figs in warm water with a splash of orange blossom water for 20 minutes to plump them up and make them jammy.


    Add a Grain Component: Serve over a bed of warm freekeh, farro, or lentils for a more substantial meal.


    Herb Variations: Thyme and basil work well in place of or alongside mint. Dried za’atar sprinkled over the finished dish adds a distinctly eastern Mediterranean character.


    Balsamic Variation: A drizzle of aged balsamic reduction instead of (or in addition to) honey adds a sweet-tart depth.


    Nutritional Information (Per Serving, based on 4 servings)


  • Calories: ~290 kcal
  • Protein: 14g
  • Carbohydrates: 18g
  • Fat: 19g
  • Saturated Fat: 9g
  • Fiber: 2.5g
  • Sodium: ~680mg

  • Storage & Reheating


    Grilled halloumi is best eaten immediately and does not store well once grilled — it becomes rubbery when refrigerated and reheated.


    Uncooked Halloumi: Stores in the refrigerator in its original brine for up to 2 weeks, or in a fresh salt-water solution.


    Assembled but Uncooked: If prepping ahead for a party, have all components ready and grill the halloumi to order.


    Pairing Suggestions


  • Warm flatbread or pita
  • A simple arugula salad with lemon and olive oil
  • Part of a mezze spread with hummus, tzatziki, and olives
  • Crisp dry rosé or a light, chilled white wine

  • Frequently Asked Questions


    Where do I find halloumi? Most well-stocked supermarkets carry it near the specialty cheeses. Whole Foods, Trader Joe’s, Middle Eastern grocery stores, and Costco all regularly stock it.


    Can I pan-fry instead of grill? Yes — a regular (not non-stick) skillet over high heat works perfectly. You won’t get the ridged marks, but the flavor and texture are identical.


    The halloumi is sticking — what am I doing wrong? The pan isn’t hot enough, or the cheese was wet. Heat the dry pan on high for at least 3-4 minutes before adding the cheese. If it’s sticking, wait — it will release once the crust forms.


    What if I can’t find fresh figs? Ripe peaches, nectarines, or sliced mango all work beautifully with halloumi and pomegranate. Sliced ripe pears are exceptional in autumn.


    Is this dish gluten-free? Yes, completely gluten-free. Serve with gluten-free flatbread if needed.

    Tools & pantry for this recipe

    A few things that make this easier. These are affiliate links, so we may earn a small commission at no extra cost to you; we only suggest what we’d actually use ourselves. See our editorial policy.

  • Bruschetta with Roasted Red Pepper and Feta

    Bruschetta with Roasted Red Pepper and Feta

    Bruschetta with Roasted Red Pepper and Feta

    Bruschetta with Roasted Red Pepper and Feta Introduction Bruschetta is one of those dishes that requires almost no cooking skill, rewards the best ingredients you can find, and is impossible to stop eating. It originated as peasant food in central Italy — a way to use day-old bread by toasting it, r

    Introduction


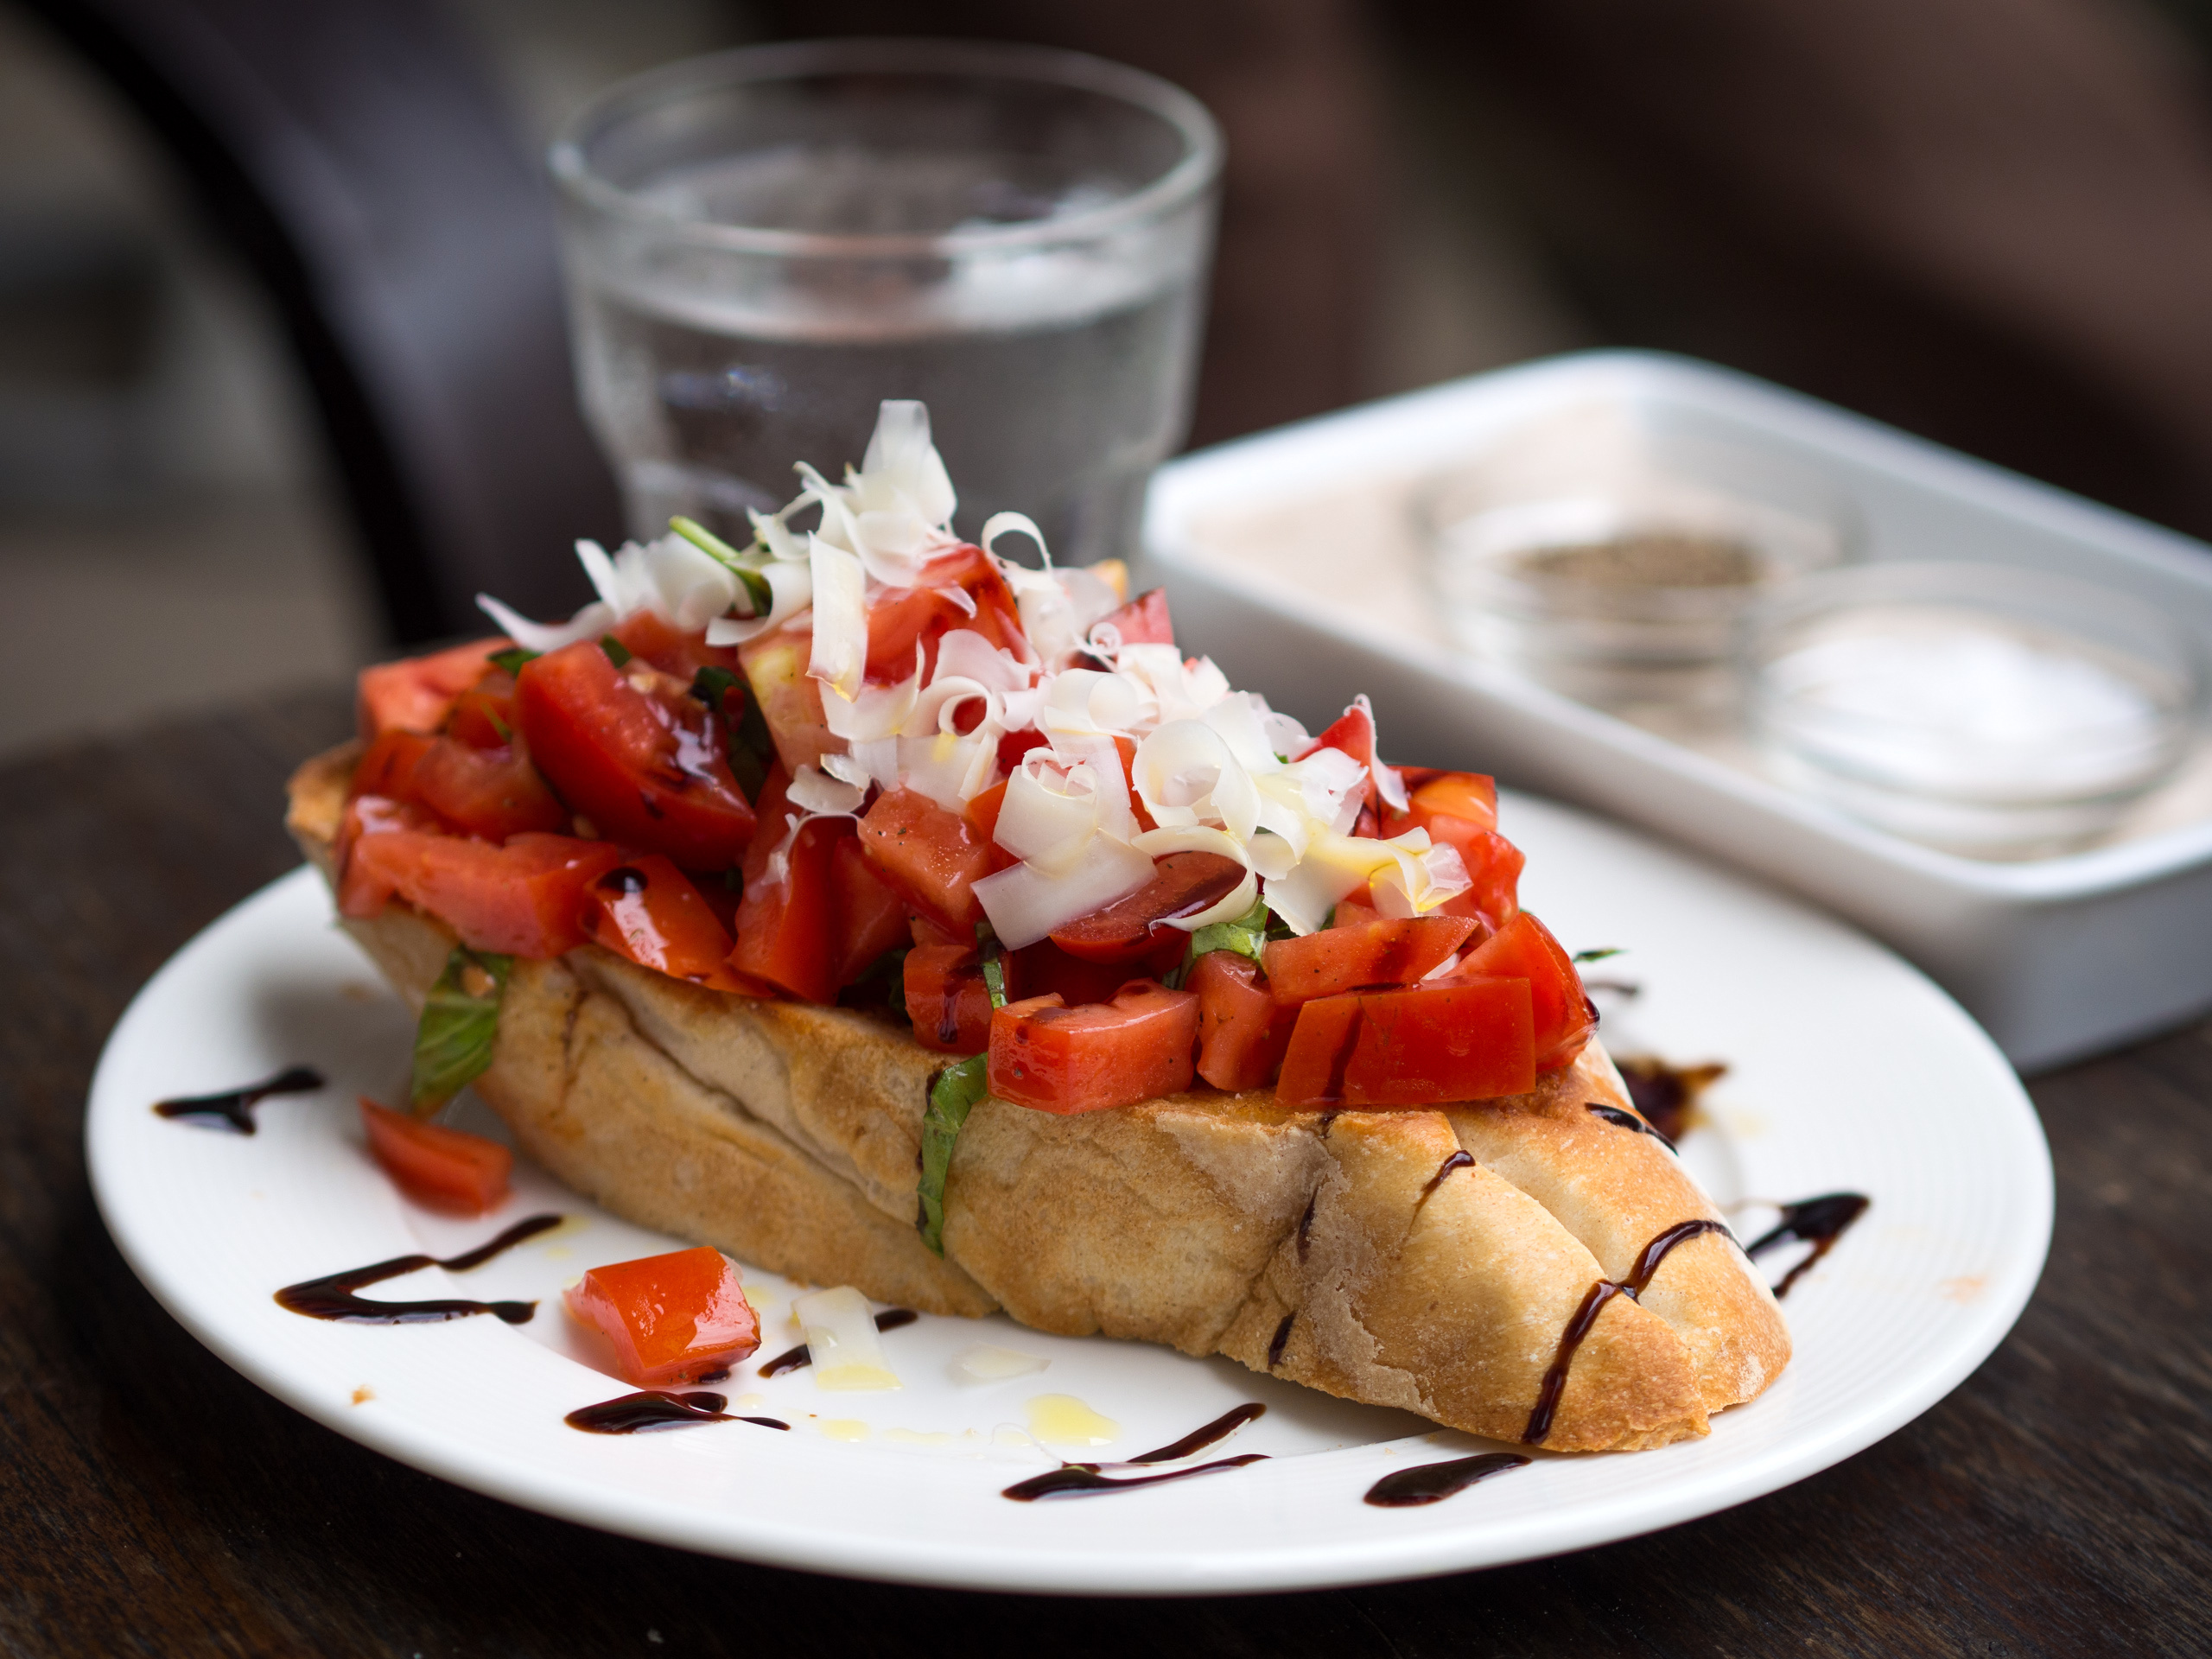
    Bruschetta is one of those dishes that requires almost no cooking skill, rewards the best ingredients you can find, and is impossible to stop eating. It originated as peasant food in central Italy — a way to use day-old bread by toasting it, rubbing it with raw garlic while still warm (so the rough bread acts like sandpaper and the garlic dissolves into the surface), and dressing it with good olive oil. Everything else that goes on top is seasonal, regional, and up to the cook.


    This version leans deeply Mediterranean: charred, sweet roasted red peppers from the Calabrian and Levantine traditions, tangy crumbled feta from Greece, fresh basil, and a final drizzle of extra virgin olive oil that ties it all together. The contrast of textures — crunchy toast, silky soft peppers, crumbly salty feta — and the contrast of flavors — sweet charred pepper, salty cheese, bright basil, garlicky bread — makes this one of the most satisfying quick appetizers in the Mediterranean repertoire.


    Use jarred roasted red peppers if you’re short on time. Roast your own when you have it, because the flavor difference is real and worth every minute.


    Why This Fits the Mediterranean Diet


    Bruschetta embodies the Mediterranean approach to eating: vegetables as the main event (not a side), olive oil as the primary fat, whole grain or sourdough bread as the vehicle, and cheese used as a flavor accent rather than a main ingredient. It’s a snack that satisfies without weighing you down, and it uses the core ingredients of the Mediterranean pantry — tomatoes, peppers, olive oil, garlic, and cheese — in their most direct, unprocessed forms.


    Health Benefits


    **Roasted red peppers — vitamin C powerhouse:** Red bell peppers contain more vitamin C than oranges — a single large pepper provides over 200% of the daily recommended intake. Roasting concentrates their natural sugars and enhances flavor without destroying the vitamin C significantly.


    **Whole grain bread:** Using whole grain or sourdough bread instead of white bread adds fiber, B vitamins, and slows carbohydrate absorption. Sourdough’s fermentation also pre-digests some of the gluten and phytic acid, improving mineral absorption.


    **Garlic rubbed directly on warm toast:** This method delivers raw garlic’s allicin directly and efficiently — the warm, rough bread surface releases and absorbs the allicin without heat degrading it.


    **Olive oil:** The generous drizzle at the end is not optional — it delivers monounsaturated fats, fat-soluble vitamin absorption from the peppers, and the polyphenols that make extra virgin olive oil one of the most studied foods in preventive medicine.


    Ingredients (Serves 4)


  • 8 thick slices sourdough or ciabatta bread (about 1 inch thick)
  • 3 large red bell peppers (or 1 jar/12 oz roasted red peppers, drained well)
  • 100g (3.5 oz) feta cheese, crumbled
  • 3 cloves garlic, peeled and halved
  • 3 tablespoons extra virgin olive oil, plus more for drizzling
  • 1 tablespoon balsamic vinegar (optional, adds depth)
  • Small handful fresh basil leaves, torn
  • Flaky sea salt and freshly cracked black pepper
  • Pinch of dried oregano

  • Equipment Needed


  • Grill pan, outdoor grill, or broiler (for bread and peppers)
  • Tongs

  • Step-by-Step Instructions


    1. **Roast the peppers** (skip if using jarred). Char whole peppers directly over a gas flame or under a broiler, turning with tongs, until the skin is blackened all over — 10–15 minutes. Place in a bowl, cover with plastic wrap, and let steam 15 minutes. Peel off the skin (it slips off easily), remove stem and seeds, and slice or tear into strips. Season with a pinch of salt and a drizzle of olive oil.


    2. **Toast the bread.** Grill bread slices on a very hot grill pan or outdoor grill until charred grill marks form and the bread is crisp on the outside but still slightly soft in the center — about 2 minutes per side. Alternatively, broil 2–3 minutes per side watching carefully.


    3. **Rub with garlic.** Immediately, while the bread is still hot, rub each slice firmly with a halved garlic clove. The rough warm surface works like a grater, pulling flavor from the raw garlic directly into the bread. Use one clove per 2–3 slices — adjust to taste.


    4. **Drizzle with olive oil.** Drizzle the garlic-rubbed toast with olive oil while still warm. Season with a pinch of flaky salt.


    5. **Top and finish.** Layer roasted red pepper strips over each slice. Crumble feta generously over the top. If using balsamic vinegar, drizzle a small amount over each. Scatter torn fresh basil leaves. Finish with cracked black pepper and a pinch of dried oregano.


    6. **Serve immediately.** Bruschetta waits for no one — the contrast between the crisp toast and soft toppings is the point. Serve within minutes of assembling.


    Pro Tips & Variations


    **Make your own roasted peppers when you have time.** Jarred peppers are convenient and acceptable. Home-roasted peppers have a smokier, more complex flavor that elevates this from snack to memorable appetizer.


    **The garlic rub is not negotiable.** This is what makes bruschetta bruschetta. Don’t skip it, don’t substitute garlic powder. The raw garlic on warm bread is the entire base flavor of the dish.


    **Add cherry tomatoes:** Halved cherry tomatoes tossed with olive oil, basil, and salt make a classic bruschetta variation. Combine with the peppers or use instead.


    **White bean and roasted pepper variation:** Spread a thin layer of mashed white beans (cannellini blended with olive oil and lemon) before adding the peppers — adds protein and makes it more substantial.


    **Anchovy variation:** Lay 1–2 oil-packed anchovy fillets over the peppers before adding the feta for a deeply savory, intensely Mediterranean flavor.


    Nutritional Information (Per Serving, 2 slices)


  • Calories: ~280 kcal
  • Protein: 9g
  • Carbohydrates: 28g
  • Fat: 14g
  • Fiber: 3g
  • Sodium: ~520mg

  • Storage & Reheating


    Bruschetta is meant to be made and eaten immediately. Assembled bruschetta does not store — the toast absorbs moisture from the toppings and becomes soggy within 30 minutes.


    **Prep ahead for a party:** Roast the peppers up to 3 days ahead (refrigerate in olive oil). Have the bread sliced and ready to toast. Crumble feta. Then assemble to order in under 5 minutes when guests arrive.


    Pairing Suggestions


  • Part of a mezze or antipasto spread
  • With chilled Prosecco, dry rosé, or crisp white wine
  • Before a simple pasta or grilled fish dinner
  • With a bowl of olives and marinated artichoke hearts

  • Frequently Asked Questions


    **Can I use baguette instead of sourdough?**

    Yes. Any substantial, crusty bread works. Avoid soft sandwich bread — it won’t stand up to the toppings. Ciabatta, baguette, rustic sourdough, and whole grain country loaves are all excellent.


    **My bread got soggy — what went wrong?**

    Either the peppers weren’t drained well enough (pat them dry), the toppings were added too far in advance, or the bread wasn’t toasted thick and crisp enough to stand up to the moisture. Toast longer and add toppings right before serving.


    **Can I serve this at room temperature?**

    The toppings, yes — they’re lovely at room temperature. The bread should be freshly toasted. Warm toast is essential to the garlic rub and to the contrast with the cool toppings.


    **Is jarred garlic okay for the rub?**

    No. Jarred minced garlic has been processed, lacto-fermented, and preserved. It does not have the sharp, pungent bite of fresh raw garlic and will not work the same way. Use fresh only for the rub.


    Tools & pantry for this recipe

    A few things that make this easier. These are affiliate links, so we may earn a small commission at no extra cost to you; we only suggest what we’d actually use ourselves. See our editorial policy.