Spicy Grilled Chicken with Lemon and Garlic
Introduction
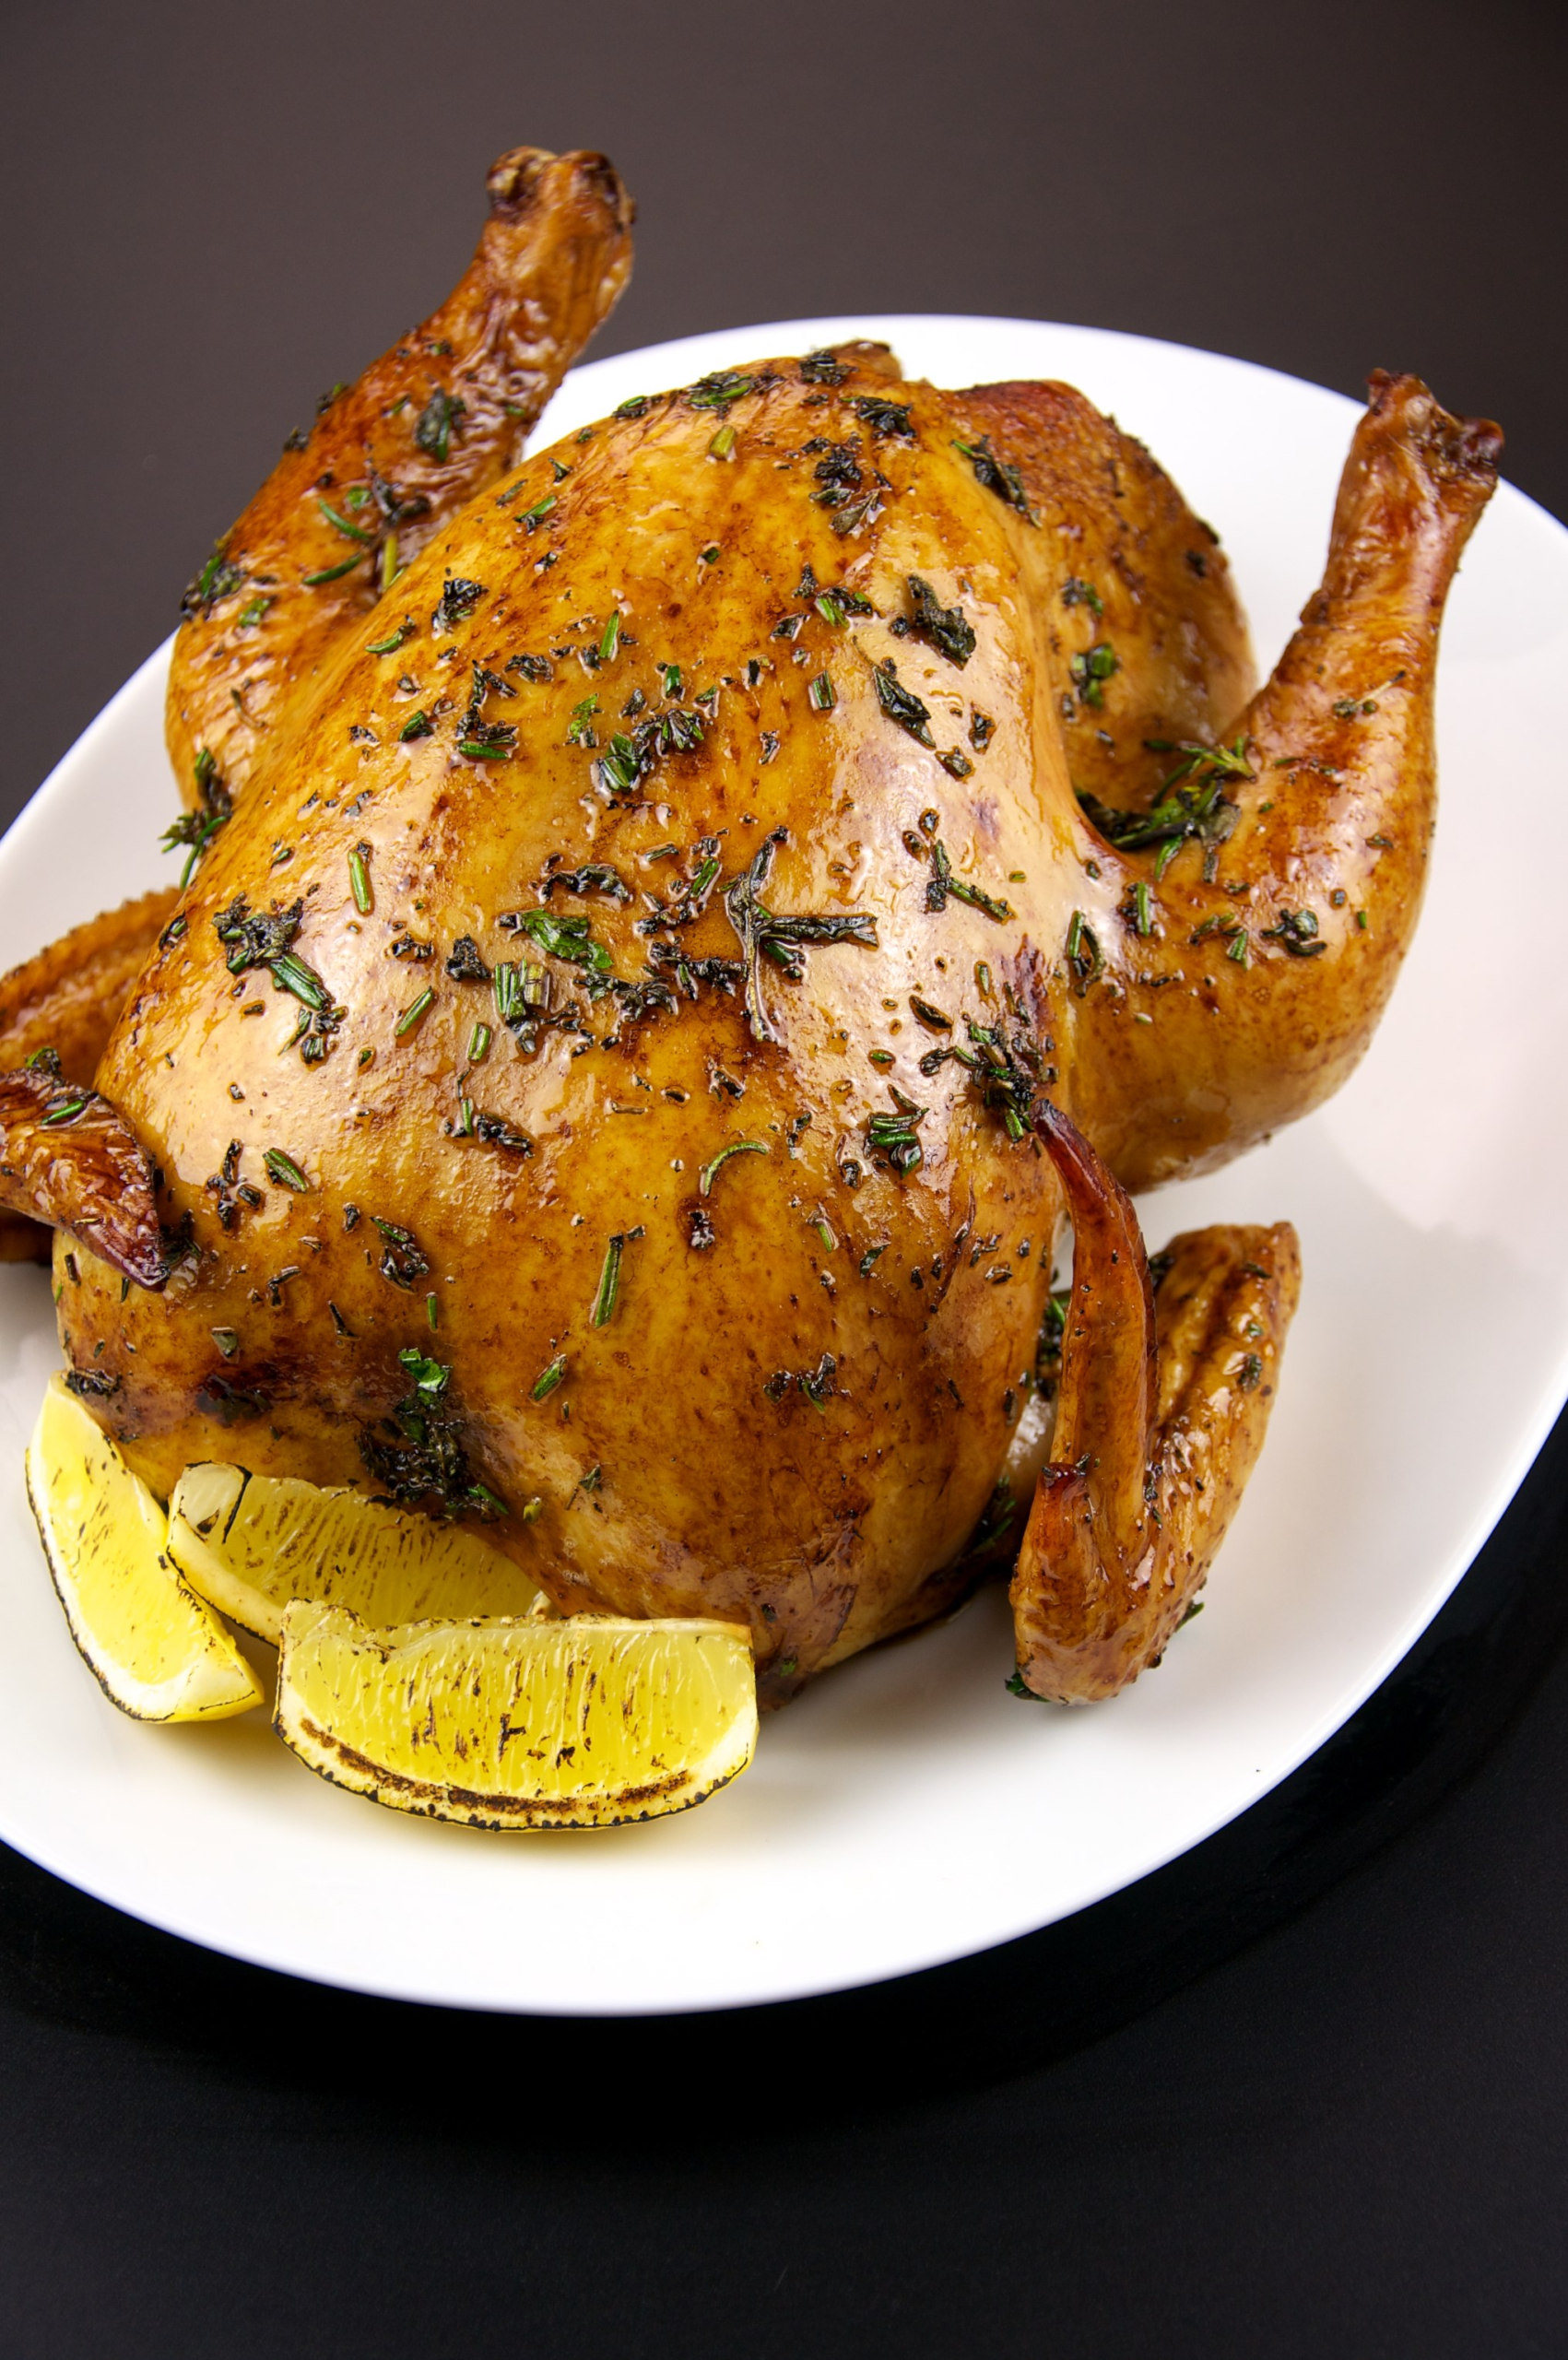
Grilled chicken marinated in lemon, garlic, and warm spices is one of the most beloved dishes across the entire Mediterranean basin — from the grilled piri piri chicken of North Africa to the Lebanese shish tawook to the simple lemon-oregano grilled chicken of Greece. This version brings together the best of all of them: a bright, punchy marinade built on lemon zest, fresh garlic, extra virgin olive oil, and a careful hand with spices that delivers heat without overwhelming the dish.
What makes this recipe distinctly Mediterranean is the marinade philosophy: acid (lemon) to tenderize, fat (olive oil) to carry flavor and prevent sticking, and aromatics (garlic, herbs, spices) to build complexity. The result is chicken that is juicy on the inside with slightly charred, deeply flavored edges on the outside — the kind of meal that tastes like it took hours to prepare but comes together in minutes once the marinating is done.
On the Mediterranean diet, chicken is a secondary protein compared to fish, but still preferred over red meat. Eaten 2–3 times per week, it provides lean protein without the saturated fat load of beef or pork. This preparation maximizes flavor while keeping the dish clean and aligned with the diet’s core principles.
Why This Fits the Mediterranean Diet
This dish exemplifies Mediterranean cooking values: real ingredients, simple technique, bold flavor without processed sauces. The marinade uses olive oil as the fat base (not butter or vegetable oil), fresh lemon (not bottled juice), and real garlic (not powder). The heat comes from Aleppo pepper and cayenne — both used throughout the Mediterranean and Middle East — rather than sugary hot sauces.
Health Benefits
Lean protein: Skinless chicken breast provides approximately 31g of protein per 4oz serving with only 4g of fat. Adequate protein intake supports muscle maintenance, immune function, and satiety.
Garlic’s cardiovascular benefits: Multiple studies show that allicin in fresh garlic reduces blood pressure, lowers LDL cholesterol, and has antibacterial properties. Using 6+ cloves per batch provides a meaningful dose.
Lemon’s vitamin C and flavor efficiency: Fresh lemon juice and zest provide vitamin C and flavonoids that act as antioxidants. Marinating in acid also reduces the formation of heterocyclic amines (HCAs) during grilling — carcinogenic compounds that form when protein is charred.
Olive oil’s monounsaturated fats: The base fat in the marinade coats the meat and carries fat-soluble flavors and spices into the flesh, while providing the Mediterranean diet’s hallmark heart-healthy fat profile.
Ingredients (Serves 4)
Equipment Needed
Step-by-Step Instructions
1. Prepare the marinade. In a small bowl, combine garlic, lemon zest, lemon juice, olive oil, Aleppo pepper, cayenne, cumin, smoked paprika, oregano, salt, and black pepper. Whisk until fully combined.
2. Pound the chicken to even thickness. Place each breast between two sheets of plastic wrap. Using a meat mallet or heavy skillet, pound to an even 3/4-inch thickness. This ensures even cooking and prevents dry edges while the thick center finishes.
3. Marinate. Place chicken in a zip-lock bag or shallow dish. Pour marinade over and turn to coat thoroughly. Seal or cover. Marinate in the refrigerator for at least 2 hours, ideally 6–8 hours. Do not marinate longer than 24 hours — the acid will begin to break down the proteins and make the texture mushy.
4. Bring to room temperature. Remove the chicken from the refrigerator 20–30 minutes before grilling. Cold chicken on a hot grill cooks unevenly — charred outside, raw inside.
5. Heat the grill. Heat gas grill to medium-high (400–450°F) or prepare a two-zone charcoal fire. If using a cast iron grill pan, heat over high heat for 3–4 minutes until very hot. Brush grates or pan with a folded paper towel dipped in oil.
6. Grill the chicken. Remove chicken from marinade, letting excess drip off. Place on the hot grill. Cook without moving for 5–6 minutes until distinct grill marks form and the chicken releases easily from the grates. Flip and cook 4–5 minutes more.
7. Check doneness. Insert an instant-read thermometer into the thickest part. Pull at 160°F — carryover heat will bring it to the safe 165°F during resting. Do not overcook to 165°F on the grill or the breast will be dry.
8. Rest before serving. Transfer to a cutting board and tent loosely with foil. Rest 5 minutes — this allows the juices to redistribute throughout the meat.
9. Slice and serve. Slice against the grain into strips or serve whole. Scatter fresh parsley over the top. Serve with lemon wedges, roasted vegetables, and a simple salad.
Pro Tips & Variations
Bone-in thighs are more forgiving. If you tend to overcook chicken breasts, use bone-in skin-on thighs instead — they have more fat and tolerate higher temperatures without drying out. Cook to 175–180°F for best texture.
Aleppo pepper is worth finding. This Syrian dried pepper is less hot than cayenne but has a fruity, slightly smoky depth that plain red pepper flakes don’t replicate. Find it at Middle Eastern grocery stores or online. It’s worth having in the pantry for Mediterranean cooking.
Overnight marinade = maximum flavor. The longer the chicken sits in the lemon-garlic marinade (up to 24 hours), the more deeply flavored it becomes. Make it the night before for a weeknight dinner.
Make extra for meal prep. This chicken reheats well and works beautifully cold in salads, wraps, and grain bowls throughout the week.
Yogurt variation: Add ¼ cup full-fat Greek yogurt to the marinade for an even more tender result and a slight tang that complements the spices.
Nutritional Information (Per Serving, 1 breast)
Storage & Reheating
Refrigerator: Cooked chicken keeps well for 3–4 days in an airtight container.
Reheating: Reheat in a covered skillet over medium-low heat with a splash of water or broth to prevent drying out. Alternatively, slice cold and serve at room temperature over a salad — often better than reheated.
Freezer: Freeze cooked chicken for up to 3 months. Thaw overnight in the refrigerator. Best sliced thin before freezing for faster thawing.
Pairing Suggestions
Frequently Asked Questions
How spicy is this dish?
With 1 tsp Aleppo pepper and ¼ tsp cayenne, it has a mild to moderate warmth — noticeable but not overpowering. Reduce or eliminate the cayenne for a milder version; double it if you like real heat.
Can I bake this instead of grilling?
Yes. Bake at 425°F on a rimmed sheet pan for 18–22 minutes, then broil 2–3 minutes for color. The texture differs slightly but the flavor is nearly as good.
What if I don’t have Aleppo pepper?
Substitute ½ teaspoon regular crushed red pepper flakes plus ¼ teaspoon sweet paprika. It’s not identical but close enough.
Can this be made ahead for a party?
Absolutely. Marinate the day before, grill up to 2 hours ahead, rest, slice, and serve at room temperature. It’s excellent party food.
Why is my grilled chicken always dry?
Three most common reasons: didn’t pound to even thickness, cooked to 165°F on the grill (overcooked — pull at 160°F), or didn’t rest before cutting.