Author: Elena

  • Mediterranean Diet Food List: What to Eat (and What to Skip)

    Mediterranean Diet Food List: What to Eat (and What to Skip)

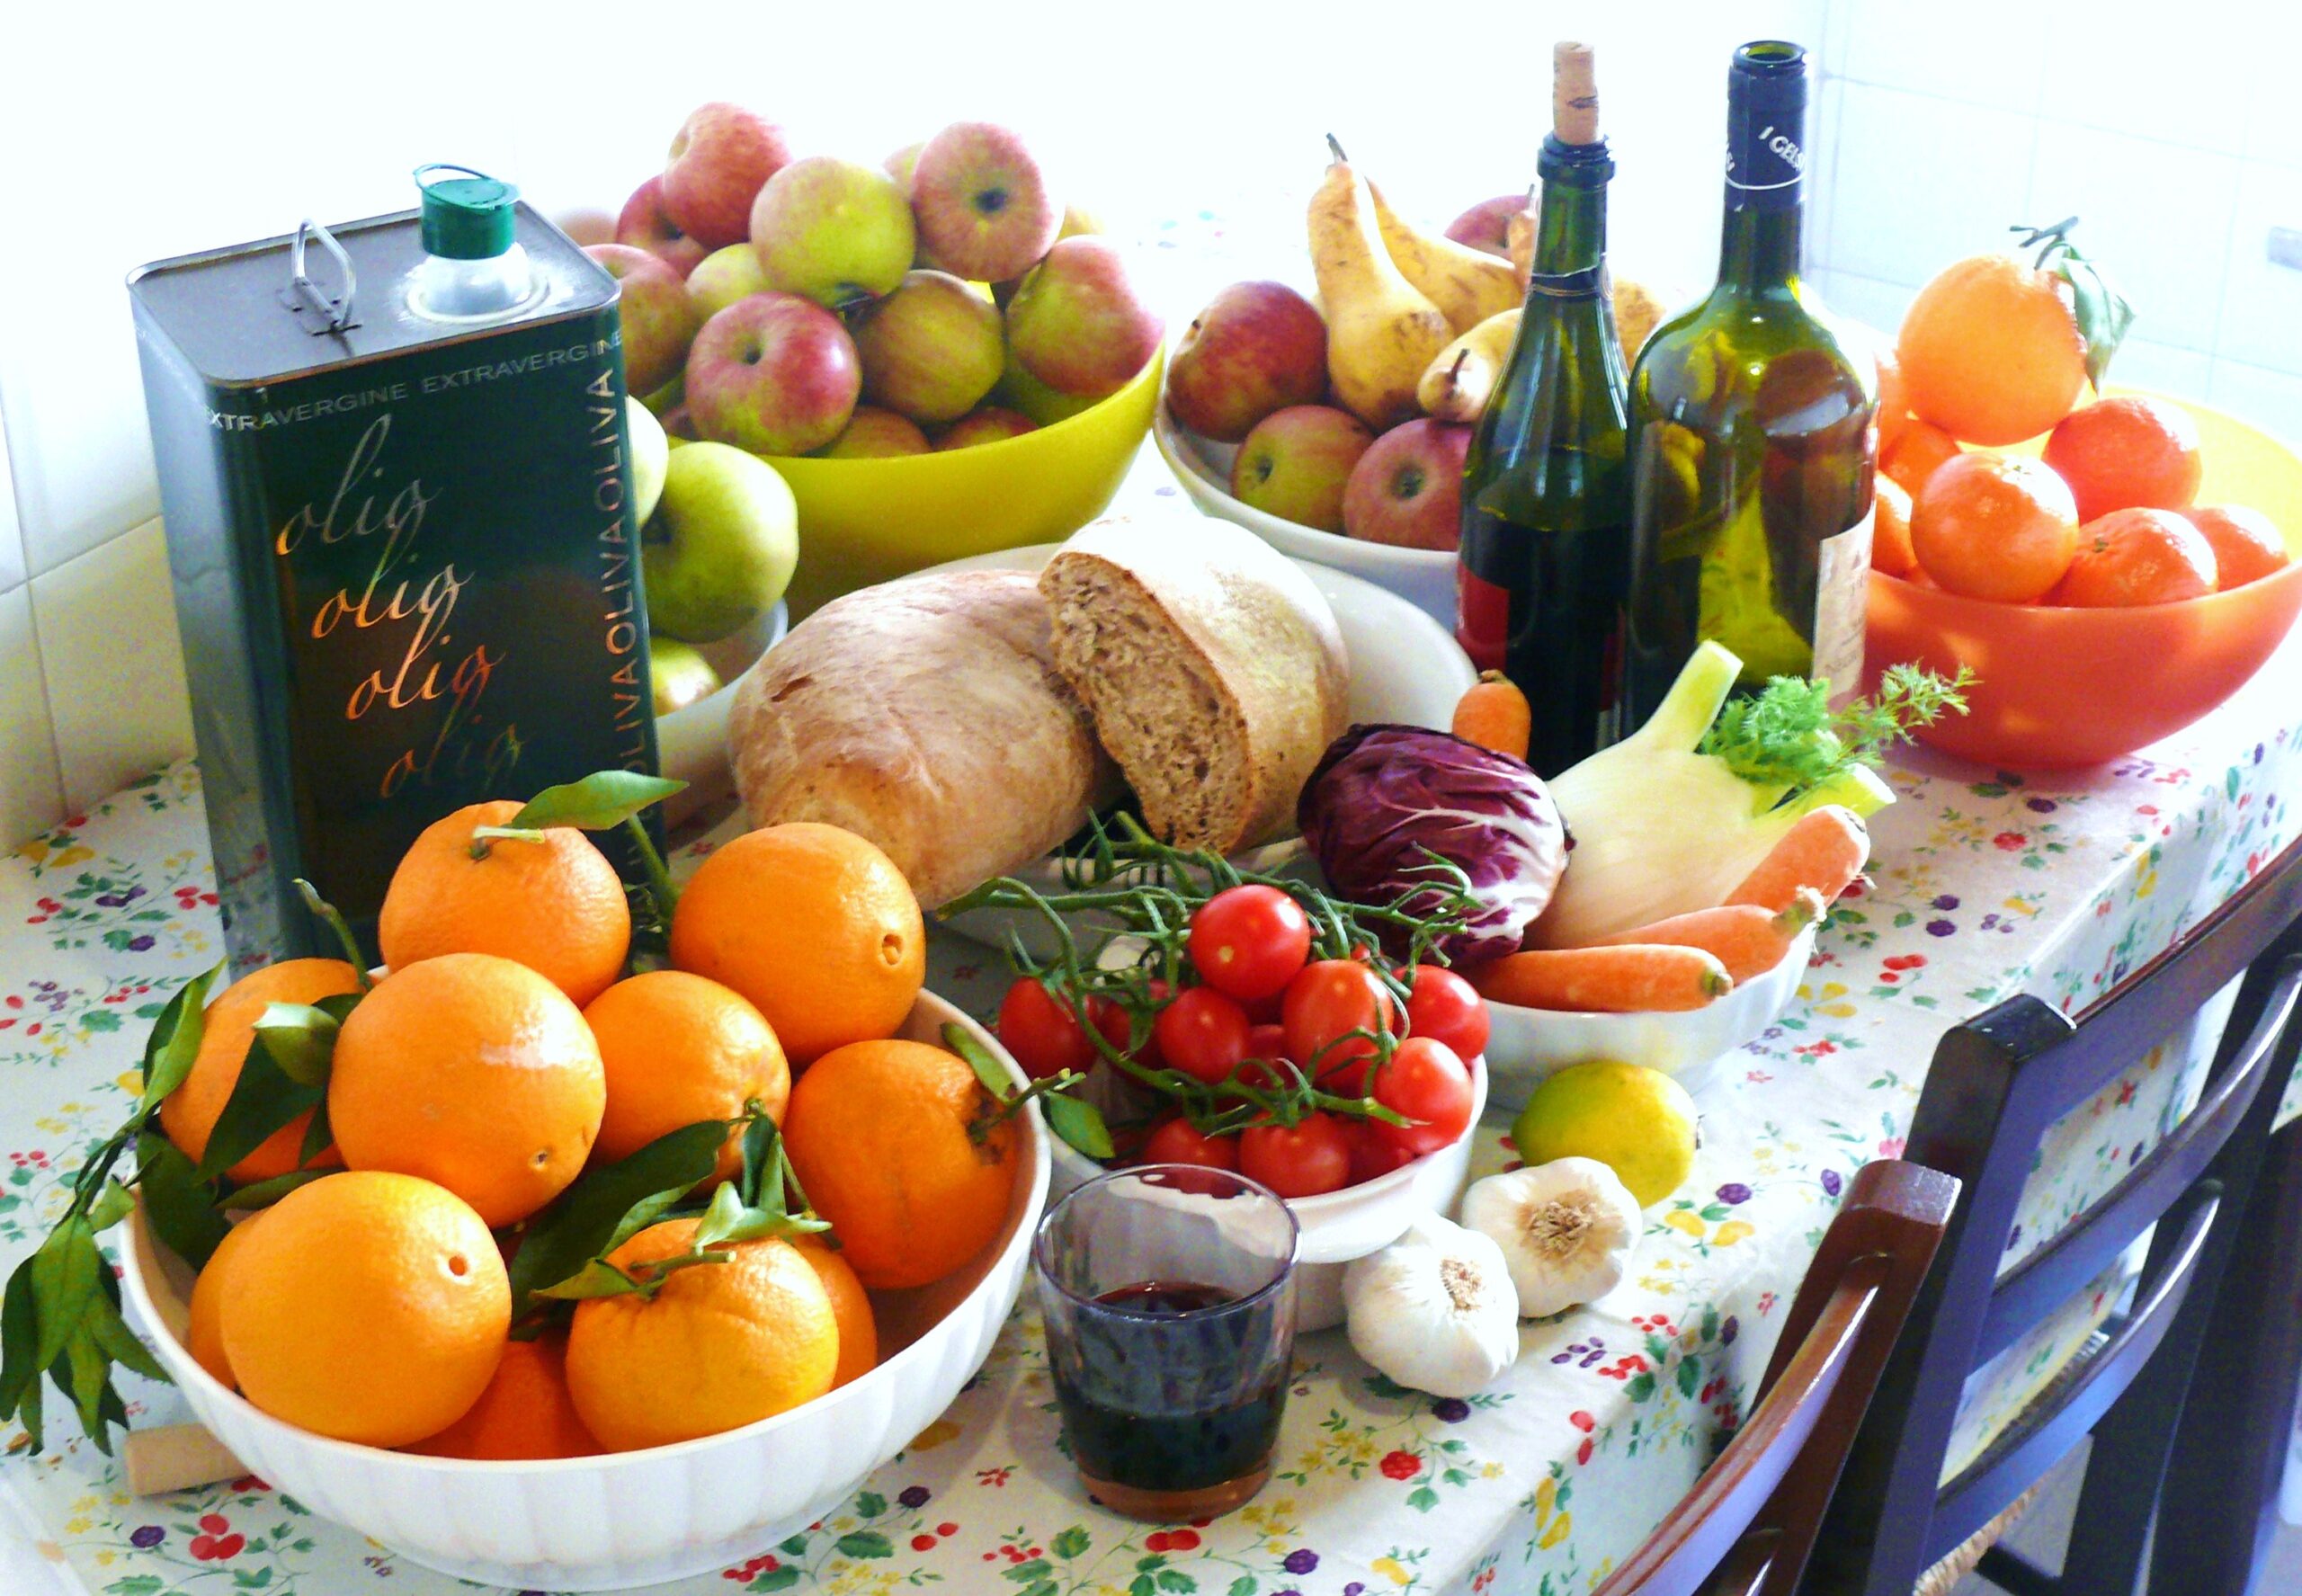
    In the coastal village of Ierapetra, Crete, a 70-year-old woman named Maria still prepares her family’s meals using olive oil, wild herbs, and locally grown vegetables. Her diet mirrors the traditional Mediterranean diet, which has been shown to reduce heart disease risk by up to 30% in the PREDIMED study (Estruch 2018, NEJM). The Mediterranean diet food list isn’t just a list of ingredients—it’s a lifestyle rooted in centuries of regional eating patterns across the Mediterranean basin. What Is the Mediterranean Diet Food List? The Mediterranean diet food list centers on whole foods, primarily plant-based, with minimal processed items. It emphasizes olive oil as the primary fat source, and includes fish, legumes, nuts, fruits, and vegetables. The diet is not a strict regimen but a flexible eating pattern that varies by region. In Andalusia, Spain, for example, meals often feature chickpeas, tomatoes, and peppers, while in Sicily, pasta with tomato sauce and seafood is common. The diet’s foundation rests on the Seven Countries Study (Keys) and the Lyon Heart Study (de Lorgeril 1999, Circulation), which demonstrated that populations consuming Mediterranean diets had significantly lower rates of cardiovascular disease. The diet is also supported by the MIND diet (Morris 2015), which links Mediterranean eating patterns to reduced risk of Alzheimer’s disease. Foods to Eat on the Mediterranean Diet The Mediterranean diet food list includes a wide variety of nutrient-dense foods. Olive oil is the cornerstone, with studies showing that replacing saturated fats with olive oil can reduce heart disease risk by 17% (Salas-Salvadó 2014, Diabetes Care). Nuts like almonds and walnuts are also encouraged, with research indicating that consuming 30 grams daily can lower LDL cholesterol by 5% (Cochrane Reviews). Fresh fruits and vegetables are abundant. In Sardinia, where the diet is particularly rich in whole grains and legumes, traditional dishes like fregola (a type of pasta) are often paired with beans and vegetables. The diet emphasizes seasonal produce, with tomatoes, eggplant, and leafy greens being staples in the Levant region. Fish and seafood are integral to the Mediterranean diet. The PREDIMED study found that participants who consumed fish at least twice a week had a 25% lower risk of cardiovascular events. In Andalusia, traditional dishes like pescaíto frito (fried fish) are common, while in Sicily, seafood is often prepared with tomatoes and herbs. Foods to Avoid on the Mediterranean Diet The Mediterranean diet food list excludes processed foods, refined sugars, and excessive red meat. The diet discourages the consumption of processed meats like salami and deli meats, which are linked to increased inflammation. In the EPIC study (Buckland 2012, BMJ), researchers found that high consumption of processed meats was associated with a 19% increased risk of cancer. Refined grains and sugary drinks are also off-limits. The diet promotes whole grains like oats, quinoa, and brown rice, which are linked to better heart health. In Crete, where the diet is most traditional, people avoid white bread and pastries, instead choosing whole grain breads and fresh fruit for snacks. Alcohol consumption is moderate and often includes red wine, which is associated with heart health when consumed in moderation. However, the diet does not encourage starting alcohol consumption if one doesn’t already drink. Olive Oil: The Heart of the Mediterranean Diet Olive oil is the primary fat in the Mediterranean diet, and its benefits are well-documented. The PREDIMED study found that those who followed a Mediterranean diet enriched with olive oil had a 30% lower risk of major cardiovascular events. In Crete, olive oil is used in almost every dish, from salads to stews. The diet emphasizes extra virgin olive oil, which is rich in polyphenols and antioxidants. These compounds help reduce inflammation and protect against heart disease. In Sardinia, where olive oil is produced locally, traditional methods of extraction preserve the oil’s beneficial properties. Fish and Seafood: A Mediterranean Staple Fish and seafood are central to the Mediterranean diet, especially in coastal regions like Sicily and Andalusia. The diet recommends consuming fish at least twice a week, with an emphasis on fatty fish like salmon, sardines, and mackerel. These fish are rich in omega-3 fatty acids, which are linked to reduced inflammation and improved heart health. The Lyon Heart Study (de Lorgeril 1999, Circulation) found that participants who followed a Mediterranean diet with fish had a 70% lower risk of dying from heart disease. In the Levant region, seafood is often prepared with olive oil, herbs, and citrus, enhancing both flavor and nutrition. Legumes and Nuts: Protein and Fiber Powerhouses Legumes and nuts are essential components of the Mediterranean diet food list. In Sardinia, beans and lentils are commonly used in traditional dishes, providing both protein and fiber. The diet encourages consuming legumes at least twice a week. Nuts like almonds, walnuts, and pistachios are also encouraged. The Cochrane Reviews found that consuming nuts daily can reduce the risk of heart disease by 19%. In Andalusia, nuts are often eaten as snacks or added to traditional pastries. Fruits and Vegetables: The Colorful Foundation Fruits and vegetables are the foundation of the Mediterranean diet, with a focus on seasonal and locally grown produce. In the Levant, tomatoes, eggplant, and peppers are staples, while in Sicily, citrus fruits and figs are common. The diet emphasizes a variety of colors, which ensures a wide range of nutrients. The MIND diet (Morris 2015) found that diets rich in colorful fruits and vegetables were associated with a 53% lower risk of Alzheimer’s disease. In Crete, traditional dishes often feature wild herbs like oregano and thyme, which are rich in antioxidants. Whole Grains: The Nutritional Backbone Whole grains are a key part of the Mediterranean diet food list, providing fiber, B vitamins, and minerals. In Sardinia, whole grains like fregola and barley are common, while in Andalusia, whole wheat bread and rice are staples. The diet recommends replacing refined grains with whole grains. In the EPIC study (Buckland 2012, BMJ), researchers found that diets high in whole grains were associated with a 22% lower risk of heart disease. The diet also encourages the consumption of oats, quinoa, and brown rice. Red Wine in Moderation: A Traditional Component Red wine is often consumed in moderation as part of the Mediterranean diet, especially in regions like Andalusia and Sicily. The diet does not encourage starting alcohol consumption if one doesn’t already drink. The JAMA Neurology 2023 study (Shannon) found that moderate consumption of red wine was associated with a 20% lower risk of cognitive decline. However, the diet emphasizes that alcohol should be consumed in moderation, with no more than one glass per day for women and two for men. Comparison Table: Mediterranean Diet Food List
    Mediterranean Diet Food List Comparison
    Food Group Recommended Avoid
    Olive Oil Extra virgin olive oil Processed oils
    Fish Salmon, sardines, mackerel Processed fish products
    Legumes Chickpeas, beans, lentils Processed legumes
    Nuts Almonds, walnuts, pistachios Roasted nuts with added salt
    Fruits Seasonal fruits Processed fruit juices
    Vegetables Leafy greens, tomatoes, peppers Processed vegetables
    Grains Whole wheat, oats, quinoa White bread, refined cereals
    Regional Variations in the Mediterranean Diet The Mediterranean diet food list varies by region, reflecting local ingredients and traditions. In Crete, the diet is rich in olive oil, wild herbs, and vegetables. In Sardinia, whole grains and legumes are emphasized, while in Andalusia, fish and seafood are common. In Sicily, the diet includes pasta with tomato sauce and seafood, while in the Levant, dishes often feature chickpeas, eggplant, and tomatoes. Each region contributes its own unique flavors and ingredients to the broader Mediterranean diet pattern. Mediterranean Diet Food List and Health Benefits The Mediterranean diet food list is associated with numerous health benefits. The PREDIMED study (Estruch 2018, NEJM) found that participants who followed the diet had a 30% lower risk of major cardiovascular events. The diet also supports brain health. The MIND diet (Morris 2015) found that diets rich in Mediterranean foods were associated with a 53% lower risk of Alzheimer’s disease. In Andalusia, where the diet is widely practiced, people often report better cognitive function and lower rates of dementia. How to Start the Mediterranean Diet Food List To begin following the Mediterranean diet food list, start by replacing processed foods with whole foods. Incorporate olive oil into cooking, add fish twice a week, and increase your intake of fruits and vegetables. For meal planning, consider the 7-day Mediterranean diet meal plan for beginners (/7-day-mediterranean-diet-meal-plan-for-beginners/). This plan includes recipes from various regions, such as Crete and Sicily, to help you get started. You can also explore Mediterranean diet recipes (/recipes/) and meal plans (/meal-plans/) to find dishes that align with the diet’s principles. FAQ

    Q: What foods are allowed on the Mediterranean diet?

    A: The Mediterranean diet allows whole grains, fruits, vegetables, legumes, nuts, olive oil, fish, and moderate amounts of red wine. Processed foods, refined sugars, and red meat are limited.

    Q: Is the Mediterranean diet good for weight loss?

    A: Yes, the Mediterranean diet is associated with weight loss and weight management. The diet emphasizes whole foods and healthy fats, which help control appetite and reduce inflammation.

    Q: Can I eat pasta on the Mediterranean diet?

    A: Yes, pasta is allowed, but it should be made with whole grains and paired with vegetables and olive oil. In Sicily, traditional pasta dishes are often rich in vegetables and seafood.

    Q: What is the best Mediterranean diet meal plan?

    A: The best meal plan varies by individual needs, but the 7-day Mediterranean diet meal plan for beginners (/7-day-mediterranean-diet-meal-plan-for-beginners/) is a great starting point.

    Q: How does the Mediterranean diet help heart health?

    A: The Mediterranean diet reduces heart disease risk by emphasizing healthy fats, fish, and vegetables. Studies like PREDIMED (Estruch 2018, NEJM) show a 30% lower risk of cardiovascular events.

    Q: Are there any downsides to the Mediterranean diet?

    A: The diet is generally safe and healthy. However, it may be challenging for those accustomed to processed foods. It requires planning and preparation to maintain the diet’s principles.

    Review date: April 2025. This article is for informational purposes only and does not constitute medical advice. Consult a healthcare provider before making significant dietary changes.

    Tools & pantry for this recipe

    A few things that make this easier. These are affiliate links, so we may earn a small commission at no extra cost to you; we only suggest what we’d actually use ourselves. See our editorial policy.
  • Tzatziki Sauce

    Tzatziki Sauce

    Tzatziki Sauce

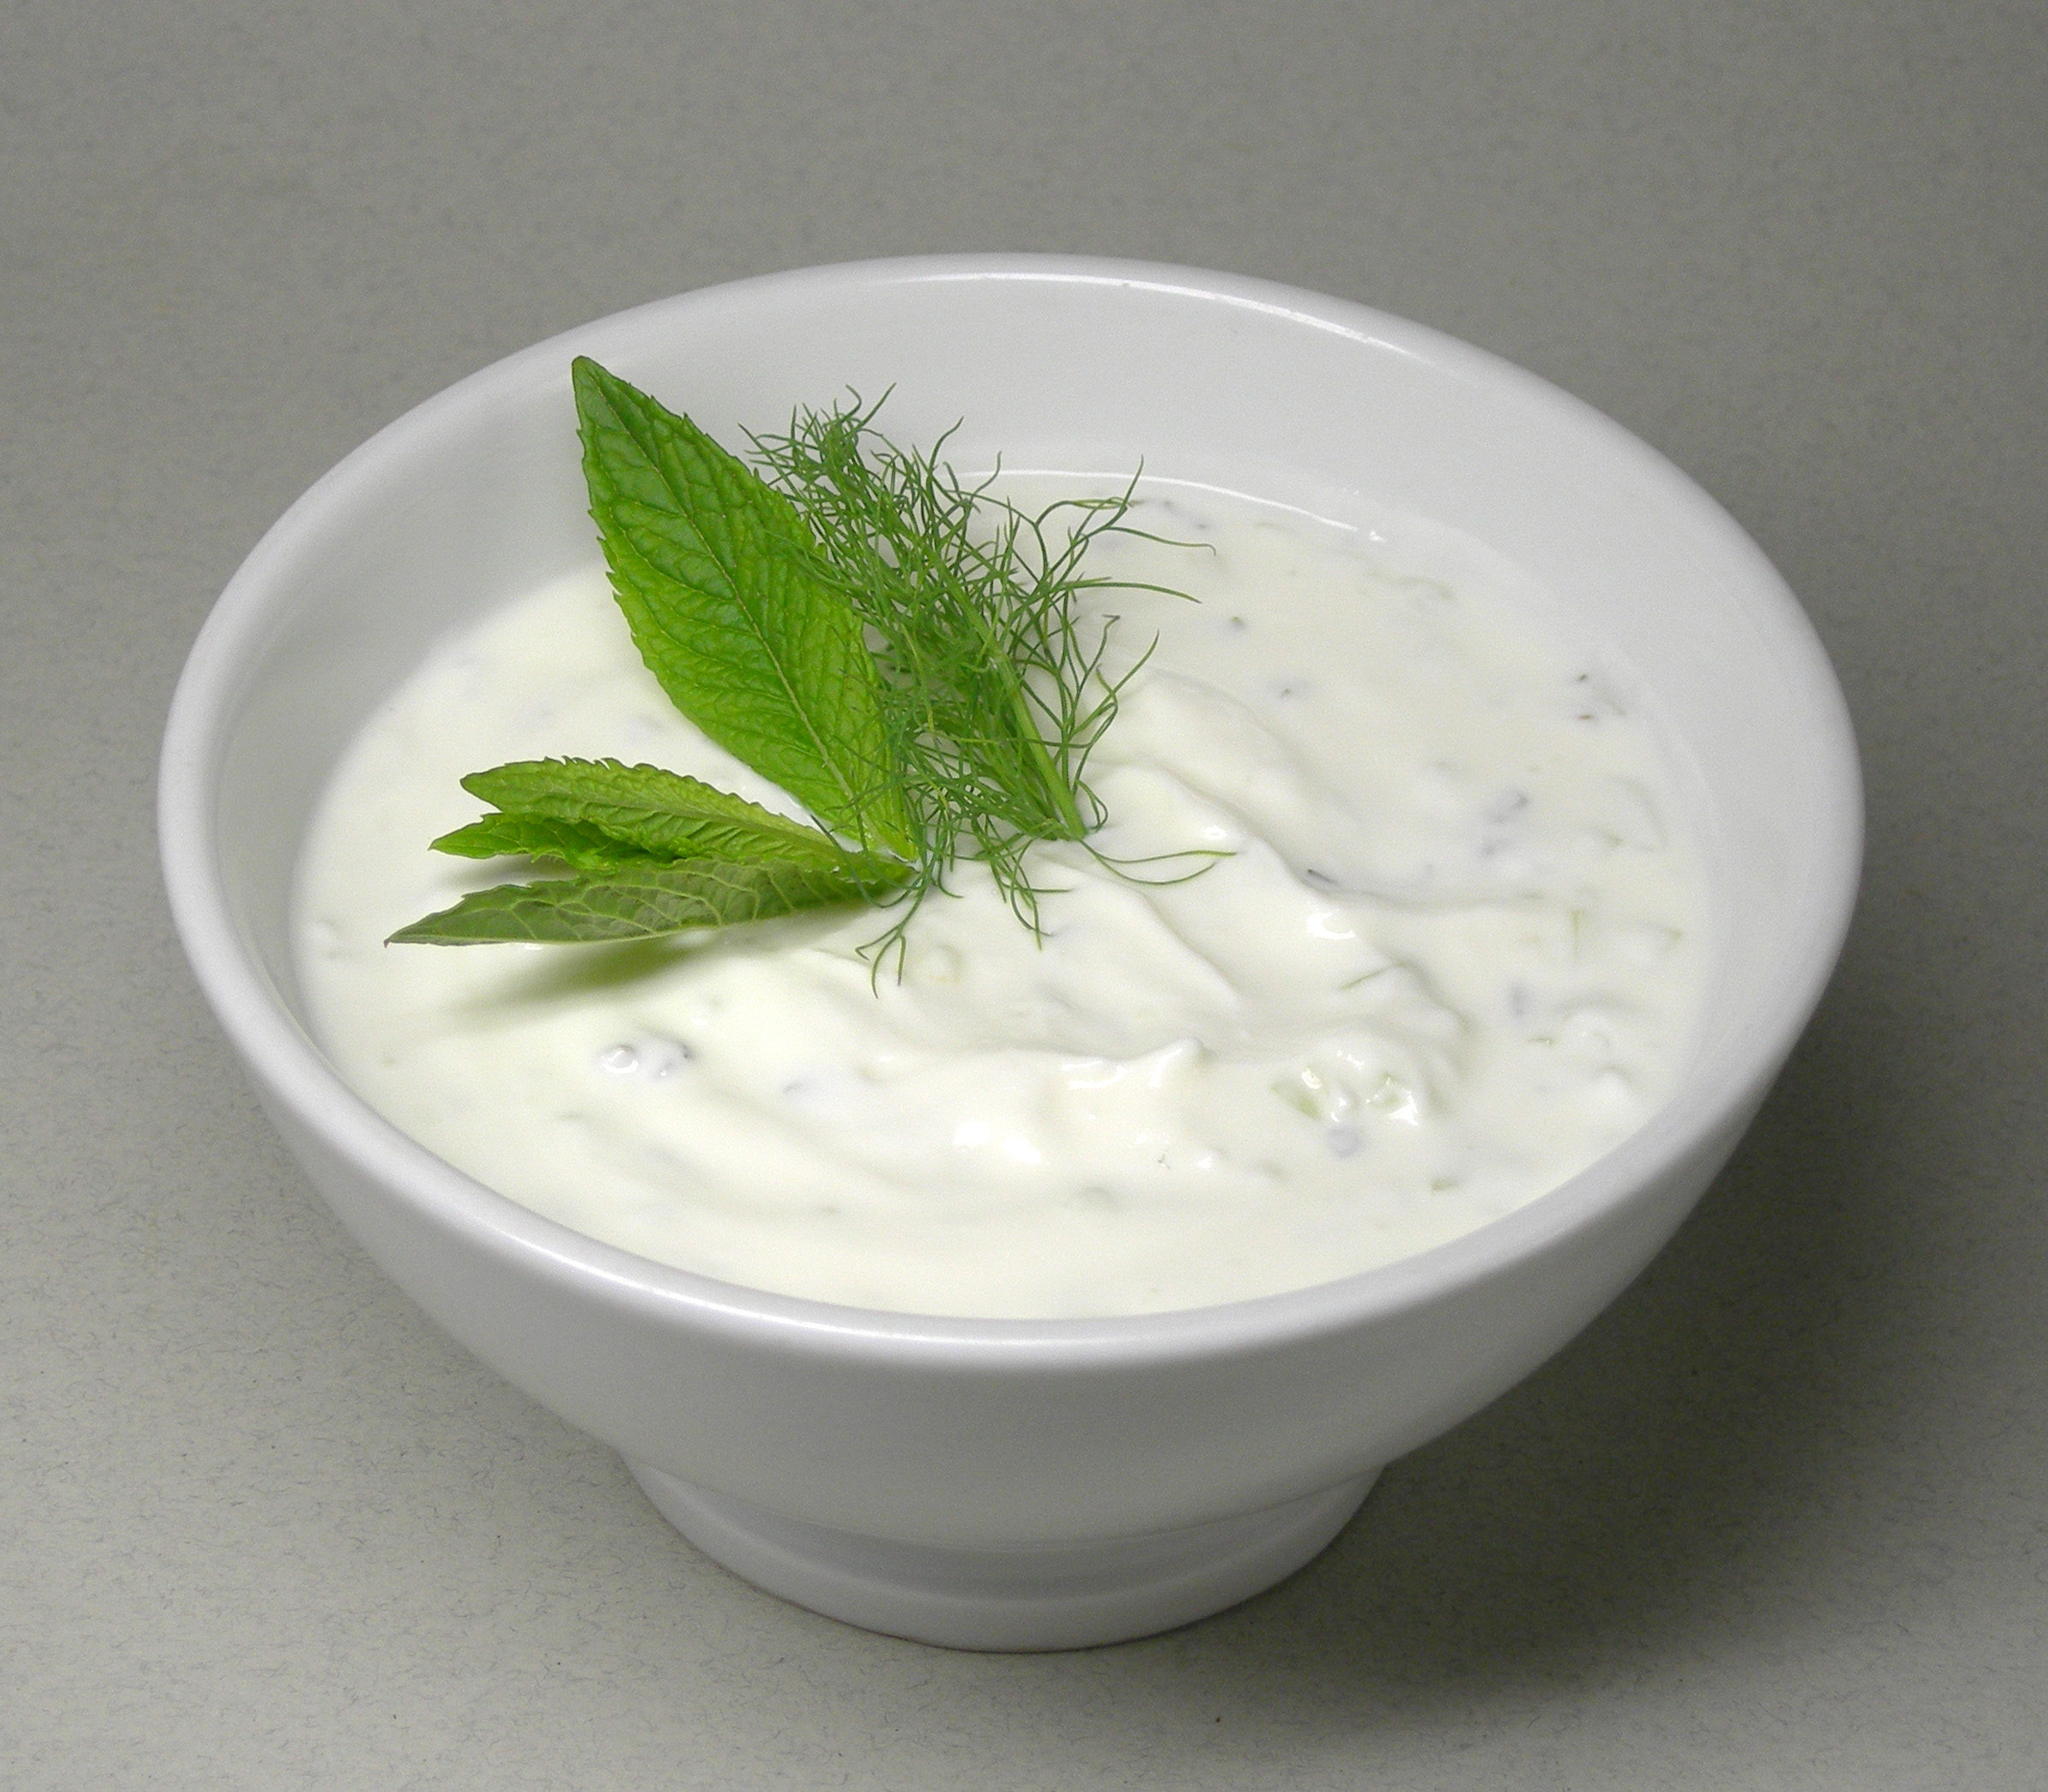
    The Foundational Greek Condiment Walk into any Greek home, and there will almost certainly be tzatziki in the refrigerator. This yogurt-based sauce — thick, cool, garlicky, threaded with cucumber and dill — is one of the defining flavors of Mediterranean cooking. It serves as a dip for pita and vege

    The Foundational Greek Condiment


    Walk into any Greek home, and there will almost certainly be tzatziki in the refrigerator. This yogurt-based sauce — thick, cool, garlicky, threaded with cucumber and dill — is one of the defining flavors of Mediterranean cooking. It serves as a dip for pita and vegetables, a sauce for grilled meats, a spread for sandwiches, and the dressing for several of the most popular Greek salads. Understanding tzatziki is understanding the logic of the Mediterranean table: fresh, simple ingredients combined in ways that amplify each other.


    The word comes from the Turkish word cacık, which shares its origins with Persian mast-o-khiar — yogurt and cucumber sauces that appear across the entire Mediterranean and Middle Eastern world under different names. The Greek version is defined by its use of strained yogurt, which gives it a thickness that thinner yogurt sauces can’t match, and by the combination of garlic and dill that gives it its distinctive character.


    Proper tzatziki takes about 15 minutes of active work — the rest is passive time for the cucumber to drain and the flavors to meld. The result keeps for five days and improves as it sits.


    —


    Why It Fits the Mediterranean Diet


    Greek yogurt — the strained variety required for authentic tzatziki — is one of the most nutrient-dense foods in the Mediterranean diet. A half-cup serving provides approximately 10–12 grams of protein, 15–20% of the daily calcium requirement, and a significant dose of probiotics that support digestive health. Unlike sour cream or mayonnaise-based sauces, tzatziki delivers its richness through protein and probiotics rather than saturated fat.


    Cucumber is almost entirely water, making it hydrating and virtually calorie-free. It contributes potassium and small amounts of vitamin K. Garlic has well-documented antimicrobial and cardiovascular benefits — allicin, the active compound released when garlic is crushed, has been studied for its effect on blood pressure and LDL cholesterol. Olive oil adds monounsaturated fats and tocopherols. This is a condiment that improves your meal nutritionally while also making it taste significantly better.


    —


    Ingredients


  • 2 cups full-fat Greek yogurt (strained — Fage, Chobani, or any that lists “strained” on the label)
  • 1 large English cucumber (or 2 Persian cucumbers)
  • 3 cloves garlic, finely minced or grated on a microplane
  • 2 tablespoons extra virgin olive oil, plus a drizzle for serving
  • 1 tablespoon fresh lemon juice
  • 2 tablespoons fresh dill, finely chopped (or 1 tablespoon dried)
  • 1 tablespoon fresh mint, finely chopped (optional but traditional in some regions)
  • ¾ teaspoon salt, plus more to taste
  • White pepper to taste

  • Quality notes: The yogurt must be strained (Greek-style), not regular plain yogurt. Regular yogurt is too thin and will make watery tzatziki. Full-fat produces the best flavor and texture, though 2% works reasonably well. For garlic, fresh cloves only — garlic powder produces a flat, one-dimensional flavor.


    —


    Equipment Needed


  • Box grater or food processor
  • Fine mesh strainer or cheesecloth
  • Mixing bowl

  • —


    Instructions


    1. Drain the cucumber.

    Grate the cucumber on the large holes of a box grater. Place the grated cucumber in a clean kitchen towel or several layers of cheesecloth, gather the edges, and twist firmly over the sink, squeezing out as much liquid as possible. This step is not optional — the cucumber releases significant water, and skipping it produces watery tzatziki. Set the drained cucumber aside.


    2. Prepare the garlic.

    For a sauce this simple, garlic preparation matters. Mince the cloves very finely, or grate them on a microplane for a paste-like consistency that distributes evenly. If you want a milder garlic flavor, let the minced garlic sit in the lemon juice for 5 minutes before combining — the acid mellows the sharpness.


    3. Combine.

    In a medium bowl, combine the strained yogurt, drained cucumber, garlic, olive oil, lemon juice, dill, mint if using, salt, and white pepper. Stir to combine thoroughly.


    4. Rest.

    Cover and refrigerate for at least 30 minutes before serving — 1 hour is better, overnight is best. The resting time allows the garlic to mellow slightly and the flavors to integrate. Taste again before serving and adjust salt and lemon.


    5. Serve.

    Transfer to a serving bowl, create a shallow well with the back of a spoon, drizzle with olive oil, and add a small sprigs of fresh dill for presentation.


    —


    Pro Tips and Variations


    The draining step is everything. Watery tzatziki is almost always caused by insufficient cucumber draining. After squeezing, taste a pinch of the cucumber — it should taste cucumber-forward with very little moisture. If it still seems wet, drain again.


    Mint vs. dill: Traditional Greek tzatziki uses primarily dill. Some regional variations — particularly in Macedonia and Thrace — use primarily mint. Both are correct. Use whichever you prefer, or combine them equally for a more complex herb flavor.


    Lemon vs. vinegar: Some versions use white wine vinegar in place of lemon juice. The result is slightly sharper and works well as a dip. Lemon juice produces a brighter, fresher flavor better suited for use as a sauce over grilled fish or chicken.


    Make it thicker: Strain the finished tzatziki in a cheesecloth-lined strainer for 2 hours for a labne-like consistency excellent for spreading on bread.


    —


    Nutritional Info (per 3-tablespoon serving)


    Calories: 60 | Protein: 4g | Carbs: 3g | Fat: 3g | Fiber: 0g | Calcium: 10% DV


    —


    Storage


    Refrigerate in an airtight container for up to 5 days. Stir before each use — some liquid separation is normal, particularly from the cucumber. The garlic flavor intensifies over time; tzatziki made the day before serving is often better than tzatziki made the same day.


    —


    What to Serve With It


    Tzatziki is the bridge sauce of Mediterranean cooking. Serve it alongside our Lemon Herb Roasted Chicken Thighs, as a dressing for Greek Salad with Tzatziki Dressing, or as a dip at the center of any mezze spread. It is also excellent with grilled lamb chops, spooned over falafel, spread on flatbread with roasted vegetables, or used as a dip for raw cucumbers, carrots, and bell pepper strips.


    —


    FAQs


    Can I use regular plain yogurt instead of Greek?

    You can, but you’ll need to strain it first. Line a fine mesh strainer with cheesecloth, add the yogurt, and let it drain in the refrigerator for at least 2 hours — ideally overnight. The result will be similar to Greek yogurt and will work well.


    How far in advance can I make tzatziki?

    Up to 3 days in advance. Make it the night before for best flavor. The garlic does intensify over time, so if you prefer a milder garlic note, reduce the amount slightly if making it more than 24 hours ahead.


    Is tzatziki served cold or at room temperature?

    Always cold or at cool room temperature. It’s a sauce designed to contrast with hot grilled meats and warm bread — the temperature contrast is part of why it works so well.


    Tools & pantry for this recipe

    A few things that make this easier. These are affiliate links, so we may earn a small commission at no extra cost to you; we only suggest what we’d actually use ourselves. See our editorial policy.
  • Tomato Basil Salad

    Tomato Basil Salad

    Tomato Basil Salad

    Introduction The Tomato Basil Salad is a vibrant, refreshing dish that embodies the essence of Mediterranean cuisine. Originating from Italy and Greece, this salad celebrates the summertime abundance of ripe tomatoes and fresh herbs. The combination of juicy tomatoes, fragrant basil leaves, and zest

    Introduction

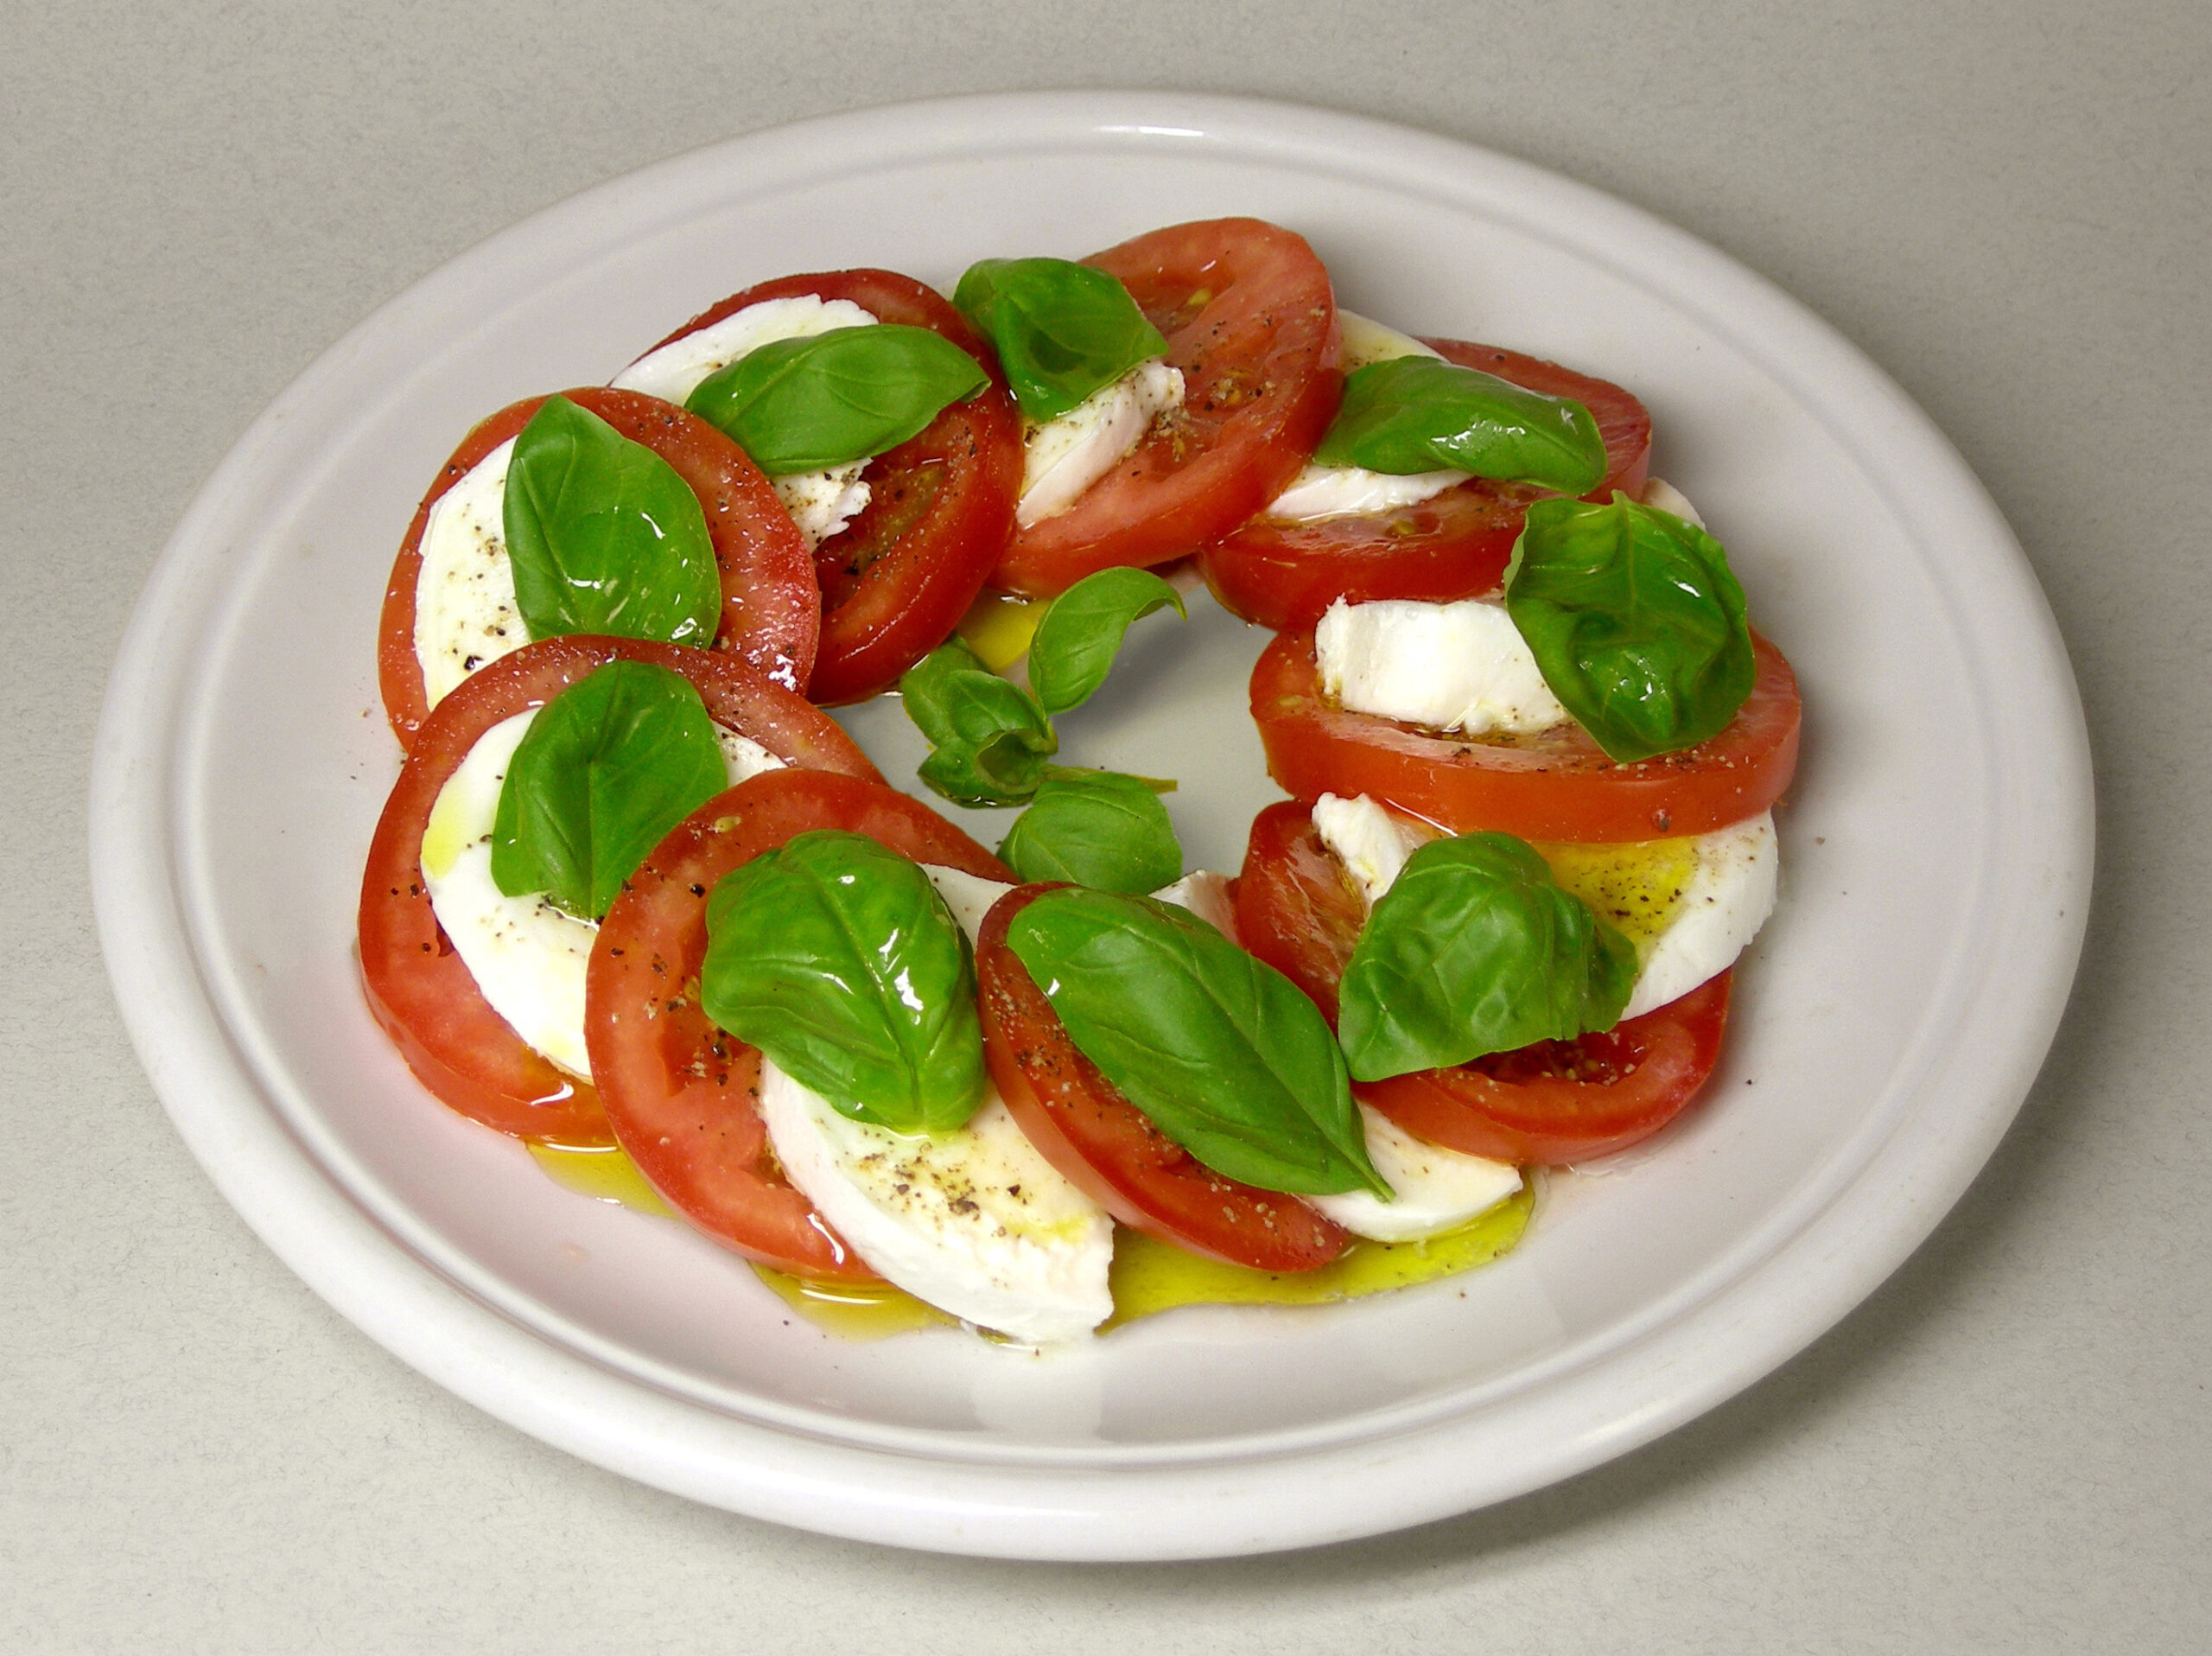
    The Tomato Basil Salad is a vibrant, refreshing dish that embodies the essence of Mediterranean cuisine. Originating from Italy and Greece, this salad celebrates the summertime abundance of ripe tomatoes and fresh herbs. The combination of juicy tomatoes, fragrant basil leaves, and zesty dressing is not only delicious but also aligns perfectly with the principles of the Mediterranean diet: emphasizing whole foods, minimal processing, and healthy fats. This dish is a testament to the simplicity yet profound flavors that define this culinary tradition.

    Health Benefits

    Tomatoes are a powerhouse of nutrients, rich in vitamin C and potassium, which support heart health by reducing blood pressure levels. They also contain lycopene, an antioxidant linked to reduced risks of certain cancers and improved skin health. Basil is not only aromatic but also beneficial for digestion; it helps soothe upset stomachs and can alleviate symptoms like bloating or indigestion thanks to its essential oils and compounds such as eugenol and limonene. Additionally, the olive oil used in this salad provides healthy monounsaturated fats, aiding in the absorption of fat-soluble vitamins A, D, E, and K.

    INGREDIENTS

  • 4 large ripe tomatoes, diced (1 lb)
  • 1/2 cup fresh basil leaves, chopped
  • 3 tablespoons high-quality extra virgin olive oil
  • Juice from half a lemon (about 3 tablespoons)
  • Salt to taste
  • Freshly ground black pepper to taste
  • Quality Notes:

  • Choose plump tomatoes with smooth skin for best flavor.
  • Opt for organic or locally sourced ingredients when possible.
  • EQUIPMENT NEEDED

  • Cutting board
  • Chef’s knife
  • Measuring spoons and cups
  • Mixing bowl
  • Tongs (for tossing salad)
  • STEP-BY-STEP INSTRUCTIONS

    1. Wash the tomatoes under cool running water, pat dry with paper towels.

    2. Dice tomatoes into bite-sized pieces; set aside in a mixing bowl.

    3. Finely chop fresh basil leaves; add to the tomato mixture.

    4. Whisk together olive oil and lemon juice in a small bowl until well combined.

    5. Drizzle dressing over salad; toss gently using tongs to evenly coat all ingredients.

    6. Season with salt and pepper according to personal preference.

    PRO TIPS & VARIATIONS (100+ words)

  • Substitutions: For variety, consider adding thinly sliced red onions or bell peppers for crunchiness and sweetness.
  • Make-Ahead Tips: Prepare dressing ahead of time and store in refrigerator until ready to use. Combine salad ingredients just before serving to maintain freshness.
  • Common Mistakes to Avoid:
  • – Over-dressing the salad can overpower its natural flavors; start with a smaller amount of dressing and add more gradually.

    NUTRITIONAL INFO

    Calories: ~120 per serving Protein: ~3g per serving Carbs: ~6g per serving Fat: ~8g per serving Fiber: ~2g per serving

    STORAGE & REHEATING (50+ words)

    This salad should be stored in an airtight container in the refrigerator for up to 1 day. It’s best enjoyed fresh and does not reheat well.

    PAIRING SUGGESTIONS

    This salad is deliberately simple so it pairs without competing:

  • Grilled branzino or whole roasted fish
  • Grilled chicken with herbs and lemon
  • Fresh mozzarella slices (a natural extension into Caprese territory)
  • Crusty sourdough or ciabatta, sliced thick
  • A chilled glass of dry rosé or crisp Pinot Grigio
  • For a more substantial meal, serve over a bed of warm white beans dressed with olive oil, or alongside a mezze spread of hummus, olives, and flatbread.

    Frequently Asked Questions

    Why does the quality of olive oil matter so much in this recipe?

    With only three to four ingredients, there is nowhere to hide. The olive oil is not a background note — it is half the flavor of the dressing. An excellent extra virgin olive oil (look for a harvest date on the bottle, not just a best-by date) has grassy, peppery, fruity characteristics that will transform this salad. A cheap refined olive oil will make it taste flat.

    Can I use dried basil instead of fresh?

    No. This is one of the few hard-and-fast rules in Mediterranean cooking. Dried basil loses almost all of its essential oils — the volatile aromatic compounds that give fresh basil its distinctive anise-pepper fragrance — during the drying process. The flavor becomes dusty and generic. Fresh basil is non-negotiable here. If you don’t have it, use fresh flat-leaf parsley or a combination of parsley and mint instead.

    What are the best tomatoes for this salad?

    In summer: any vine-ripened, locally grown tomato. Heirloom varieties in mixed colors are spectacular. Out of season: cherry tomatoes or grape tomatoes are reliably sweet year-round and hold up better than large tomatoes, which can be watery and flavorless in winter months. Never refrigerate tomatoes — cold kills their flavor and mealy texture results.

    Should I add balsamic vinegar?

    Balsamic is not traditional in a simple tomato-basil salad, but a high-quality aged balsamic (thick, syrupy, not the thin cheap kind) drizzled over the finished salad adds a beautiful sweet-tart depth. If using, reduce the lemon juice slightly. Skip cheap balsamic entirely — it adds acidity without the complexity that makes the pairing work.

    How long can the assembled salad sit before serving?

    Serve within 20–30 minutes of dressing. Tomatoes release water as they sit with salt and acid, making the dressing watery. For a party or buffet, keep components separate and dress on-site. The dressed salad left overnight becomes a soggy, faded version of itself and is not worth saving.

    Tools & pantry for this recipe

    A few things that make this easier. These are affiliate links, so we may earn a small commission at no extra cost to you; we only suggest what we’d actually use ourselves. See our editorial policy.
  • Spicy Grilled Chicken with Lemon and Garlic

    Spicy Grilled Chicken with Lemon and Garlic

    Spicy Grilled Chicken with Lemon and Garlic

    Introduction Grilled chicken marinated in lemon, garlic, and warm spices is one of the most beloved dishes across the entire Mediterranean basin — from the grilled piri piri chicken of North Africa to the Lebanese shish tawook to the simple lemon-oregano grilled chicken of Greece. This version bring

    Introduction


    Grilled chicken marinated in lemon, garlic, and warm spices is one of the most beloved dishes across the entire Mediterranean basin — from the grilled piri piri chicken of North Africa to the Lebanese shish tawook to the simple lemon-oregano grilled chicken of Greece. This version brings together the best of all of them: a bright, punchy marinade built on lemon zest, fresh garlic, extra virgin olive oil, and a careful hand with spices that delivers heat without overwhelming the dish.


    What makes this recipe distinctly Mediterranean is the marinade philosophy: acid (lemon) to tenderize, fat (olive oil) to carry flavor and prevent sticking, and aromatics (garlic, herbs, spices) to build complexity. The result is chicken that is juicy on the inside with slightly charred, deeply flavored edges on the outside — the kind of meal that tastes like it took hours to prepare but comes together in minutes once the marinating is done.


    On the Mediterranean diet, chicken is a secondary protein compared to fish, but still preferred over red meat. Eaten 2–3 times per week, it provides lean protein without the saturated fat load of beef or pork. This preparation maximizes flavor while keeping the dish clean and aligned with the diet’s core principles.


    Why This Fits the Mediterranean Diet


    This dish exemplifies Mediterranean cooking values: real ingredients, simple technique, bold flavor without processed sauces. The marinade uses olive oil as the fat base (not butter or vegetable oil), fresh lemon (not bottled juice), and real garlic (not powder). The heat comes from Aleppo pepper and cayenne — both used throughout the Mediterranean and Middle East — rather than sugary hot sauces.


    Health Benefits


    Lean protein: Skinless chicken breast provides approximately 31g of protein per 4oz serving with only 4g of fat. Adequate protein intake supports muscle maintenance, immune function, and satiety.


    Garlic’s cardiovascular benefits: Multiple studies show that allicin in fresh garlic reduces blood pressure, lowers LDL cholesterol, and has antibacterial properties. Using 6+ cloves per batch provides a meaningful dose.


    Lemon’s vitamin C and flavor efficiency: Fresh lemon juice and zest provide vitamin C and flavonoids that act as antioxidants. Marinating in acid also reduces the formation of heterocyclic amines (HCAs) during grilling — carcinogenic compounds that form when protein is charred.


    Olive oil’s monounsaturated fats: The base fat in the marinade coats the meat and carries fat-soluble flavors and spices into the flesh, while providing the Mediterranean diet’s hallmark heart-healthy fat profile.


    Ingredients (Serves 4)


  • 4 boneless, skinless chicken breasts (or 8 bone-in thighs for more flavor)
  • 6 cloves garlic, minced or grated on a microplane
  • Zest and juice of 2 lemons (about ¼ cup juice)
  • 3 tablespoons extra virgin olive oil
  • 1 teaspoon Aleppo pepper (or ½ tsp crushed red pepper)
  • ¼ teaspoon cayenne pepper
  • 1 teaspoon ground cumin
  • 1 teaspoon smoked paprika
  • 1 teaspoon dried oregano
  • 1 teaspoon kosher salt
  • ½ teaspoon freshly ground black pepper
  • 2 tablespoons fresh flat-leaf parsley, chopped, for serving
  • Lemon wedges for serving

  • Equipment Needed


  • Gas or charcoal grill, or ridged cast iron grill pan
  • Zip-lock bag or shallow glass baking dish for marinating
  • Instant-read thermometer (essential for chicken doneness)
  • Tongs

  • Step-by-Step Instructions


    1. Prepare the marinade. In a small bowl, combine garlic, lemon zest, lemon juice, olive oil, Aleppo pepper, cayenne, cumin, smoked paprika, oregano, salt, and black pepper. Whisk until fully combined.


    2. Pound the chicken to even thickness. Place each breast between two sheets of plastic wrap. Using a meat mallet or heavy skillet, pound to an even 3/4-inch thickness. This ensures even cooking and prevents dry edges while the thick center finishes.


    3. Marinate. Place chicken in a zip-lock bag or shallow dish. Pour marinade over and turn to coat thoroughly. Seal or cover. Marinate in the refrigerator for at least 2 hours, ideally 6–8 hours. Do not marinate longer than 24 hours — the acid will begin to break down the proteins and make the texture mushy.


    4. Bring to room temperature. Remove the chicken from the refrigerator 20–30 minutes before grilling. Cold chicken on a hot grill cooks unevenly — charred outside, raw inside.


    5. Heat the grill. Heat gas grill to medium-high (400–450°F) or prepare a two-zone charcoal fire. If using a cast iron grill pan, heat over high heat for 3–4 minutes until very hot. Brush grates or pan with a folded paper towel dipped in oil.


    6. Grill the chicken. Remove chicken from marinade, letting excess drip off. Place on the hot grill. Cook without moving for 5–6 minutes until distinct grill marks form and the chicken releases easily from the grates. Flip and cook 4–5 minutes more.


    7. Check doneness. Insert an instant-read thermometer into the thickest part. Pull at 160°F — carryover heat will bring it to the safe 165°F during resting. Do not overcook to 165°F on the grill or the breast will be dry.


    8. Rest before serving. Transfer to a cutting board and tent loosely with foil. Rest 5 minutes — this allows the juices to redistribute throughout the meat.


    9. Slice and serve. Slice against the grain into strips or serve whole. Scatter fresh parsley over the top. Serve with lemon wedges, roasted vegetables, and a simple salad.


    Pro Tips & Variations


    Bone-in thighs are more forgiving. If you tend to overcook chicken breasts, use bone-in skin-on thighs instead — they have more fat and tolerate higher temperatures without drying out. Cook to 175–180°F for best texture.


    Aleppo pepper is worth finding. This Syrian dried pepper is less hot than cayenne but has a fruity, slightly smoky depth that plain red pepper flakes don’t replicate. Find it at Middle Eastern grocery stores or online. It’s worth having in the pantry for Mediterranean cooking.


    Overnight marinade = maximum flavor. The longer the chicken sits in the lemon-garlic marinade (up to 24 hours), the more deeply flavored it becomes. Make it the night before for a weeknight dinner.


    Make extra for meal prep. This chicken reheats well and works beautifully cold in salads, wraps, and grain bowls throughout the week.


    Yogurt variation: Add ¼ cup full-fat Greek yogurt to the marinade for an even more tender result and a slight tang that complements the spices.


    Nutritional Information (Per Serving, 1 breast)


  • Calories: ~285 kcal
  • Protein: 38g
  • Carbohydrates: 4g
  • Fat: 12g (mostly monounsaturated)
  • Fiber: 0.5g
  • Sodium: ~520mg

  • Storage & Reheating


    Refrigerator: Cooked chicken keeps well for 3–4 days in an airtight container.


    Reheating: Reheat in a covered skillet over medium-low heat with a splash of water or broth to prevent drying out. Alternatively, slice cold and serve at room temperature over a salad — often better than reheated.


    Freezer: Freeze cooked chicken for up to 3 months. Thaw overnight in the refrigerator. Best sliced thin before freezing for faster thawing.


    Pairing Suggestions


  • Creamy tzatziki and warm pita bread
  • Simple Greek salad (tomatoes, cucumber, olives, feta)
  • Roasted lemon potatoes with oregano
  • Tabbouleh or couscous with herbs
  • Roasted or grilled zucchini and bell peppers

  • Frequently Asked Questions


    How spicy is this dish?

    With 1 tsp Aleppo pepper and ¼ tsp cayenne, it has a mild to moderate warmth — noticeable but not overpowering. Reduce or eliminate the cayenne for a milder version; double it if you like real heat.


    Can I bake this instead of grilling?

    Yes. Bake at 425°F on a rimmed sheet pan for 18–22 minutes, then broil 2–3 minutes for color. The texture differs slightly but the flavor is nearly as good.


    What if I don’t have Aleppo pepper?

    Substitute ½ teaspoon regular crushed red pepper flakes plus ¼ teaspoon sweet paprika. It’s not identical but close enough.


    Can this be made ahead for a party?

    Absolutely. Marinate the day before, grill up to 2 hours ahead, rest, slice, and serve at room temperature. It’s excellent party food.


    Why is my grilled chicken always dry?

    Three most common reasons: didn’t pound to even thickness, cooked to 165°F on the grill (overcooked — pull at 160°F), or didn’t rest before cutting.


    Tools & pantry for this recipe

    A few things that make this easier. These are affiliate links, so we may earn a small commission at no extra cost to you; we only suggest what we’d actually use ourselves. See our editorial policy.
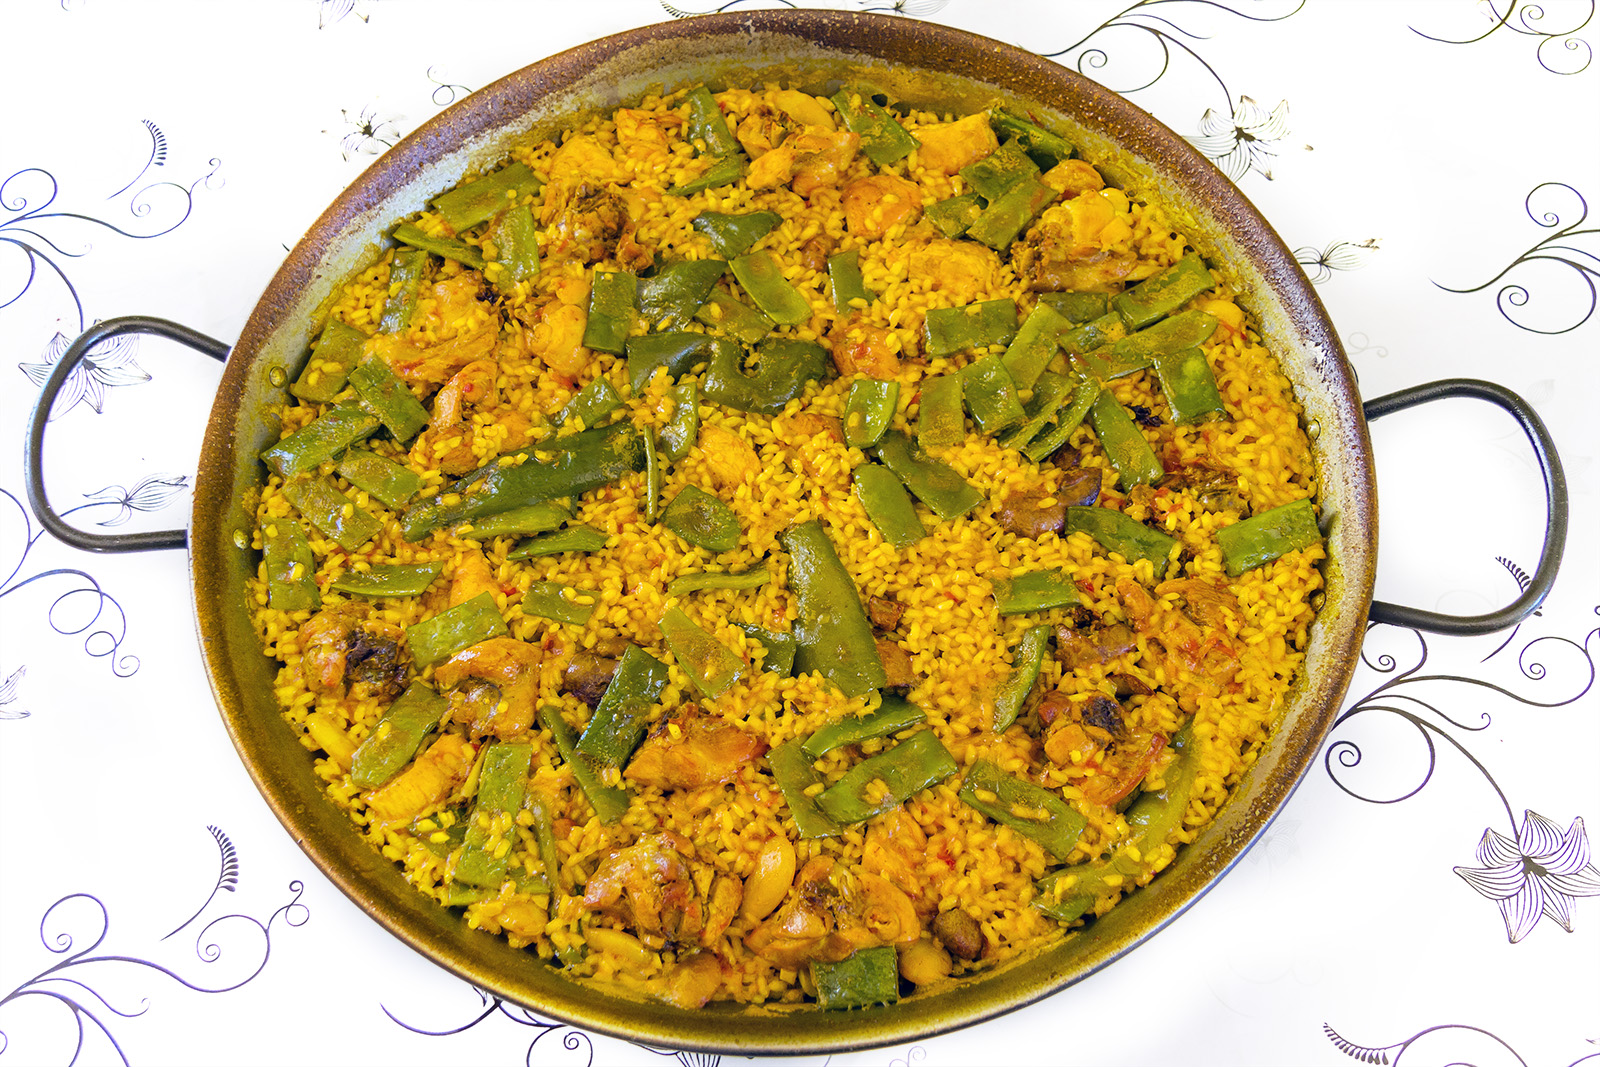
  • Seafood Paella (Authentic Mediterranean Style)

    Seafood Paella (Authentic Mediterranean Style)

    Seafood Paella (Authentic Mediterranean Style)

    Authentic Mediterranean seafood paella.

    Introduction


    Seafood paella is one of the most iconic dishes to emerge from the Mediterranean coast — a vibrant, saffron-gold rice dish that originated in Valencia, Spain, and has been celebrated across the Mediterranean world for centuries. The word “paella” actually refers to the wide, shallow pan in which it is cooked, and the dish itself is a testament to the Mediterranean philosophy of cooking: use what the sea and land provide, cook it simply, and share it generously.


    Traditional seafood paella brings together the ocean’s bounty — shrimp, mussels, clams, and squid — with short-grain rice that absorbs a rich, saffron-scented broth until every grain is infused with flavor. What makes this dish distinctly Mediterranean is the generous use of olive oil, garlic, tomatoes, and saffron — ingredients that appear across the cooking traditions of Spain, Italy, Greece, and North Africa.


    On the Mediterranean diet, paella is a near-perfect meal. It is built around seafood (the diet’s preferred protein), olive oil (the primary fat), vegetables, and minimally processed rice. There is no butter, no heavy cream, no processed ingredients — just real food cooked with intention. It’s also a meal that naturally brings people together, which is central to the Mediterranean way of life.


    Why This Fits the Mediterranean Diet


    Seafood paella checks nearly every box of the Mediterranean diet pyramid. Shellfish and fish provide lean protein rich in omega-3 fatty acids, iodine, and zinc. The short-grain rice delivers complex carbohydrates and energy. The tomatoes, peppers, and onions contribute antioxidants including vitamin C and lycopene. Saffron — the world’s most prized spice — has been shown in research to have anti-inflammatory and antidepressant properties. And olive oil ties it all together with heart-healthy monounsaturated fats.


    Health Benefits


    Omega-3 fatty acids: Shrimp, mussels, and squid are all excellent sources of omega-3s, which reduce inflammation, lower triglycerides, and support brain health. Regular consumption of shellfish is associated with reduced cardiovascular risk.


    Lycopene from tomatoes: Cooking tomatoes in olive oil dramatically increases the bioavailability of lycopene, a powerful antioxidant linked to lower rates of prostate cancer and heart disease.


    Saffron’s mood benefits: A 2015 meta-analysis found saffron supplementation significantly reduced symptoms of depression. Even the small amount used in cooking delivers bioactive compounds including crocin and safranal.


    Anti-inflammatory base: The combination of olive oil, garlic, and shellfish creates a naturally anti-inflammatory meal that aligns with the diet’s core therapeutic mechanism.


    Ingredients (Serves 4–6)


  • 2 cups Bomba or Arborio rice
  • 1 lb large shrimp, peeled and deveined
  • 1 lb mussels, scrubbed and debearded
  • ½ lb clams, scrubbed
  • ½ lb squid rings (optional)
  • 4 cups warm seafood or chicken broth
  • ½ cup dry white wine
  • 1 large can (14 oz) whole peeled tomatoes, crushed by hand
  • 1 large yellow onion, finely diced
  • 1 red bell pepper, diced
  • 6 cloves garlic, minced
  • ¼ teaspoon saffron threads
  • 1 teaspoon smoked paprika
  • ½ teaspoon sweet paprika
  • 3 tablespoons extra virgin olive oil
  • Salt and freshly ground black pepper to taste
  • Fresh flat-leaf parsley, chopped, for garnish
  • 2 lemons, cut into wedges

  • Equipment Needed


  • 15–18 inch paella pan (or the widest, shallowest skillet you own)
  • Large ladle
  • Wooden spoon or silicone spatula
  • Small bowl for blooming saffron

  • Step-by-Step Instructions


    1. Bloom the saffron. Place saffron threads in a small bowl with 2 tablespoons of warm (not boiling) water. Let steep for at least 10 minutes. The water will turn deep orange — this is your flavor bomb.


    2. Heat the pan. Place your paella pan over medium-high heat. When the pan is hot, add the olive oil and swirl to coat the bottom evenly.


    3. Sear the seafood lightly. Season shrimp with salt and pepper. Sear in a single layer for 60–90 seconds per side — just until pink. Remove and set aside. They will finish cooking in the rice. Do the same with squid rings if using (30 seconds per side). Reserve.


    4. Build the sofrito. In the same pan, add onion and red pepper. Cook over medium heat, stirring occasionally, for 8–10 minutes until softened and beginning to caramelize. Add garlic and cook 1 minute more until fragrant.


    5. Add the tomatoes. Add the crushed tomatoes along with smoked paprika and sweet paprika. Stir well and cook 4–5 minutes, stirring occasionally, until the tomato mixture has thickened and darkened slightly. This concentrated base — the sofrito — is the flavor foundation of the entire dish.


    6. Toast the rice. Add the rice directly to the sofrito. Stir to coat every grain with the tomato mixture. Toast for 2 minutes, stirring constantly.


    7. Deglaze and add broth. Add the white wine, stir vigorously to scrape up any browned bits. Let it reduce by half, about 1 minute. Pour in the warm broth and the bloomed saffron water (threads and all). Stir once to distribute everything evenly. From this point, do not stir the rice again.


    8. Cook the rice. Bring to a vigorous boil, then reduce heat to medium-low. Cook uncovered for 15–18 minutes, rotating the pan occasionally if using a gas burner, until most of the liquid has been absorbed and the rice is almost (but not fully) cooked.


    9. Add the shellfish. Press the mussels and clams hinge-side down into the rice. Return the seared shrimp and squid to the pan, nestling them in. Cover loosely with foil and cook 5–7 minutes more until mussels and clams have opened and the shrimp are fully cooked.


    10. Develop the socarrat. In the last 2 minutes, remove the foil and increase heat to medium-high. Listen for a gentle crackling sound — this is the socarrat forming, the prized caramelized crust on the bottom of the pan. It should smell nutty, not burnt. Remove from heat immediately.


    11. Rest and serve. Let the paella rest off heat for 5 minutes. Discard any unopened mussels or clams. Garnish generously with chopped parsley and lemon wedges. Serve directly from the pan at the table.


    Pro Tips & Variations


    The socarrat is non-negotiable. The crispy rice crust at the bottom is the most coveted part of authentic paella. Don’t rush to the table — wait for it.


    Never stir after adding the broth. Unlike risotto, paella rice should never be stirred once the broth is in. Stirring releases starch and makes the rice gummy instead of distinct and separate.


    Use the right rice. Bomba rice (Spanish short-grain) is ideal because it absorbs liquid without getting mushy. Arborio (risotto rice) is a good substitute. Do not use long-grain rice — it won’t absorb the broth properly.


    Seafood substitutions: Use whatever is freshest. Crab legs, scallops, langoustines, or chunks of firm white fish (monkfish, cod) all work beautifully.


    Make it vegetarian: Skip the seafood, double the vegetables (artichoke hearts, green beans, zucchini), and use vegetable broth. The sofrito and saffron carry the dish.


    Saffron substitution: If saffron is unavailable, turmeric adds color but not the same flavor. A pinch goes a long way.


    Nutritional Information (Per Serving, Serves 6)


  • Calories: ~420 kcal
  • Protein: 32g
  • Carbohydrates: 48g
  • Fat: 9g (primarily monounsaturated from olive oil)
  • Fiber: 3g
  • Sodium: ~580mg
  • Omega-3 fatty acids: ~800mg

  • Storage & Reheating


    Paella is best eaten fresh, the day it is made. The socarrat softens overnight and cannot be recaptured.


    Refrigerator: Store leftovers in an airtight container for up to 2 days.


    Reheating: Add 2–3 tablespoons of water or broth per cup of leftover rice. Reheat covered in a skillet over medium-low heat, stirring gently once or twice, until heated through. Microwave on 60% power in 90-second intervals.


    Freezing: Not recommended — seafood becomes rubbery and rice texture degrades significantly.


    Pairing Suggestions


    Seafood paella is a complete meal, but it pairs beautifully with:

  • A crisp Spanish white wine: Albariño, Verdejo, or dry Rosé
  • Simple green salad with sherry vinegar dressing
  • Crusty sourdough bread to soak up any remaining sofrito
  • A glass of cold sparkling water with lemon

  • Frequently Asked Questions


    Can I make paella without a paella pan?

    Yes. The widest, shallowest skillet you own works fine. A 12-inch cast iron or stainless steel skillet will do. The goal is maximum surface area for even cooking and socarrat development.


    Why won’t my rice cook evenly?

    Uneven heat distribution is the most common issue. Rotate the pan every few minutes if using gas. On electric or induction, use a heat diffuser or cook at a steady medium-low.


    My mussels didn’t open — are they safe to eat?

    No. Discard any mussels or clams that didn’t open after cooking — they were dead before cooking and are not safe to eat.


    Can I prep the sofrito in advance?

    Yes. The sofrito (steps 2–5) can be made up to 2 days ahead and refrigerated. Reheat before adding the rice and broth.


    Is frozen seafood okay?

    Absolutely — most “fresh” seafood at the supermarket was previously frozen anyway. Thaw completely, pat dry before using to avoid excess water in the pan.


    Tools & pantry for this recipe

    A few things that make this easier. These are affiliate links, so we may earn a small commission at no extra cost to you; we only suggest what we’d actually use ourselves. See our editorial policy.
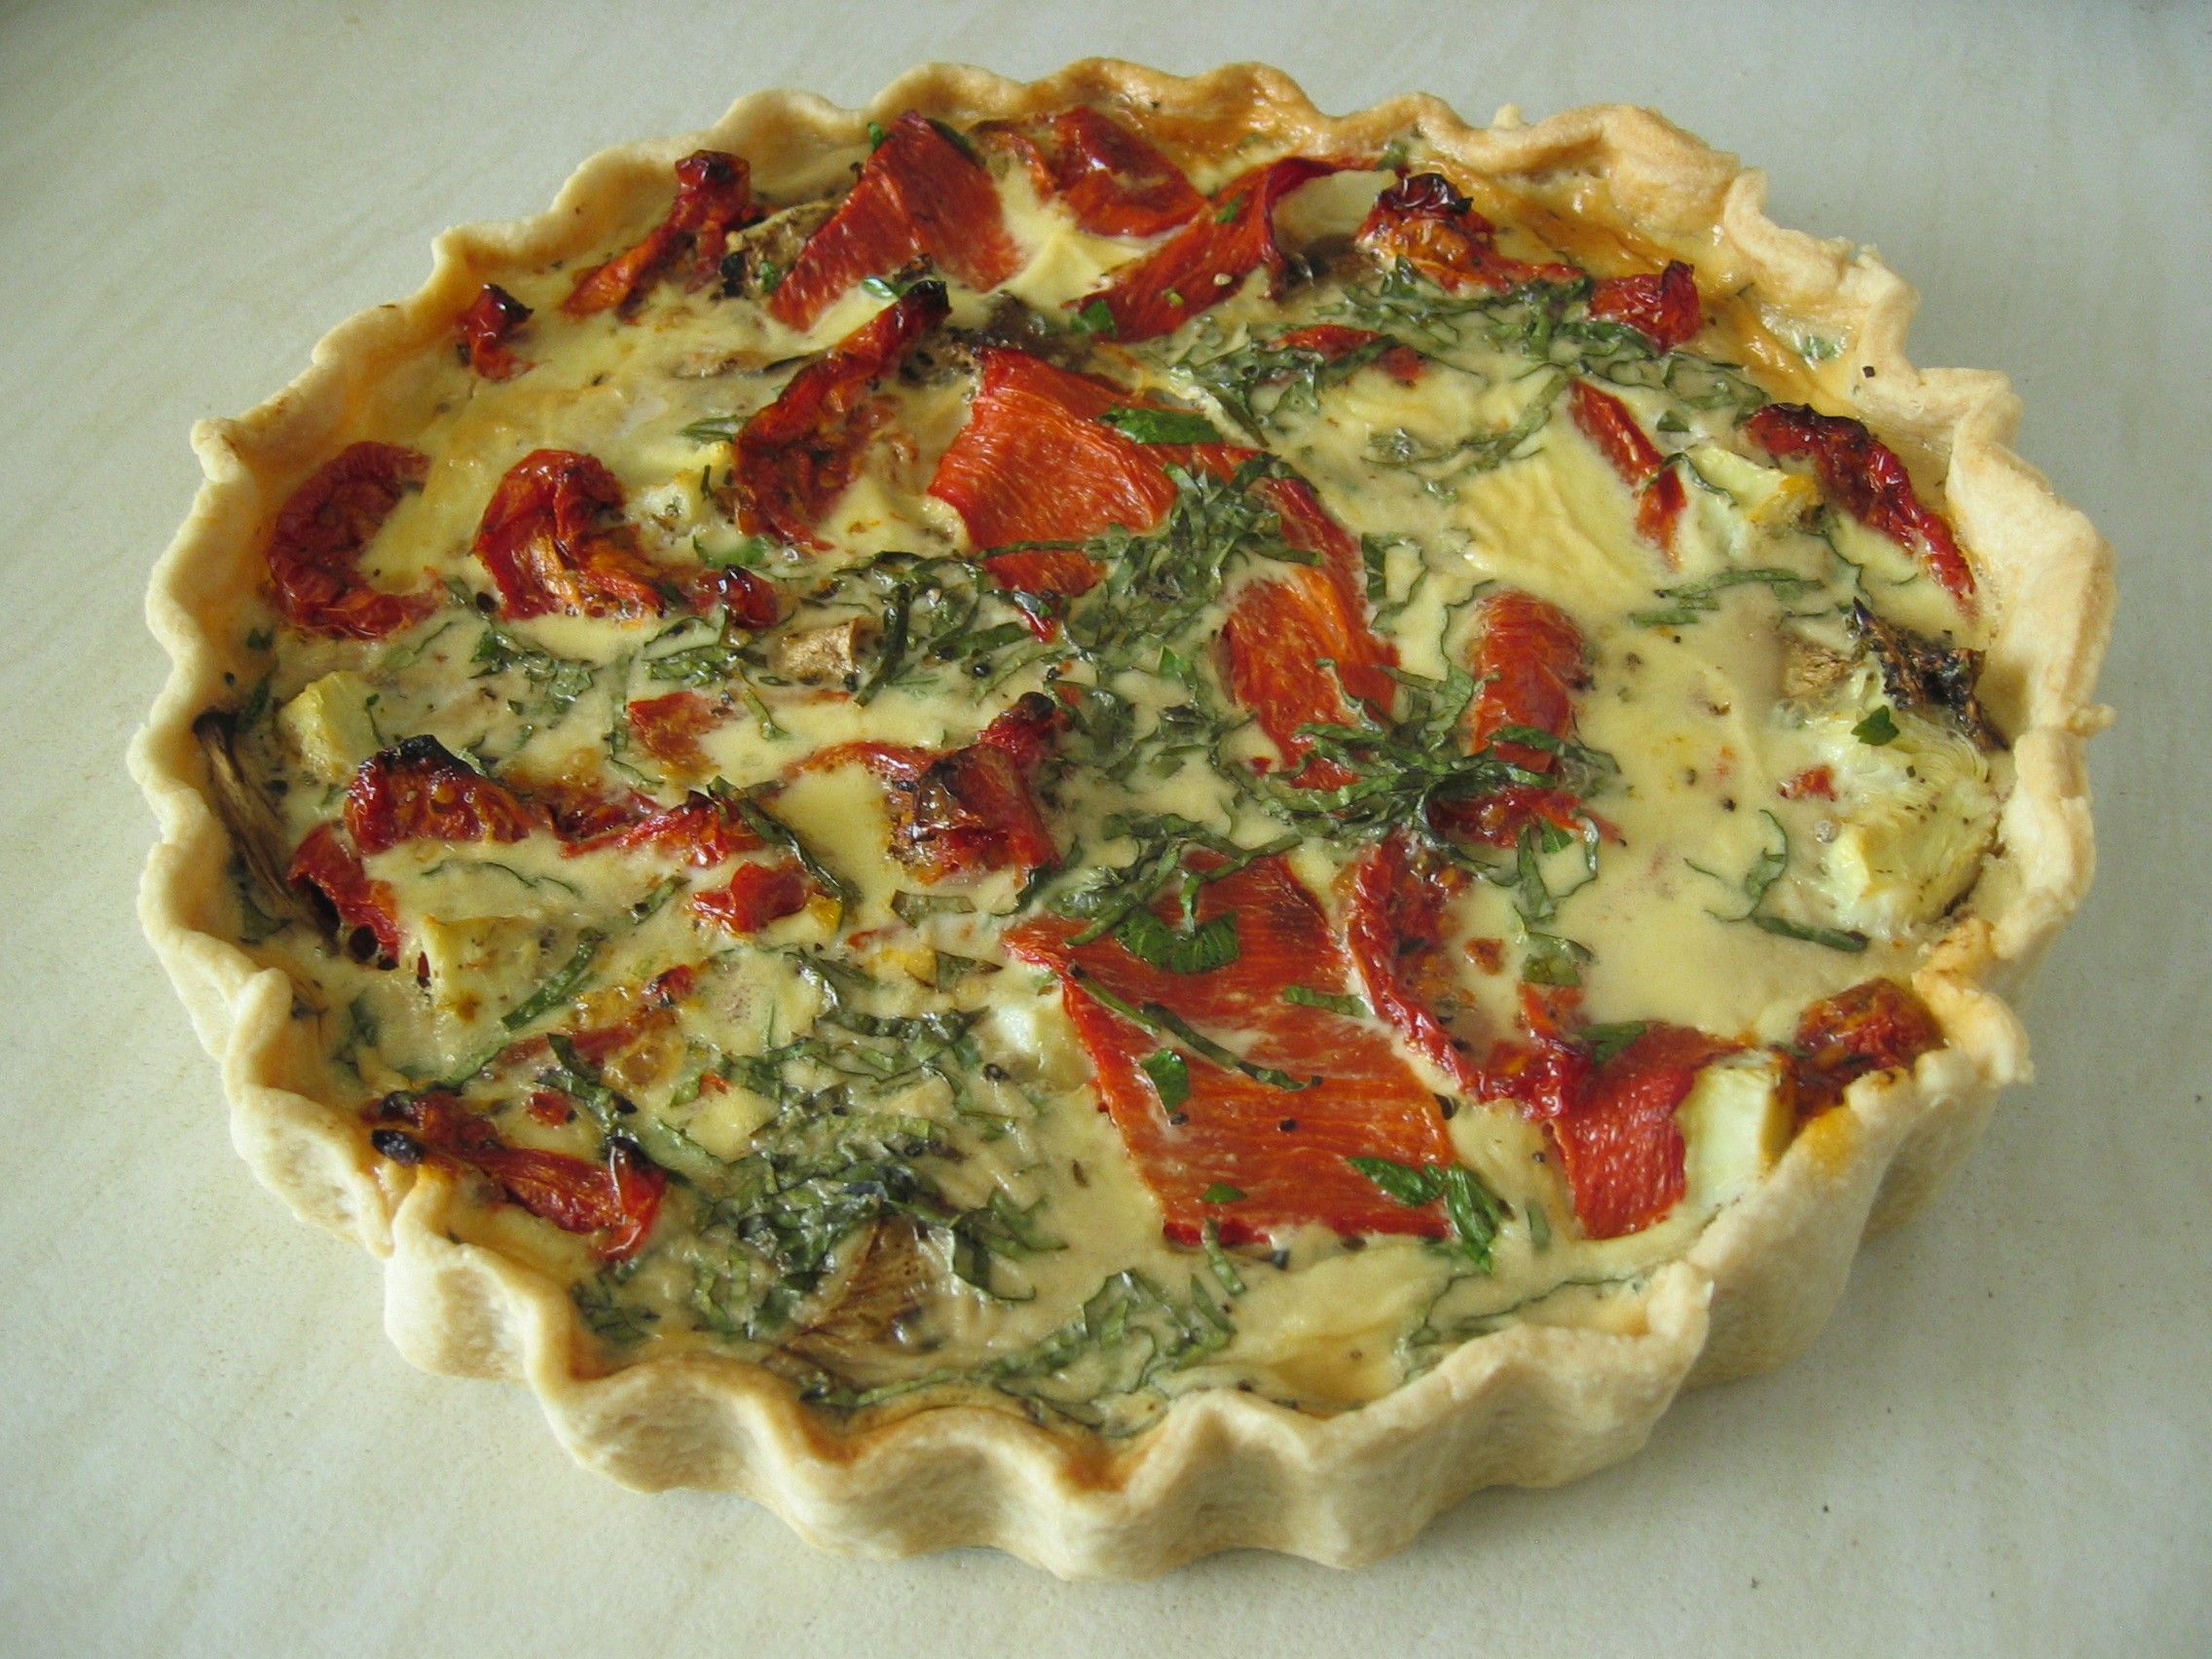
  • Mediterranean Roasted Vegetable Quiche

    Mediterranean Roasted Vegetable Quiche

    Mediterranean Roasted Vegetable Quiche

    Introduction Quiche has French roots, but this version is unmistakably Mediterranean — filled with roasted zucchini, bell peppers, sun-dried tomatoes, Kalamata olives, and crumbled feta cheese, then bound in a silky egg and cream custard that sets beautifully in the oven. It’s the kind of dish

    Introduction


    Quiche has French roots, but this version is unmistakably Mediterranean — filled with roasted zucchini, bell peppers, sun-dried tomatoes, Kalamata olives, and crumbled feta cheese, then bound in a silky egg and cream custard that sets beautifully in the oven. It’s the kind of dish that bridges the gap between the egg-centric eating of the eastern Mediterranean and the custard-pastry traditions of southern France and northern Italy.


    What makes a quiche Mediterranean rather than French is less about technique and more about what goes inside: roasted vegetables instead of bacon, feta instead of Gruyère, olive oil in the pastry instead of butter, and herbs like oregano and fresh dill that speak the language of Greece and the Levant. The result is brighter, lighter, and more vegetable-forward than a classic quiche Lorraine, while retaining all of the silky, satisfying richness that makes quiche so universally loved.


    This dish works as a weekend brunch centerpiece, a light weekday dinner with a green salad, or an elegant component of a larger Mediterranean spread. It slices cleanly, keeps well in the refrigerator, and is served beautifully at room temperature — making it ideal for entertaining.


    Why This Fits the Mediterranean Diet


    The Mediterranean diet places eggs as a regular, moderate protein source — approximately 4–7 eggs per week in the traditional pattern. This quiche makes that easy: one slice provides the nourishment of 1–2 eggs along with two or three servings of roasted vegetables. The pastry is made with olive oil rather than butter (a simple, lower-saturated-fat swap), and the filling emphasizes vegetables, herbs, and cheese over meat.


    Health Benefits


    Eggs — complete protein and choline: Eggs are one of nature’s most complete proteins, containing all essential amino acids. They’re also the richest dietary source of choline, essential for liver function, brain development, and metabolism. The yolk contains fat-soluble vitamins A, D, E, and K2.


    Roasted vegetables — concentrated nutrition: Roasting vegetables at high heat caramelizes their natural sugars and concentrates their nutrients, making them more flavorful and arguably more satisfying than raw. Zucchini provides vitamin C; bell peppers are extraordinarily rich in vitamin C (a red bell pepper has 3× the vitamin C of an orange); tomatoes provide lycopene.


    Feta’s calcium and probiotics: Traditional feta, made from sheep’s and goat’s milk, provides calcium and may contain beneficial bacteria from its brine-aging process. It’s naturally lower in calories than many hard cheeses.


    Olive oil pastry: Using extra virgin olive oil in place of butter in the crust reduces saturated fat significantly while adding Mediterranean monounsaturated fats and polyphenols.


    Ingredients (Serves 6–8)


    For the olive oil crust:

  • 1½ cups all-purpose flour
  • ½ teaspoon kosher salt
  • ⅓ cup extra virgin olive oil
  • 3–4 tablespoons ice water

  • For the roasted vegetable filling:

  • 1 medium zucchini, diced into ½-inch pieces
  • 1 red bell pepper, diced
  • 1 yellow bell pepper, diced
  • ½ red onion, thinly sliced
  • 4 sun-dried tomatoes in oil, roughly chopped
  • ¼ cup Kalamata olives, pitted and halved
  • 2 tablespoons extra virgin olive oil
  • ½ teaspoon dried oregano
  • Salt and black pepper

  • For the custard:

  • 4 large eggs
  • 1 cup heavy cream (or half heavy cream, half whole milk for lighter)
  • ½ teaspoon salt
  • ¼ teaspoon black pepper
  • Pinch of nutmeg

  • Finishing:

  • 100g (3.5 oz) feta cheese, crumbled
  • 2 tablespoons fresh dill, chopped
  • 2 tablespoons fresh flat-leaf parsley, chopped

  • Equipment Needed


  • 9-inch tart pan with removable bottom (preferred) or 9-inch pie plate
  • Rimmed baking sheet
  • Mixing bowls
  • Whisk
  • Parchment paper and pie weights or dried beans

  • Step-by-Step Instructions


    1. Roast the vegetables. Preheat oven to 425°F (220°C). Toss zucchini, bell peppers, and red onion with olive oil, oregano, salt, and pepper on a rimmed baking sheet. Spread in a single layer — don’t crowd them or they’ll steam. Roast 20–25 minutes until tender and caramelized at the edges. Remove and let cool. Reduce oven to 375°F (190°C).


    2. Make the olive oil crust. In a bowl, whisk flour and salt. Drizzle in the olive oil and stir with a fork until the mixture looks like coarse crumbs — it will be a bit crumbly, unlike butter pastry. Add ice water 1 tablespoon at a time, stirring, until the dough just comes together into a ball. Press into a flat disk, wrap in plastic, and rest 10–15 minutes.


    3. Press the crust into the pan. Roll or simply press the dough into your tart pan with your fingers — this olive oil crust is very forgiving and press-in works perfectly. Press evenly up the sides. Prick the bottom all over with a fork.


    4. Blind bake the crust. Line the crust with parchment and fill with pie weights or dried beans. Bake at 375°F for 15 minutes. Remove weights and parchment, bake 5 more minutes until the base is lightly golden and no longer raw-looking. Remove from oven.


    5. Make the custard. Whisk eggs, cream, salt, pepper, and nutmeg together in a bowl until completely smooth and uniform in color.


    6. Assemble the quiche. Scatter the roasted vegetables over the blind-baked crust. Add the sun-dried tomatoes and olives. Crumble the feta evenly over the top. Scatter fresh dill and parsley. Pour the custard slowly and evenly over everything — it will settle between the vegetables.


    7. Bake. Bake at 375°F for 30–35 minutes until the custard is set at the edges but has a very slight wobble in the center, like just-set Jell-O. The center will firm up as it cools. Do not overbake — a dry quiche is a sad quiche.


    8. Cool before slicing. Rest at room temperature for at least 15 minutes before cutting. This allows the custard to fully set and makes clean slices possible.


    Pro Tips & Variations


    The center should wobble. Pull the quiche from the oven when it has a quarter-sized wobble in the very center. It will set completely as it rests. Overbaking until it’s fully firm in the oven guarantees a rubbery, weeping texture.


    Roast vegetables the day before. The roasted vegetables can be made ahead, refrigerated, and used directly from the fridge. This makes assembly very fast.


    Gruyère variation: Replace feta with shredded Gruyère for a more classic, French-style quiche. Use thyme instead of dill.


    Add spinach: Sauté a handful of baby spinach until just wilted, squeeze out excess water, and add to the filling for more greens and iron.


    Crustless option: Skip the pastry entirely. Grease the pan, add filling, pour custard over, and bake. It becomes a frittata-style baked egg dish — lower carb, equally delicious.


    Nutritional Information (Per Serving, based on 8 slices)


  • Calories: ~320 kcal
  • Protein: 10g
  • Carbohydrates: 18g
  • Fat: 23g
  • Saturated Fat: 9g
  • Fiber: 2g
  • Sodium: ~480mg

  • Storage & Reheating


    Quiche is one of the best meal-prep items in the Mediterranean repertoire — it keeps and reheats beautifully.


    Refrigerator: Wrapped well, quiche keeps for 4–5 days. Flavors often improve by day 2.


    Reheating: Place slices on a baking sheet and reheat at 325°F for 12–15 minutes until warmed through. Microwave works in a pinch (60–70% power, 90 seconds) but the crust softens.


    Serving temperature: Excellent at room temperature, which makes it perfect for picnics, packed lunches, and buffet-style entertaining.


    Freezer: Freeze individual slices wrapped tightly in plastic then foil for up to 2 months. Thaw overnight in the refrigerator, then reheat in the oven.


    Pairing Suggestions


  • Simple green salad with lemon vinaigrette
  • A bowl of olives and sliced cucumbers
  • Chilled dry rosé or a crisp Sauvignon Blanc
  • Warm pita bread and tzatziki
  • Tomato and feta bruschetta as a starter

  • Frequently Asked Questions


    Can I use store-bought pie crust?

    Yes, absolutely. A pre-made refrigerated crust saves time and the quiche will still be excellent. Just blind bake before filling.


    My quiche is watery after baking — what happened?

    Watery quiche is almost always caused by vegetables that weren’t properly roasted (releasing water into the custard) or by adding raw vegetables without cooking them first. Always roast or sauté vegetables to remove excess moisture before they go into the quiche.


    Can I make this dairy-free?

    The custard can be made with full-fat coconut cream, though the flavor changes. Replace feta with dairy-free cheese. The texture will be slightly less silky but still good.


    What is blind baking and why is it necessary?

    Blind baking pre-cooks the pastry before adding the wet filling. Without it, the bottom crust is usually underdone and soggy. It takes 20 extra minutes but guarantees a properly cooked crust.


    Can this be made in advance for a dinner party?

    Quiche is an ideal dinner party dish because it must be made in advance. Bake the day before, refrigerate, and bring to room temperature an hour before serving. It slices more cleanly when cooled and re-sliced than when piping hot from the oven.


    Tools & pantry for this recipe

    A few things that make this easier. These are affiliate links, so we may earn a small commission at no extra cost to you; we only suggest what we’d actually use ourselves. See our editorial policy.
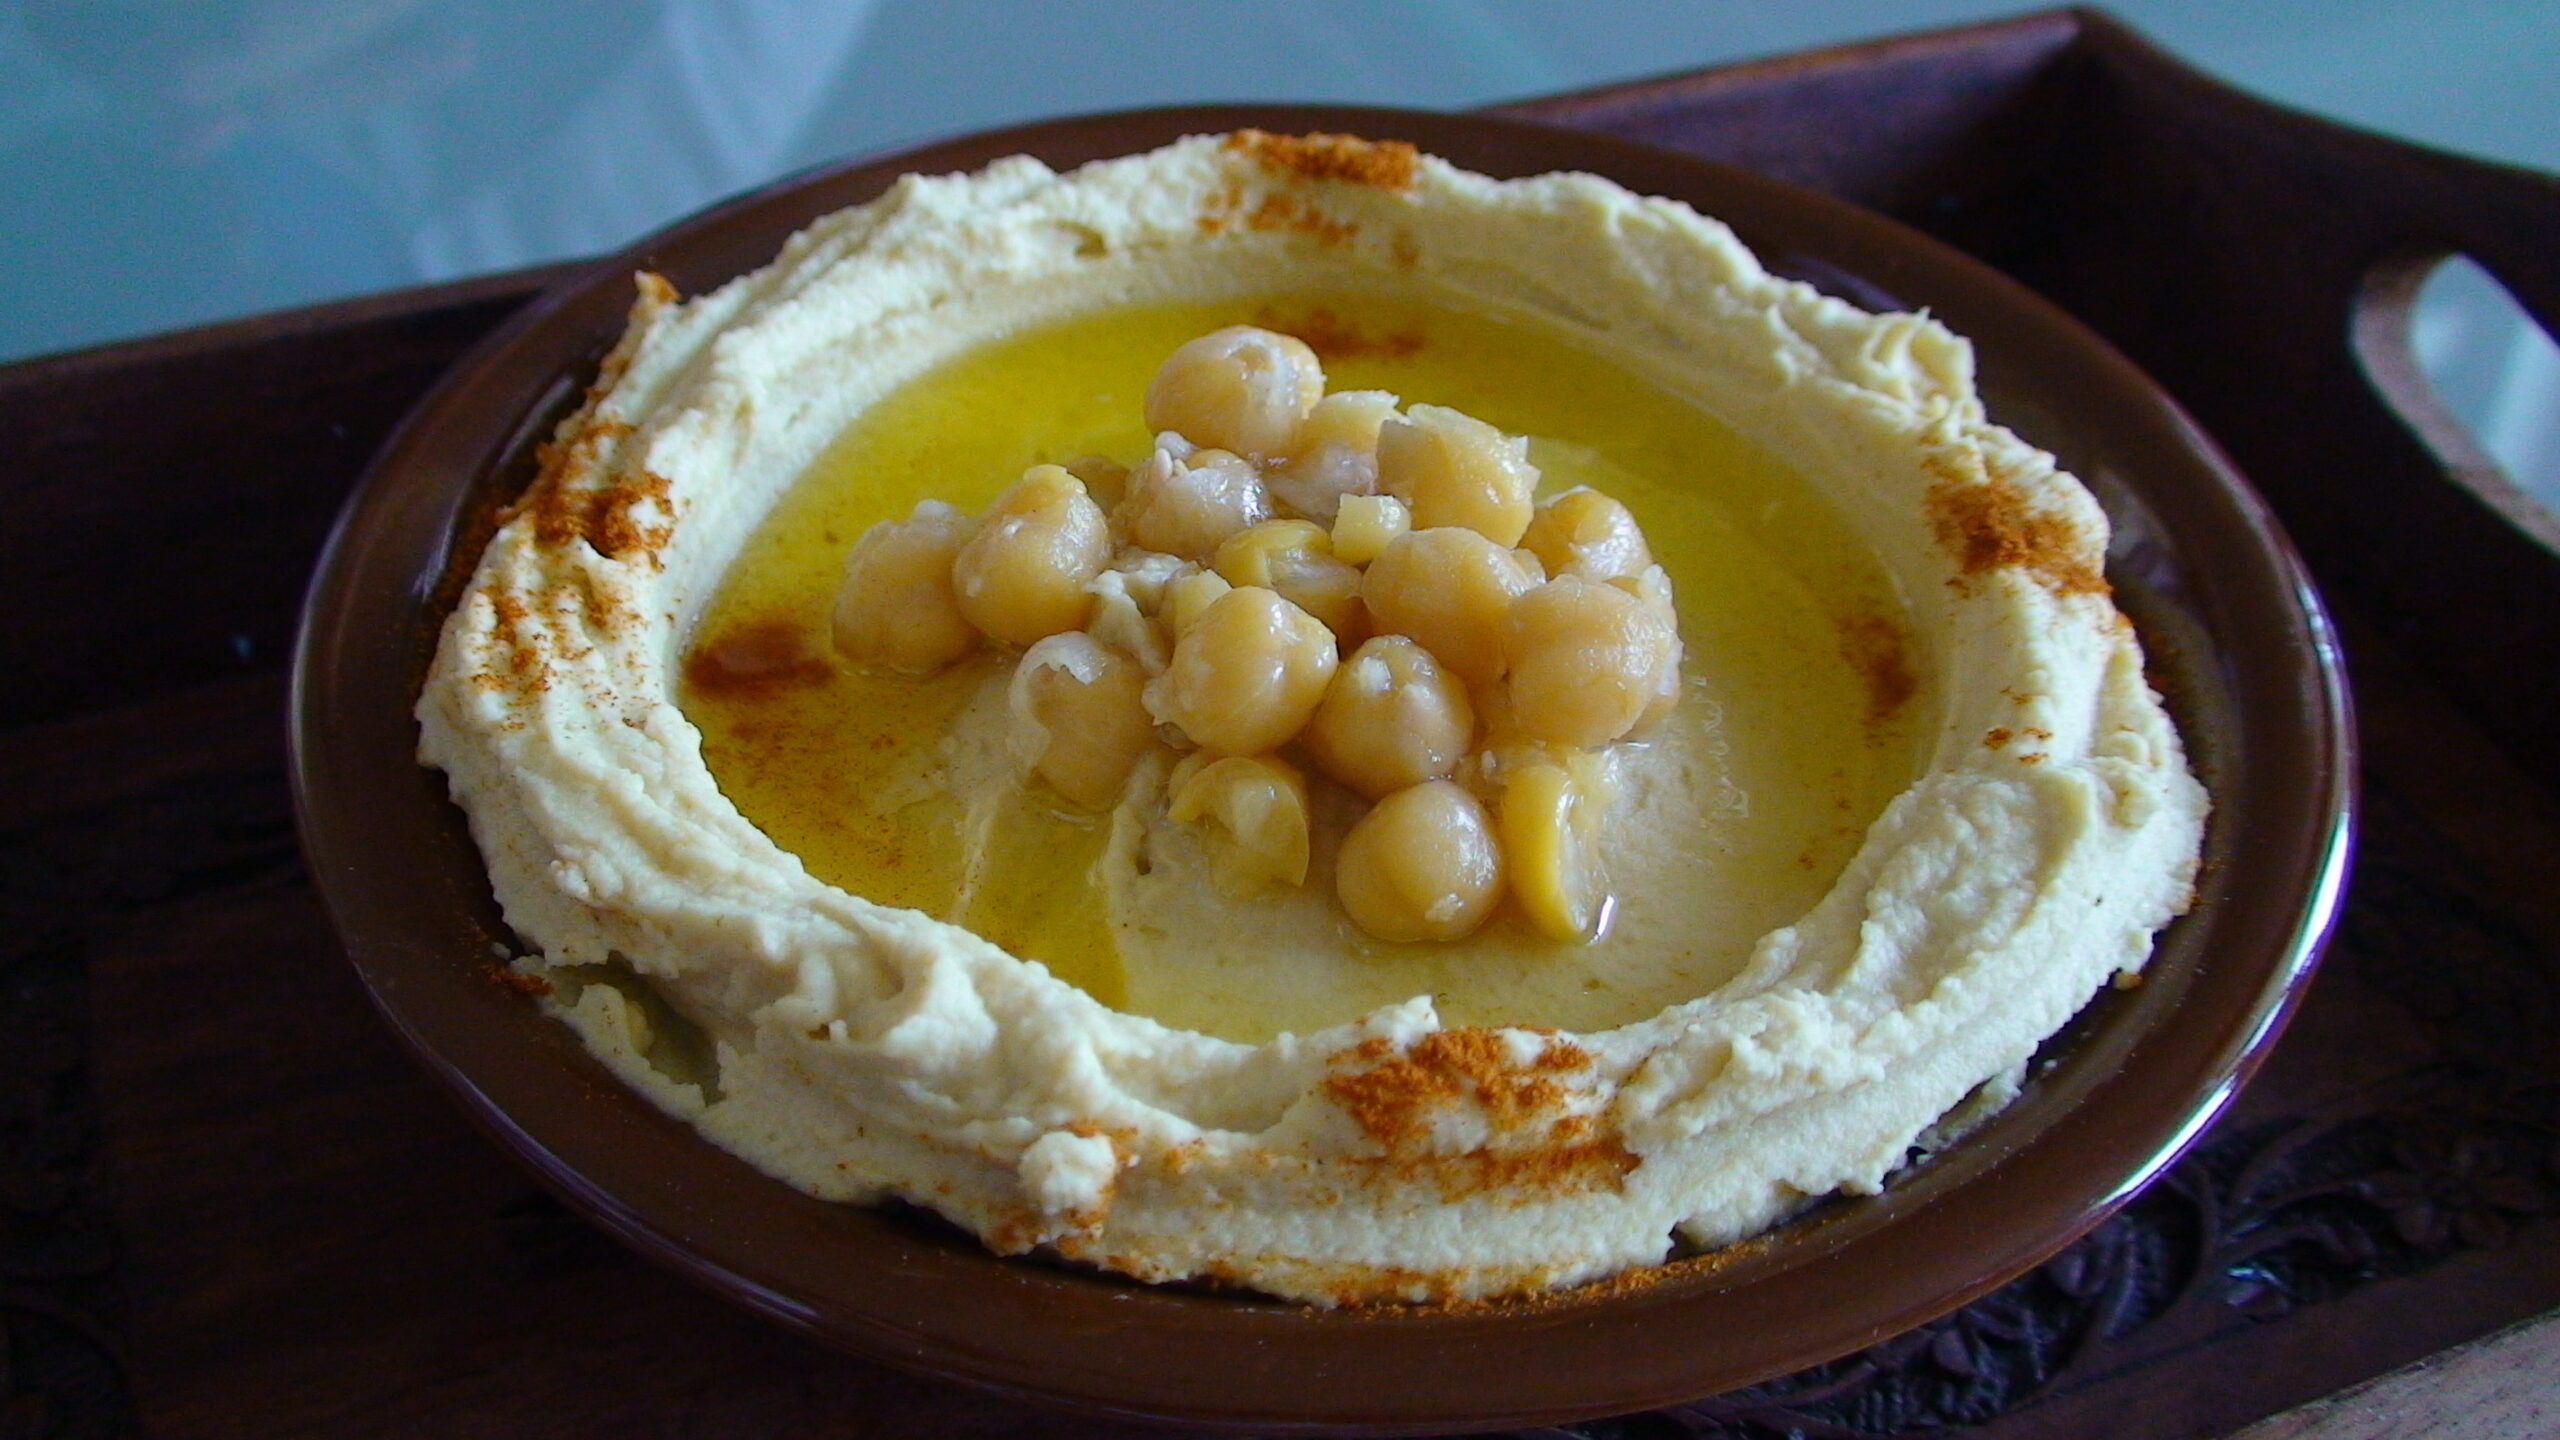
  • Roasted Red Pepper Hummus

    Roasted Red Pepper Hummus

    Roasted Red Pepper Hummus

    A Mediterranean Classic with a Smoky Twist Hummus is one of the oldest and most beloved dishes in Mediterranean cuisine, with roots stretching back thousands of years across the Levant, North Africa, and Southern Europe. This roasted red pepper version takes the classic chickpea dip into richer terr

    A Mediterranean Classic with a Smoky Twist


    Hummus is one of the oldest and most beloved dishes in Mediterranean cuisine, with roots stretching back thousands of years across the Levant, North Africa, and Southern Europe. This roasted red pepper version takes the classic chickpea dip into richer territory — the char of oven-roasted peppers brings a gentle smokiness that balances the earthiness of tahini and the brightness of lemon. It is the kind of recipe that looks impressive on a table but comes together in under 30 minutes, which makes it a staple in Mediterranean households for good reason.


    The Mediterranean diet is built around exactly this kind of food: plant-based, olive oil-forward, nutrient-dense, and genuinely satisfying. Hummus delivers protein and fiber from chickpeas, healthy monounsaturated fats from olive oil and tahini, and a range of micronutrients that processed snack foods simply cannot match. Swap out the chip bowl at your next gathering for a platter of roasted red pepper hummus with warm pita and raw vegetables, and the difference in how you feel afterward will be noticeable.


    This recipe works as an appetizer, a snack, a sandwich spread, or the center of a mezze platter. It keeps well in the refrigerator for up to a week, which means making a double batch is almost always worth it.


    —


    Why It Fits the Mediterranean Diet


    Chickpeas are a cornerstone of the Mediterranean diet for good reason. A single cup provides approximately 15 grams of protein and 12 grams of fiber — the kind of plant-based protein that keeps blood sugar stable and hunger in check for hours. The fiber in chickpeas has been specifically studied for its effect on LDL cholesterol reduction.


    Tahini, made from ground sesame seeds, contributes calcium, iron, and healthy fats. Sesame seeds are rich in lignans — plant compounds with documented antioxidant properties. Extra virgin olive oil provides oleocanthal, a natural anti-inflammatory compound with effects comparable to ibuprofen at culinary doses.


    Roasted red peppers are an excellent source of vitamin C (a single pepper contains more than an orange) and beta-carotene, which converts to vitamin A in the body. The combination of chickpeas, olive oil, tahini, and peppers in a single dish delivers a nutritional profile that would take a dozen processed products to replicate.


    —


    Ingredients


    For the hummus:

  • 2 cans (15 oz each) chickpeas, drained and rinsed — reserve ¼ cup of the liquid
  • 2 large red bell peppers
  • 3 tablespoons extra virgin olive oil, plus more for drizzling
  • 3 tablespoons tahini (well-stirred)
  • 2 cloves garlic
  • Juice of 1 large lemon (about 3 tablespoons)
  • 1 teaspoon ground cumin
  • ½ teaspoon smoked paprika
  • ½ teaspoon salt, plus more to taste
  • Pinch of cayenne pepper (optional)

  • For serving:

  • Drizzle of extra virgin olive oil
  • Smoked paprika for dusting
  • Fresh parsley, chopped
  • Warm pita bread, cucumber slices, carrot sticks

  • Quality notes: Use whole chickpeas from a can rather than a carton — the texture is better. For tahini, buy a brand where the only ingredient is sesame seeds; the natural oils should separate to the top (stir before using). Use the best olive oil you can for finishing — it matters more here than in cooked applications.


    —


    Equipment Needed


  • Baking sheet lined with foil or parchment
  • Food processor or high-powered blender
  • Tongs for handling roasted peppers

  • —


    Step-by-Step Instructions


    1. Roast the peppers.

    Preheat your oven to 450°F (230°C). Place whole red bell peppers directly on the baking sheet. Roast for 25–30 minutes, turning with tongs halfway through, until the skins are blackened and blistered on all sides. Transfer to a bowl, cover tightly with plastic wrap or a plate, and let steam for 10 minutes. The steam loosens the skin. Peel off and discard the charred skin, remove the stem and seeds, and roughly chop the flesh. Set aside.


    2. Prepare the chickpeas.

    Drain and rinse the chickpeas, reserving ¼ cup of the liquid (aquafaba). For the smoothest hummus, take 2 minutes to slip the thin skins off the chickpeas — just pinch each one between your fingers. This step is optional but noticeably improves the texture.


    3. Build the hummus.

    Add the garlic to the food processor and pulse until minced. Add the chickpeas, roasted red pepper flesh, tahini, lemon juice, cumin, smoked paprika, salt, and cayenne if using. Process for 1 full minute. Scrape down the sides. With the machine running, drizzle in the olive oil, then add the reserved chickpea liquid a tablespoon at a time until the hummus reaches your preferred consistency — smooth and creamy, not stiff. Process for another 2 minutes for the smoothest result.


    4. Taste and adjust.

    Taste for salt, lemon, and cumin. Mediterranean hummus should be distinctly lemony and well-seasoned. Add more lemon or salt if needed. If the hummus is too thick, add another tablespoon of chickpea liquid.


    5. Serve.

    Transfer to a wide, shallow bowl. Use the back of a spoon to create a swirl pattern. Drizzle generously with olive oil, dust with smoked paprika, and scatter chopped parsley over the top.


    —


    Pro Tips and Variations


    Make it creamier: The secret to restaurant-quality hummus is processing longer than you think necessary — at least 3–4 full minutes total. The extended blending breaks down the cell walls of the chickpeas for a much smoother result.


    Roasting shortcut: If you need to move faster, use jarred roasted red peppers (drain and pat dry). The flavor is slightly less smoky but very close.


    Sun-dried tomato variation: Substitute half the roasted peppers with oil-packed sun-dried tomatoes for a more intense, concentrated flavor.


    Add heat: A teaspoon of harissa paste or a whole roasted jalapeño blended in gives the hummus a North African character that pairs beautifully with grilled meats.


    For a smooth surface: If serving for a gathering, refrigerate the hummus for at least 30 minutes before serving — cold hummus holds its shape better for presentation.


    —


    Nutritional Info (per serving, approximately ¼ cup)


    Calories: 180 | Protein: 7g | Carbs: 18g | Fat: 10g | Fiber: 5g | Vitamin C: 45% DV


    —


    Storage and Reheating


    Store in an airtight container in the refrigerator for up to 7 days. The flavor actually improves after 24 hours as the garlic mellows and the spices deepen. Keep a thin layer of olive oil on the surface to prevent the top from drying out.


    This hummus does not freeze well — the texture becomes grainy after thawing.


    —


    What to Serve With It


    Pair with warm whole wheat pita, sliced cucumber, carrot sticks, and cherry tomatoes for a classic mezze presentation. On the Mediterranean diet, hummus is also excellent as a spread on sandwiches in place of mayonnaise, as a topping for grain bowls, or alongside grilled chicken or fish. Try it with our Grilled Eggplant and Bell Pepper Skewers for a fully plant-forward Mediterranean meal.


    —


    FAQs


    Can I use dried chickpeas instead of canned?

    Yes, and the result will be even smoother. Soak 1½ cups dried chickpeas overnight, then simmer with ½ teaspoon baking soda for about 1 hour until very tender. The baking soda helps break down the chickpeas for a creamier texture. Reserve the cooking liquid in place of aquafaba.


    Why is my hummus grainy instead of smooth?

    Usually this means the chickpeas weren’t processed long enough, or the tahini was not properly stirred before measuring (the sesame paste separates and the dry portion makes for gritty hummus). Process for at least 3–4 minutes and use room-temperature ingredients.


    Is this recipe gluten-free?

    Yes. All ingredients are naturally gluten-free. Serve with gluten-free crackers or vegetable dippers for a fully gluten-free option.


    How much does this yield?

    This recipe makes approximately 3 cups — enough for 8–10 as an appetizer or 12 as part of a larger mezze spread.


    Tools & pantry for this recipe

    A few things that make this easier. These are affiliate links, so we may earn a small commission at no extra cost to you; we only suggest what we’d actually use ourselves. See our editorial policy.
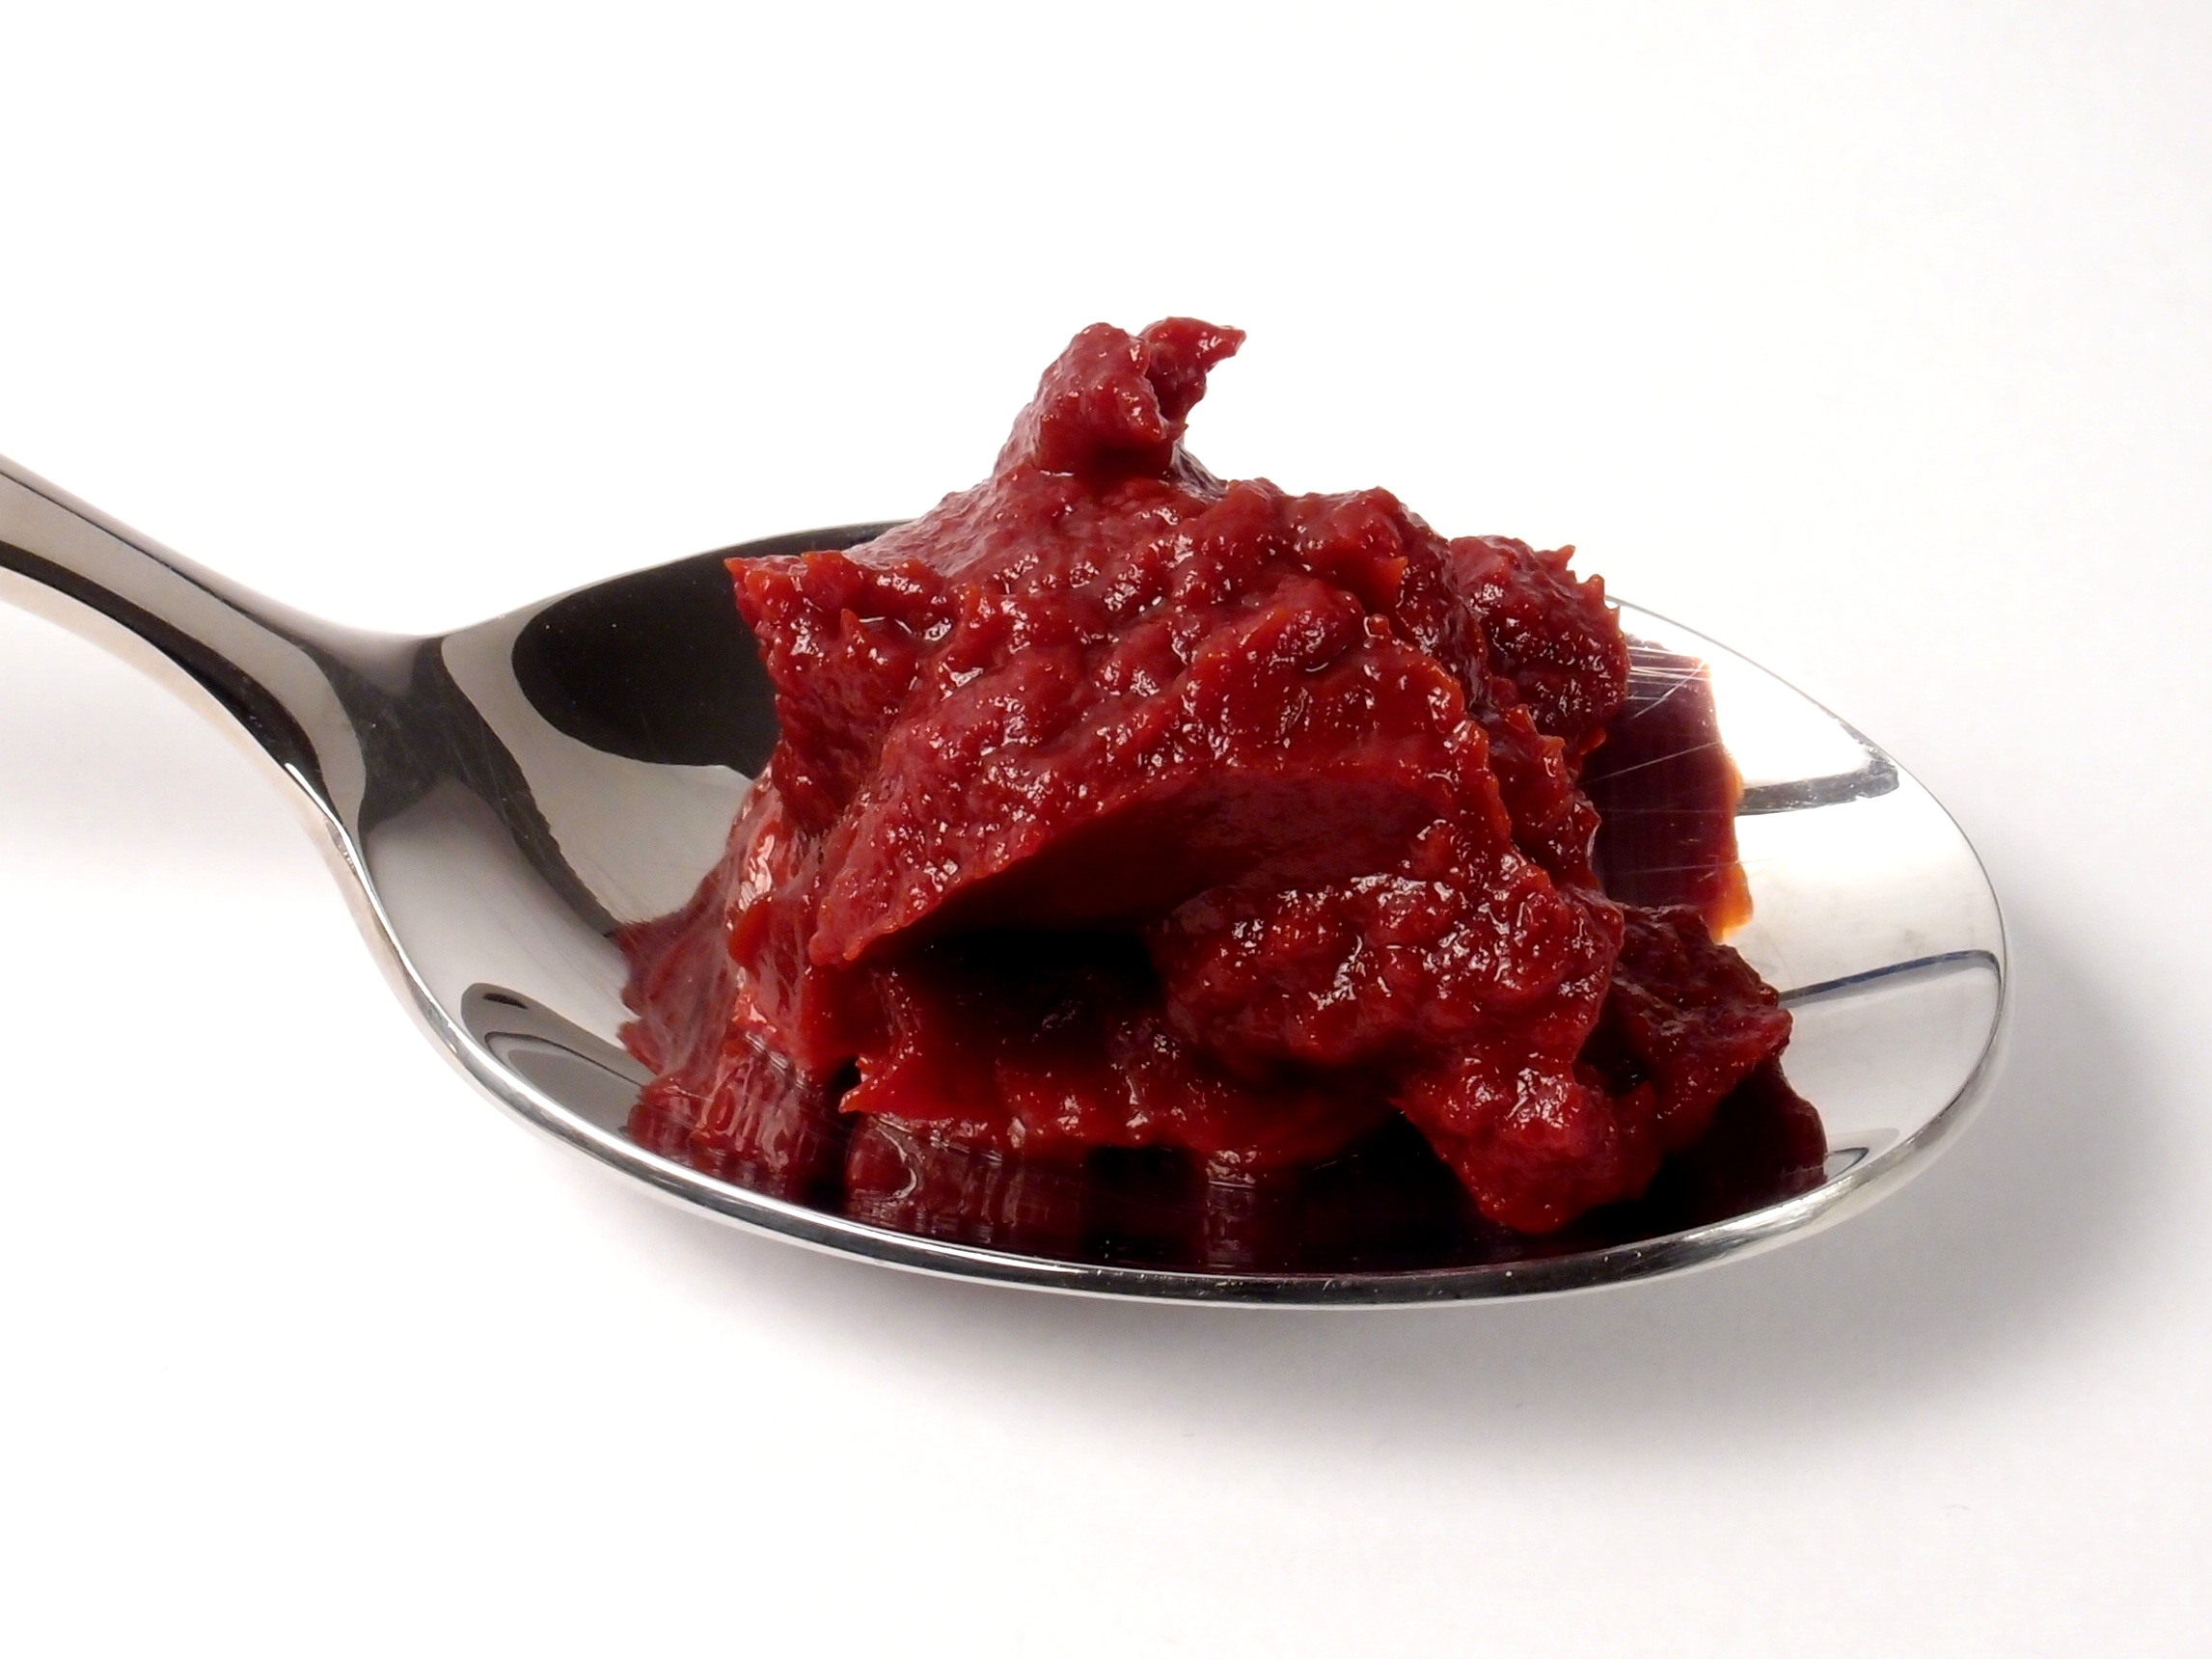
  • Recipe: Olive Oil Tomato Paste

    Recipe: Olive Oil Tomato Paste

    Introduction

    Olive Oil Tomato Paste is a cornerstone ingredient in Mediterranean cuisine, adding a rich, sweet flavor to countless dishes. Originating from Italian culinary traditions, this paste is created by slowly cooking down ripe tomatoes into a thick, concentrated sauce brimming with umami. This versatile condiment not only complements the principles of the Mediterranean diet but also enhances various meals such as pasta sauces, soups, and stews. By using high-quality extra virgin olive oil, this paste becomes a healthy option packed with beneficial fats and antioxidants.

    Health Benefits

    Tomato Paste offers numerous health benefits thanks to its rich content of vitamins A and C, potassium, and lycopene—an antioxidant that supports heart health by reducing cholesterol levels. Additionally, the presence of beta-carotene helps in maintaining good vision and skin health. The use of extra virgin olive oil enhances these nutritional values further by providing monounsaturated fats, which support heart health through improved cholesterol levels.

    Ingredients

  • 3 lbs ripe tomatoes (about 6 large)
  • 1/4 cup high-quality extra virgin olive oil
  • Salt to taste
  • Quality Notes:

  • Look for organic or heirloom varieties of tomatoes.
  • Choose an EVOO with a robust flavor profile and low acidity.
  • Equipment Needed

  • Large pot with lid
  • Immersion blender (or regular blender)
  • Cutting board
  • Chef’s knife
  • Measuring cups
  • Step-by-Step Instructions

    1. Preparation: Wash tomatoes under cool water and cut into quarters.

    2. Cooking Process: Heat olive oil in a large pot over medium heat until shimmering. Add quartered tomatoes and season with salt to taste.

    3. Simmering & Reduction: Bring mixture to a gentle simmer, cover partially, and cook for about 1-2 hours or until the tomatoes have broken down significantly into a thick paste.

    4. Blending: Allow cooled sauce to cool slightly and blend using an immersion blender directly in pot or transfer to regular blender until smooth.

    Pro Tips & Variations

  • Substitutions: For added complexity, consider incorporating dried herbs like oregano or basil into the paste.
  • Make-Ahead Tips: This paste can be stored refrigerated for up to one week or frozen for several months.
  • Common Mistakes: Avoid over-cooking which may lead to an overly thick consistency and loss of nutrients.
  • Nutritional Information

    Calories: ~85 per serving

    Protein: ~1g per serving

    Carbs: ~9g per serving

    Fat: ~4.5g per serving

    Fiber: ~2g per serving

    Storage & Reheating

    Store in an airtight container at room temperature for up to 3 days, refrigerate for up to one week, or freeze for several months.

    Pairing Suggestions

    Perfect for enhancing the flavor of pasta sauces, stews, and soups. A great base ingredient for homemade pizza sauce or marinara.

    FAQ

    Q: What is lycopene?

    A: Lycopene is a powerful antioxidant found in tomatoes that supports heart health by reducing cholesterol levels.

    Q: Can I substitute tomato paste with ketchup?

    A: While similar, ketchup contains additional ingredients like sugar and vinegar, which alter both flavor profile and nutritional value. Stick to pure tomato paste for authenticity.

    Tools & pantry for this recipe

    A few things that make this easier. These are affiliate links, so we may earn a small commission at no extra cost to you; we only suggest what we’d actually use ourselves. See our editorial policy.
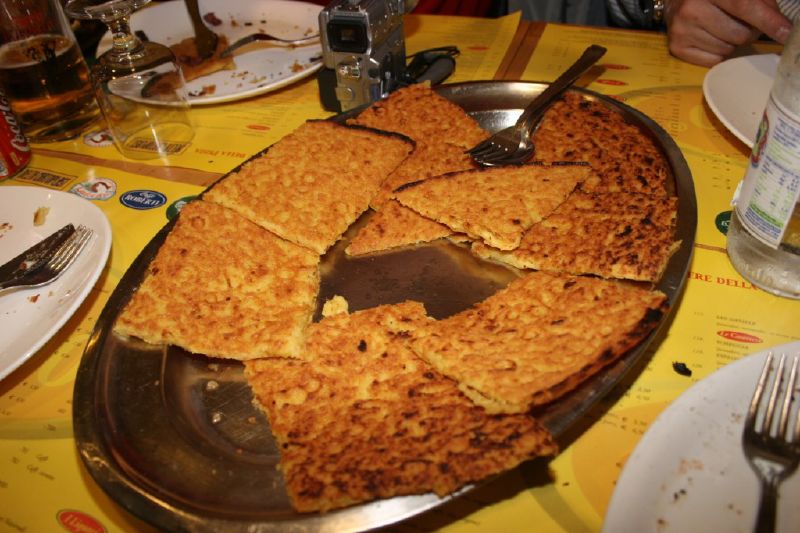
  • Moroccan Chickpea Stew

    Moroccan Chickpea Stew

    Moroccan Chickpea Stew

    North Africa Meets the Mediterranean Diet Moroccan cuisine occupies a fascinating position within Mediterranean food culture — it sits at the intersection of Berber, Arab, Andalusian, and sub-Saharan African influences, producing some of the most complex and aromatic dishes in the wider Mediterranea

    North Africa Meets the Mediterranean Diet


    Moroccan cuisine occupies a fascinating position within Mediterranean food culture — it sits at the intersection of Berber, Arab, Andalusian, and sub-Saharan African influences, producing some of the most complex and aromatic dishes in the wider Mediterranean world. This chickpea stew is one of the most accessible entry points into that tradition. It requires no special equipment, relies on pantry staples, comes together in under an hour, and demonstrates why the Mediterranean diet is not merely Greek and Italian food — it is a whole hemisphere of cooking traditions united by olive oil, legumes, grains, fresh vegetables, and spices.


    The spice profile here — cumin, coriander, cinnamon, and smoked paprika — is characteristic of Moroccan home cooking, where warm spices are used not to add heat but to add depth. The chickpeas absorb the spiced tomato broth over a long simmer, developing a richness that makes this stew feel far more substantial than its ingredient list suggests.


    This is also one of the most practical recipes on this site for weekly meal prep. It keeps for five days in the refrigerator and tastes better on day two and three than it does fresh. Serve it over couscous, with crusty bread, or alongside a simple green salad.


    —


    Why It Fits the Mediterranean Diet


    Chickpeas are one of the most nutritionally complete legumes available. A single cup provides 15 grams of protein, 12 grams of dietary fiber, and a range of micronutrients including iron, folate, phosphorus, and manganese. The fiber in chickpeas is primarily soluble fiber, which has documented effects on cholesterol reduction and blood sugar management.


    The tomatoes in this stew provide lycopene (bioavailability enhanced by the olive oil and heat), vitamin C, and potassium. Spinach or kale — the optional greens stirred in at the end — contribute folate, magnesium, and vitamin K. The cumin, coriander, and cinnamon are not merely flavor additions; these spices have active compounds studied for their anti-inflammatory and blood sugar-modulating properties.


    This is a fully plant-based dish that provides complete nutrition without requiring animal protein — a cornerstone of the Mediterranean diet’s flexible, plant-forward approach to eating.


    —


    Ingredients


  • 2 cans (15 oz each) chickpeas, drained and rinsed
  • 1 can (28 oz) whole peeled tomatoes, crushed by hand
  • 1 medium yellow onion, diced
  • 4 cloves garlic, minced
  • 3 tablespoons extra virgin olive oil
  • 2 teaspoons ground cumin
  • 1½ teaspoons ground coriander
  • 1 teaspoon smoked paprika
  • ½ teaspoon ground cinnamon
  • ½ teaspoon ground turmeric
  • ¼ teaspoon cayenne pepper (adjust to taste)
  • 1 teaspoon salt, plus more to taste
  • 1 cup vegetable broth or water
  • 2 cups baby spinach or roughly chopped kale (optional, stirred in at the end)
  • Juice of ½ lemon
  • Fresh cilantro or parsley for serving

  • For serving: Couscous, crusty bread, or rice; plain Greek yogurt; harissa on the side for heat


    Quality notes: Whole canned tomatoes crushed by hand give better texture and flavor than pre-crushed or diced canned tomatoes, which often contain calcium chloride that keeps them firm. For the spices, buy them whole and grind them if you can — the difference is significant. Pre-ground works fine for a weeknight, but freshly ground cumin and coriander have a brightness that pre-ground loses within months.


    —


    Equipment Needed


  • Large heavy-bottomed pot or Dutch oven
  • Wooden spoon

  • —


    Instructions


    1. Build the base.

    Heat the olive oil in a large pot over medium heat. Add the diced onion and cook, stirring occasionally, until softened and translucent — about 7–8 minutes. Do not rush this step; properly softened onion is the foundation of the stew’s sweetness. Add the minced garlic and cook for 1 minute until fragrant.


    2. Toast the spices.

    Add the cumin, coriander, smoked paprika, cinnamon, turmeric, and cayenne directly to the onion and garlic. Stir constantly for 60–90 seconds, until the spices are fragrant and darkened slightly. This step — blooming the spices in oil — releases their fat-soluble flavor compounds in a way that adding them to liquid never achieves.


    3. Add tomatoes and chickpeas.

    Pour in the crushed tomatoes, scraping up any spices stuck to the bottom. Add the chickpeas and vegetable broth. Stir to combine, bring to a boil, then reduce heat and simmer uncovered for 25–30 minutes, stirring occasionally. The stew should thicken noticeably — the chickpeas will absorb the liquid and the tomato sauce will concentrate.


    4. Add greens and finish.

    If using spinach or kale, stir it in during the last 2–3 minutes of cooking. Squeeze in the lemon juice. Taste for salt, cumin, and heat — adjust as needed.


    5. Serve.

    Ladle over couscous or serve with bread. Top with a spoonful of Greek yogurt (the cool creaminess against the warm spiced stew is excellent), fresh cilantro or parsley, and harissa on the side for those who want more heat.


    —


    Pro Tips and Variations


    For deeper flavor: Brown the chickpeas before adding the other ingredients. Drain and rinse, then add to the hot oil after the onions are cooked, before the spices. Let them sit undisturbed for 2 minutes per side to develop a light golden crust. The texture holds better and the flavor is more complex.


    Add preserved lemon: A quarter of a Moroccan preserved lemon, rind only, minced and added with the garlic, gives an authentic depth that fresh lemon cannot replicate.


    Sweet potato variation: Add one medium sweet potato (½-inch dice) with the tomatoes for a heartier stew. Add 15 minutes to the cooking time.


    Make it ahead: This stew is significantly better on day two. Make a double batch on Sunday and use it throughout the week.


    —


    Nutritional Info (per serving, serves 4)


    Calories: 340 | Protein: 14g | Carbs: 45g | Fat: 12g | Fiber: 12g | Iron: 25% DV


    —


    Storage


    Refrigerate for up to 5 days in an airtight container. Freeze for up to 3 months — let thaw overnight in the refrigerator and reheat on the stovetop with a splash of water if it has thickened too much.


    —


    What to Serve With It


    Serve over couscous (which requires only boiling water and 5 minutes), with warm flatbread, or alongside Roasted Red Pepper Hummus as part of a plant-based Mediterranean spread. A dollop of plain Greek yogurt and a handful of fresh herbs are not optional — they complete the dish.


    —


    FAQs


    Can I use dried chickpeas?

    Yes. Soak 1¼ cups dried chickpeas overnight in cold water with a pinch of baking soda. Drain, cover with fresh water by 2 inches, and simmer for 60–90 minutes until tender. Use the cooking liquid in place of broth. The texture of dried chickpeas holds up better during the long simmer.


    Is this dish vegan?

    Yes, as written — all ingredients are plant-based. Serve with dairy-free yogurt to keep it fully vegan.


    How spicy is this?

    As written, it has mild background heat from the cayenne. The dish is aromatic and warm-spiced, not hot. Add more cayenne, red pepper flakes, or serve harissa on the side for those who want heat.


    Tools & pantry for this recipe

    A few things that make this easier. These are affiliate links, so we may earn a small commission at no extra cost to you; we only suggest what we’d actually use ourselves. See our editorial policy.
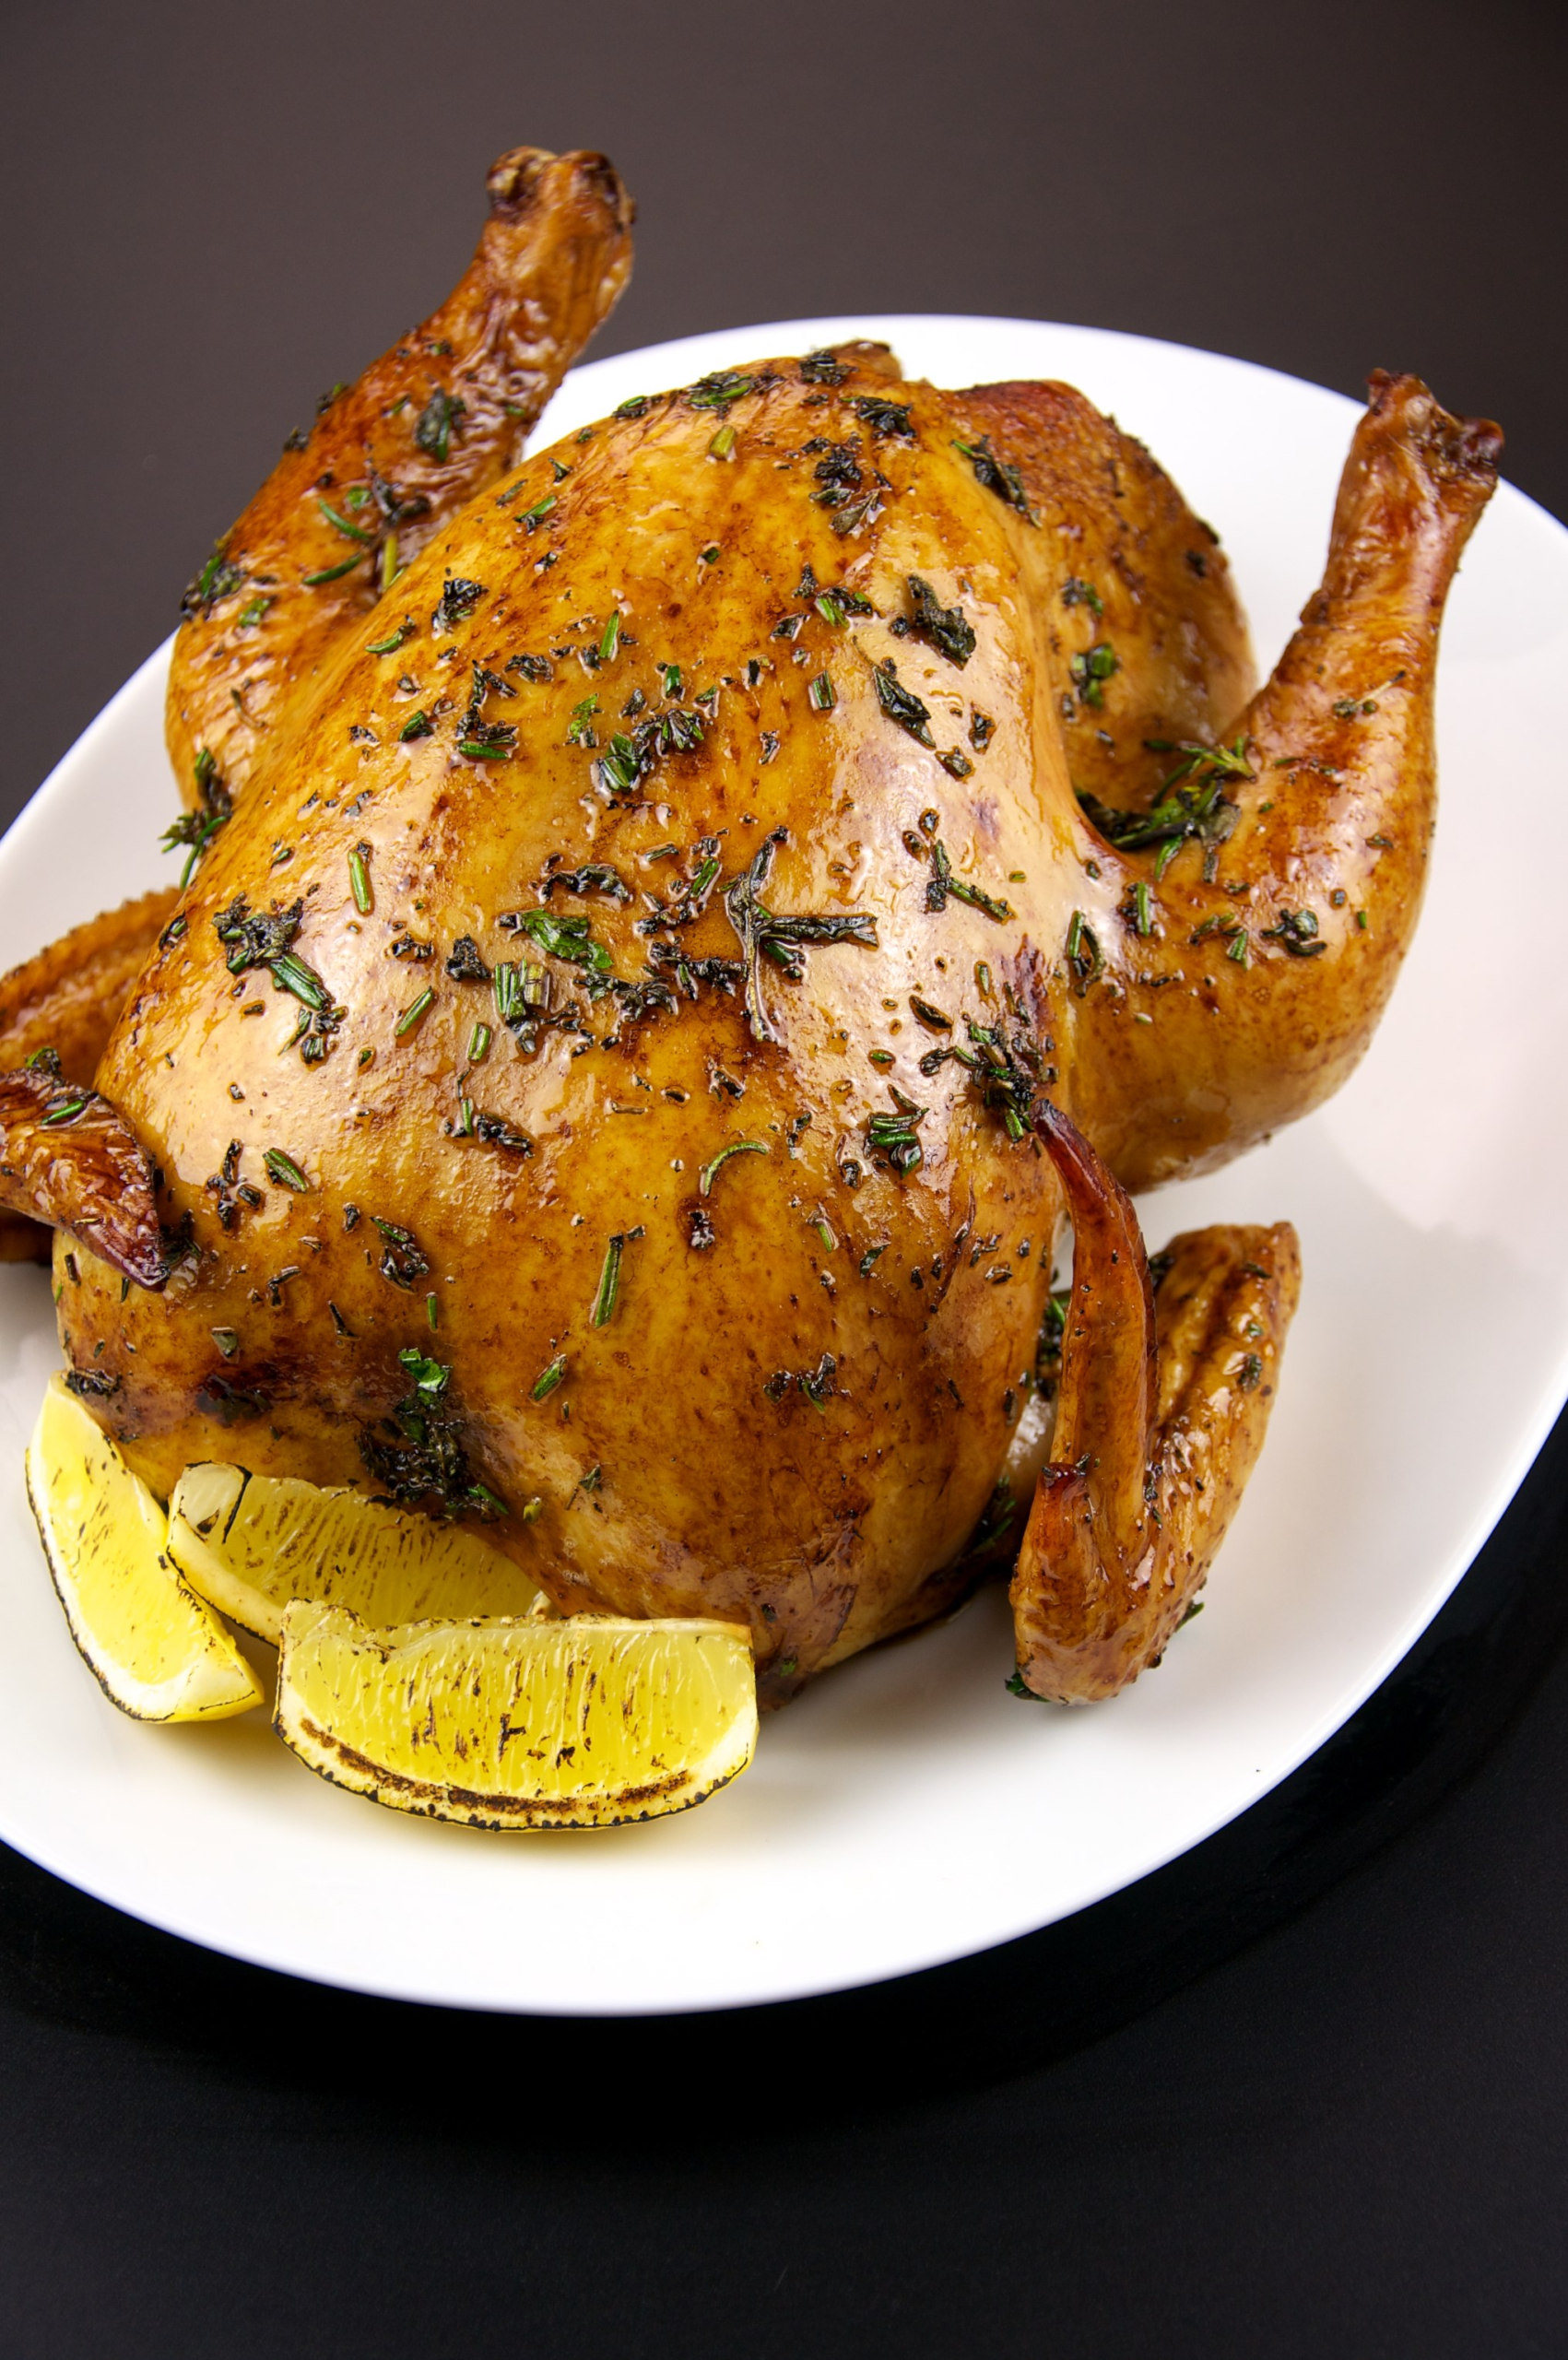
  • Lemon and Herb Roasted Chicken Thighs

    Lemon and Herb Roasted Chicken Thighs

    Lemon and Herb Roasted Chicken Thighs

    Lemon and Herb Roasted Chicken Thighs A Classic Mediterranean Dish Inspired by Greek Cuisine Ingredients: #### Key Ingredients: **Chicken Thighs**: Choose skin-on thighs for extra flavor. Skinless alternatives can be substituted but will result in a less rich texture. *Quality Notes*: Opt for fresh,

    A Classic Mediterranean Dish Inspired by Greek Cuisine


    Ingredients:

    #### Key Ingredients:

  • **Chicken Thighs**: Choose skin-on thighs for extra flavor. Skinless alternatives can be substituted but will result in a less rich texture.
  • *Quality Notes*: Opt for fresh, organic chicken if available; it tends to have more robust flavors and is better for you.


  • **Lemon Juice**: Essential for adding brightness and zest to the dish. Use freshly squeezed lemon juice for maximum flavor and freshness.
  • *Substitutions*: If lemons aren’t readily accessible, consider using bottled lemon juice or even lime juice as an alternative.


  • **Olive Oil**: A cornerstone of Mediterranean cooking; extra virgin olive oil is preferred for its superior taste and health benefits.
  • *Quality Notes*: Look for cold-pressed varieties with a distinct fruity aroma.


  • **Garlic & Herbs**:
  • – Fresh garlic adds depth while parsley, oregano, and thyme provide aromatic complexity.


    *Substitutions*: For oregano, dried Italian seasoning can be used instead. Alternatively, fresh basil or cilantro could substitute for some of the herbs if desired.


    Equipment Needed

  • Baking dish (for roasting)
  • Mixing bowl (to prepare marinade)

  • Instructions:

    1. **Preheat Oven**: Begin by preheating your oven to 400°F (200°C). This ensures the chicken will cook evenly from the start.

    *Tip*: If you’re short on time, you can use a convection setting to reduce cooking time slightly.


    2. **Prepare Marinade**:

    – In a small bowl, mix together lemon juice, minced garlic, olive oil, chopped parsley, dried oregano, salt, and pepper until well combined.

    *Timing*: This step takes about 3-5 minutes.


    3. **Season Chicken**:

    – Rub the chicken thighs thoroughly with the marinade mixture to ensure every inch is coated in flavor.

    *Tip*: Using your hands works best for this part; don’t be afraid to get messy!


    4. **Roast Thighs**:

    – Place seasoned chicken thighs into a single layer on a baking dish and add fresh thyme sprigs if desired.

    – Roast in the preheated oven for approximately 25-30 minutes or until the internal temperature reaches at least 165°F (74°C).


    *Tip*: Use an instant-read thermometer inserted into the thickest part of a thigh to check doneness.


    Pro Tips and Variations:

    For those looking for additional flavor profiles, consider these variations:

  • **Herb Mix**: Experiment with different combinations such as rosemary, tarragon, or dill alongside oregano.
  • **Citrus Twist**: Use a combination of lemon zest along with orange juice and zest to introduce another layer of brightness.
  • **Cheese Lovers**: Add a sprinkle of grated parmesan cheese over the thighs during the last 5 minutes for added richness.

  • Nutritional Info per Serving (Estimate)

    Calories: ~280 | Protein: ~34g | Carbs: ~3g | Fat: ~17g | Fiber: ~0.6g


    Storage and Reheating

    Allow leftovers to cool completely before storing them in an airtight container in the refrigerator for up to 3 days or freeze for up to 2 months.

    To reheat, either microwave on high power until warmed through or place in a preheated oven at 350°F (180°C) for about 10-15 minutes.


    What to Serve With It

    Pair this dish with some Greek salad dressed lightly with olive oil and vinegar, or serve alongside steamed vegetables like green beans or broccoli florets.


    FAQs About This Dish

    **Q: Can I use chicken breasts instead?**

    A: Yes! Chicken breasts would work well too. Just adjust the cooking time to around 30-35 minutes due to their thicker cut.


    **Q: How do you know when it’s done?**

    A: Insert a meat thermometer into the thickest part of a thigh; it should read at least 165°F (74°C).


    **Q: What if I don’t have oregano on hand?**

    A: Substitute with Italian seasoning or use fresh basil for a lighter, more aromatic note.

    Tools & pantry for this recipe

    A few things that make this easier. These are affiliate links, so we may earn a small commission at no extra cost to you; we only suggest what we’d actually use ourselves. See our editorial policy.